How do I upload or embed images and videos?
Coursebox makes it easy to enrich your lessons with visuals. You can upload your own images and videos, select from stock libraries, or paste external links (like YouTube or Vimeo). AI-generated images and automatic PDF image extraction are also available.
Click the + button on the page to open the content picker. Select the MULTIMEDIA tab.
Insert images
Images are a powerful way to enhance your course content and improve learner engagement. Whether you're using high-quality stock visuals, uploading your own graphics, or generating unique images with AI, Coursebox offers flexible options to suit your content style. This section walks you through the different ways you can incorporate images to support your learning objectives and create a more visually compelling experience.
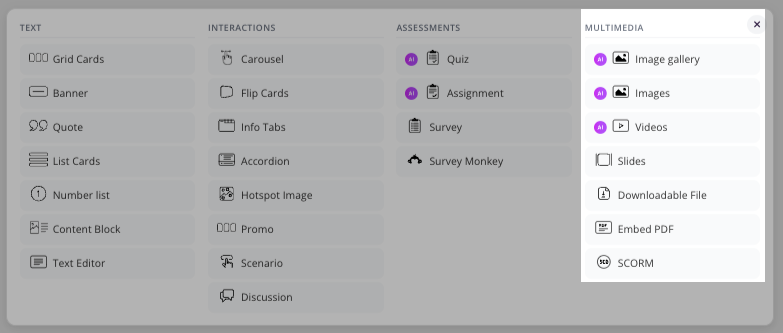
Once the block is open, you can select from the following image options:
Image Gallery > Stock Images
Coursebox allows you to easily enhance your content by selecting high-quality stock images directly within the platform. From the top menu, you can browse and insert visuals that align with your lesson themes, making your course more engaging and visually appealing.
When the popup shows, you can select any of the following features:
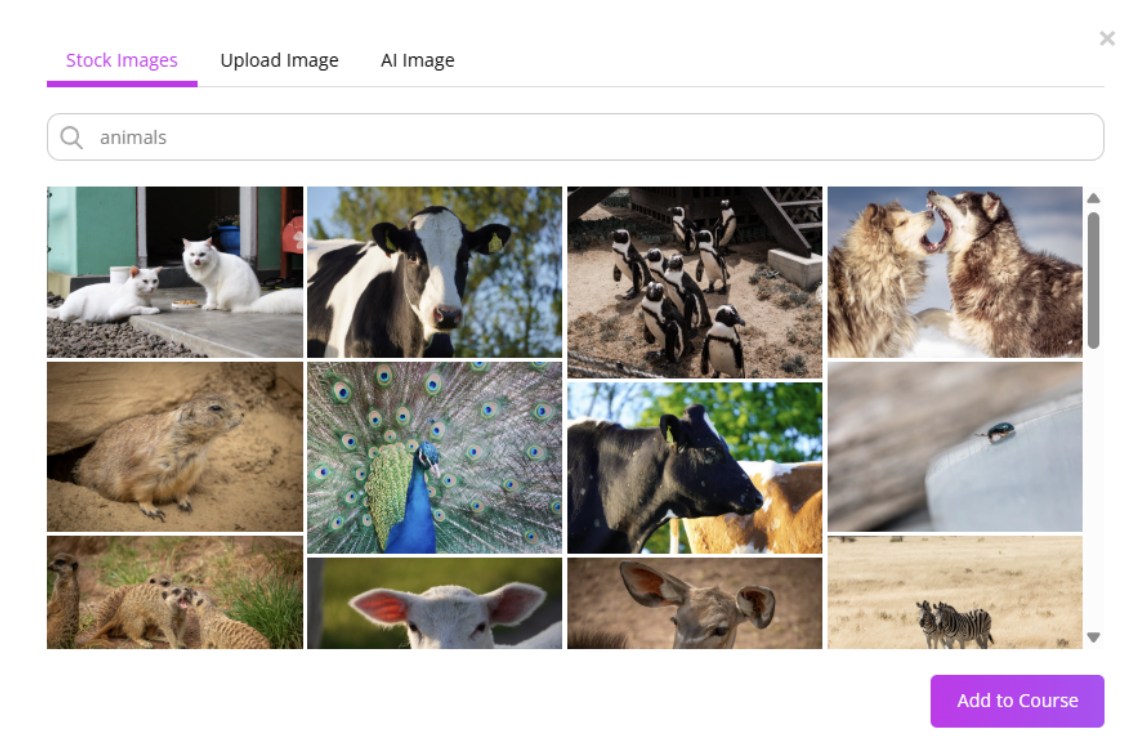
Image Gallery > Upload Images
In addition to stock images, Coursebox makes it simple to personalise your content by uploading your own visuals. Just drag and drop images directly into the editor to enhance lessons with custom graphics, branding, or relevant media.
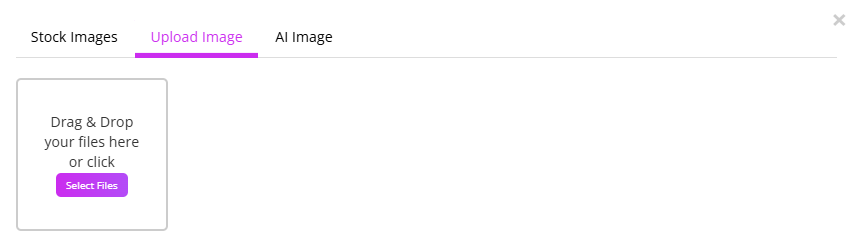
Image Gallery > AI Image
Coursebox lets you create custom visuals using AI image generation. You can access this feature as described above (via the + button and MULTIMEDIA tab).
Then, simply write a prompt describing the type of image you need, and the platform will generate a unique image to match your content—perfect for tailoring visuals to specific topics or themes.
Note: In Coursebox, generated images cannot be edited directly (there is no image-editing mode). To make changes, you'll need to regenerate a new version of the image using a refined or customized prompt, then replace the image in your course with the updated version.
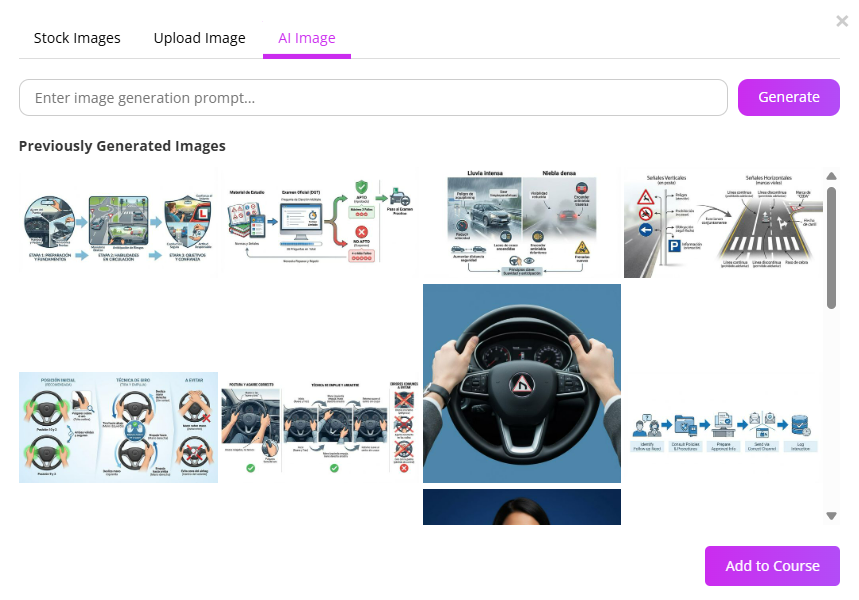
Note: If Coursebox does not allow you to generate more images, it is usually because you have reached the image-generation credit limit included in your plan. Image credits typically reset according to your billing cycle (the date you subscribed), not necessarily on the first day of the month.
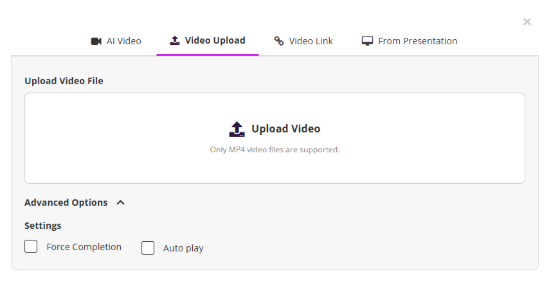
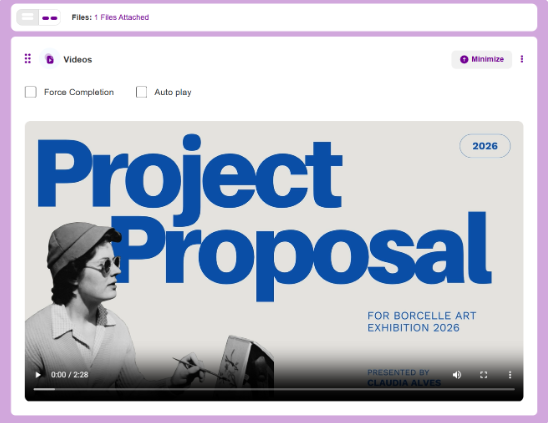
Video upload
If you already have a video, upload it directly to your course. This option is perfect for pre-recorded training sessions, presentations, or tutorials you've created outside the platform.
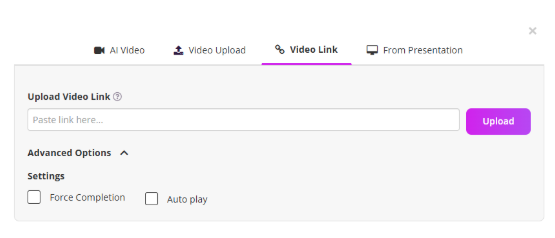
In the Advanced Options, you can select Force completion to require learners to watch the video before continuing, and/or Auto Play the video.
Note: Coursebox does not support in-platform video editing. If you need to edit a video (for example, trim, cut, add captions, or update visuals), this must be done in an external video-editing program. Once edited, simply re-upload the updated video to your course.
Video link
You can also embed videos from platforms like YouTube, Vimeo, or Loom by pasting the video link. This is a great way to incorporate external content and keep your learners connected to high-quality video resources.
From Presentation
Navigate to the AI Video section.
Click From Presentation in the top menu.
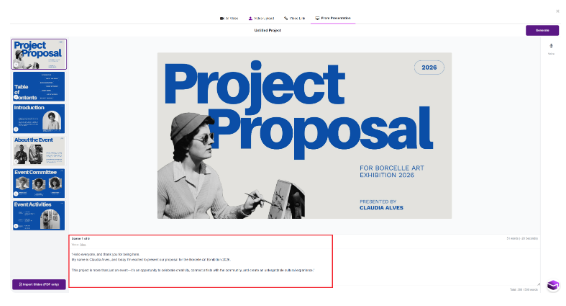
You'll see the presentation workspace.
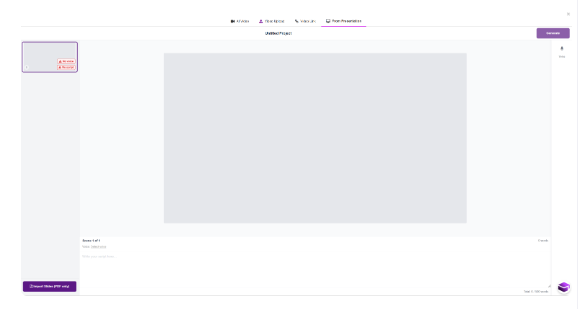
Click the Import Slides (PDF only) button (bottom left).
Upload your presentation file in PDF format.
Once uploaded, your slides will automatically appear as scenes — each slide becomes a separate video scene.
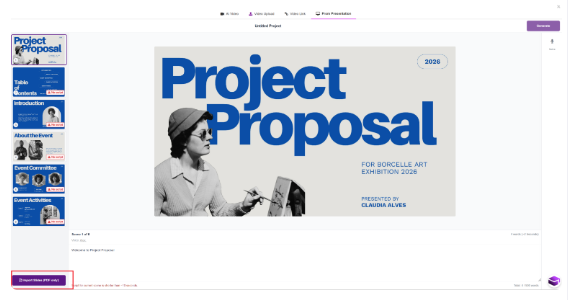
Select a slide (scene) from the left panel.
In the script area below the slide, add your narration text.
Ensure your script is:
Clear and conversational
At least 10 seconds long for better output
Tip: Aim for ~40–70 words per slide.
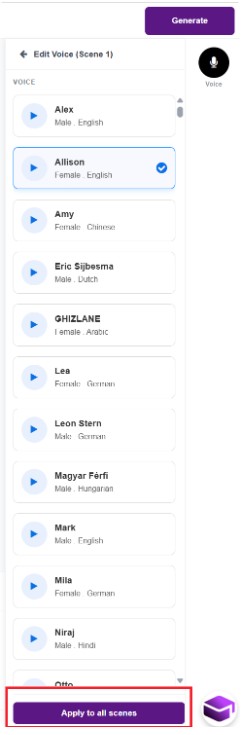
Click the Voice option.
Preview different voices (e.g. Alex, Allison, Amy).
Select your preferred voice.
Click Apply to all scenes to keep consistency across the video.
Once all slides have scripts and a voice selected, click Generate (top right).
The platform will:
Convert your slides into scenes
Add voice-over narration
Produce your AI video
For more information on video, see Multimedia Content.
Note: AI image generation uses AI credits from your plan. To understand how image credits work and check your balance, see AI Credits Explained and How do I check my AI credits and usage balance in Coursebox?