
How do I manage course themes, logos, and branding?
Plan requirement: Portal branding — logos, colours and fonts — is available on Pro and above. Connecting your own custom domain (Bring Your Own Domain) requires Pro + LMS. Compare plans.
On an earlier plan? Plan names and inclusions changed when we moved to Free, Creator, Pro, Pro + LMS and Enterprise. If you are on an earlier plan, your subscription continues unchanged and you keep everything it included — so you may still see features this article lists under a higher plan. Nothing has been removed from your account.
In the Theme settings, you can upload logos (desktop, mobile, email), adjust header colours, fonts, and menu icons. You can also change SCORM menu colours and set a branded background for consistency across your courses and portal.
Portal settings
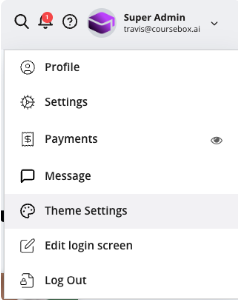
You can set your course theme from the Profile menu shown below.
Bring Your Own Domain
The Bring Your Own Domain feature allows you to connect a custom domain (for example, learn.yourdomain.com) to your Coursebox portal instead of using the default Coursebox URL.
Steps to configure a custom domain:
Navigate to Theme in the portal settings.
Click Theme. A new window will open displaying the portal branding options.
In the General tab, locate the Bring Your Own Domain section.
In the domain field, enter your custom domain (for example:
learn.yourdomain.com) and click Save.
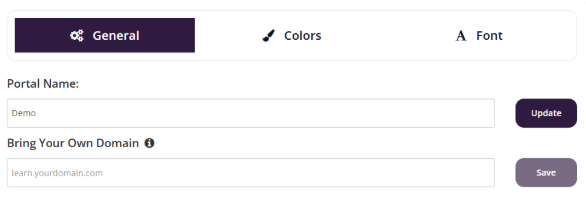
A setup window will appear to guide you through configuration.
Click Continue to begin.

Log in to your domain provider (e.g. Network Solutions). This allows automatic DNS configuration.
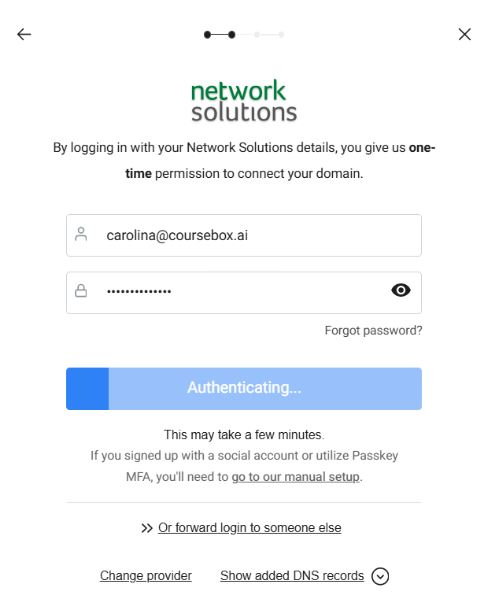
The system will automatically configure your domain. This may take a few minutes.
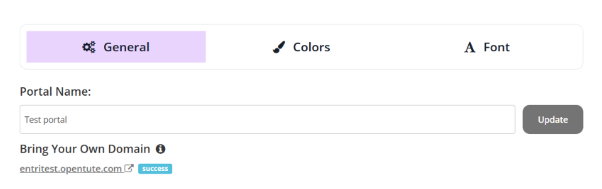
When the configuration is successful, the domain will display with a success indicator.
Colour settings
The Colour settings allow you to fully customise the visual appearance of your Coursebox platform and individual courses. You can adjust colours to match your brand, improve readability, and create a consistent experience for learners and administrators.
Colour settings are grouped into two levels:
Portal colours — control the overall look of the Coursebox platform.
Course colours — control how individual courses and course content appear.
Tip: Setting colours at the portal level ensures consistency across all courses and saves time when creating new ones.
There are two ways to update colours in Coursebox, depending on whether you want changes to apply across the whole portal or to one specific course only.
Option 1: Change colours via Edit Branding
Use this option if you want consistent colours applied across all courses.
Select the Colors tab.
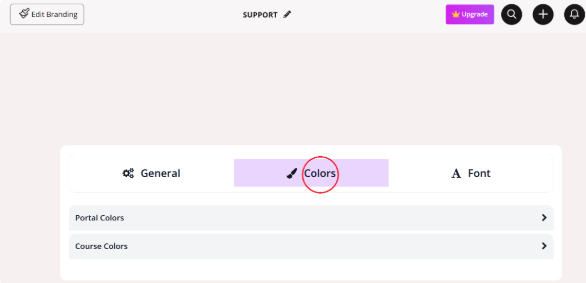
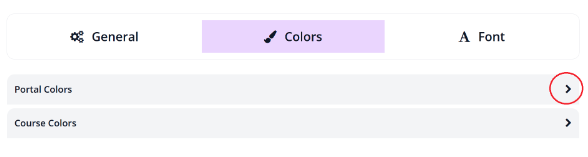
Expand Portal or Course Colours.
Click the colour tile or edit icon next to the element you want to change.
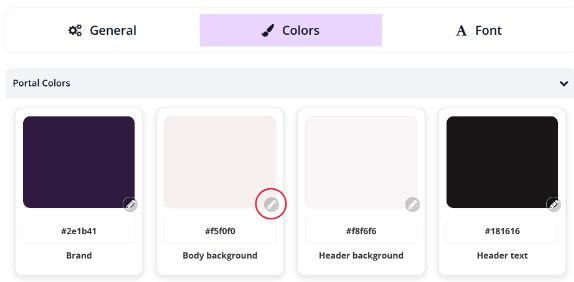
Either choose a colour using the picker, or enter a HEX code to match your brand exactly.
Repeat for any additional elements.
Changes are applied automatically based on where the colour is set (portal-wide or course-specific).
Option 2: Change colours within a specific course (course theme)
Use this option if you want to customise the look and feel of one course only.
Open the course you want to customise and click Edit Course.
On any course page, select Theme within the course editor.
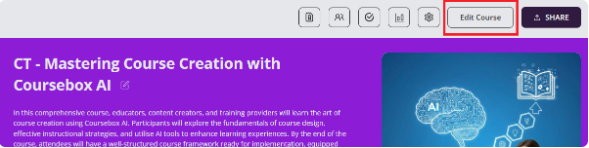
The dropdown shown below will appear.
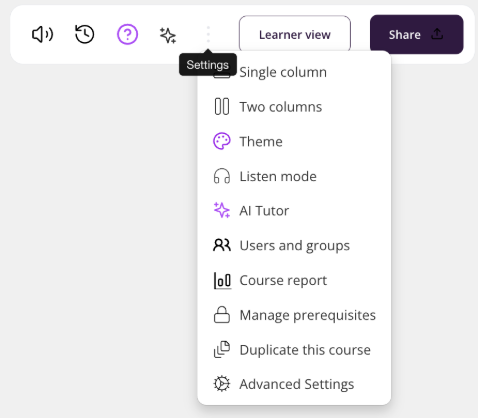
Then select your colours.
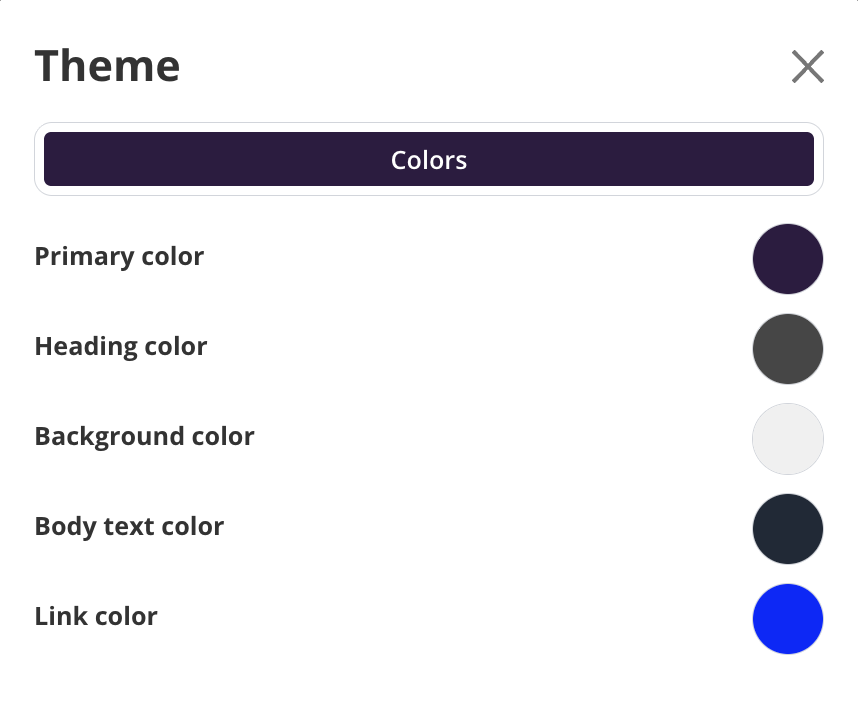
For each option, choose a colour or enter a HEX code, and save your changes.
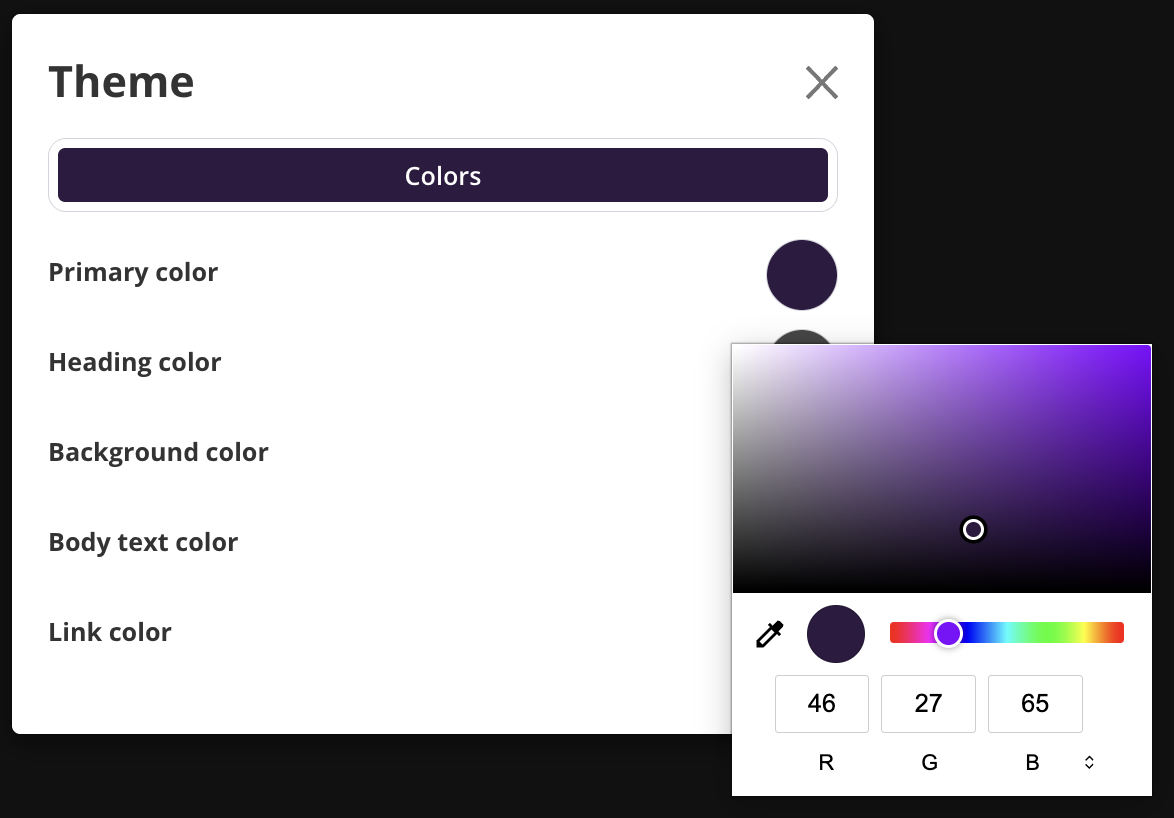
Note: These colours apply only to that course and won't affect others.
Portal colours
Portal colours define the global branding and navigation experience across the platform.
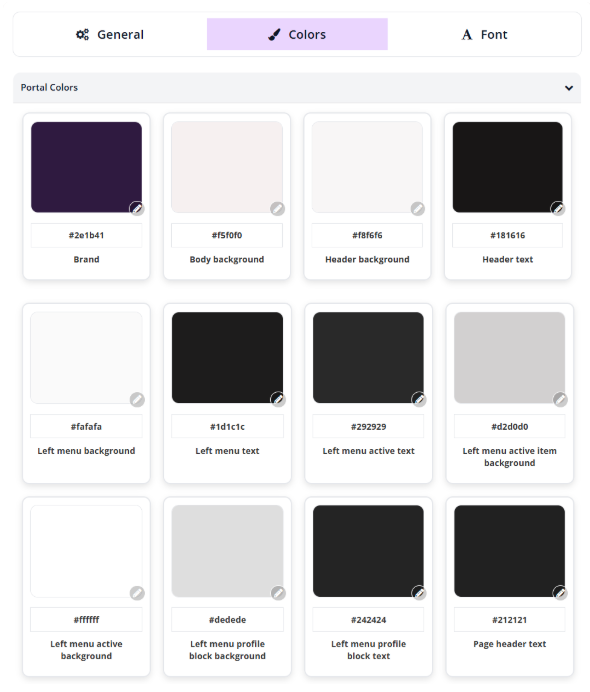
Branding & layout
Brand — primary brand colour used across buttons, highlights, and accents.
Body background — background colour of course content pages.
Header background — background colour of the top header.
Header text — text colour used in the header area.
Left menu styling
Left menu background — background colour of the navigation menu.
Left menu text — colour of menu item text.
Left menu active text — text colour of the currently selected menu item.
Left menu active item background — background colour of the selected menu item.
Left menu active background — background colour applied when a menu item is active.
Profile & page styling
Left menu profile block background — background colour of the profile section.
Left menu profile block text — text colour within the profile section.
Page header text — colour used for page titles and headers.
For the full reference on portal branding, logos and the top menu, see Platform Theme.