
Appearance Settings
The Appearance settings let Super Admins control how the platform looks and which items appear for users. You can find these options under Settings then Appearance. This article covers the Header and Footer configuration, the left-hand menu, course pages, resources pages, and the onboarding welcome popup.
Header and Footer Configuration
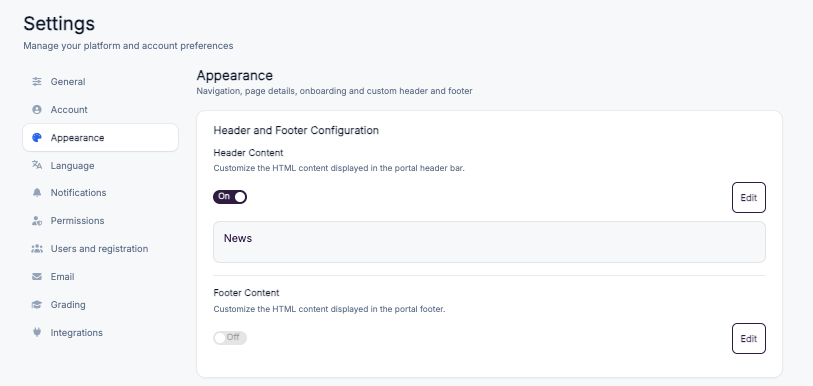
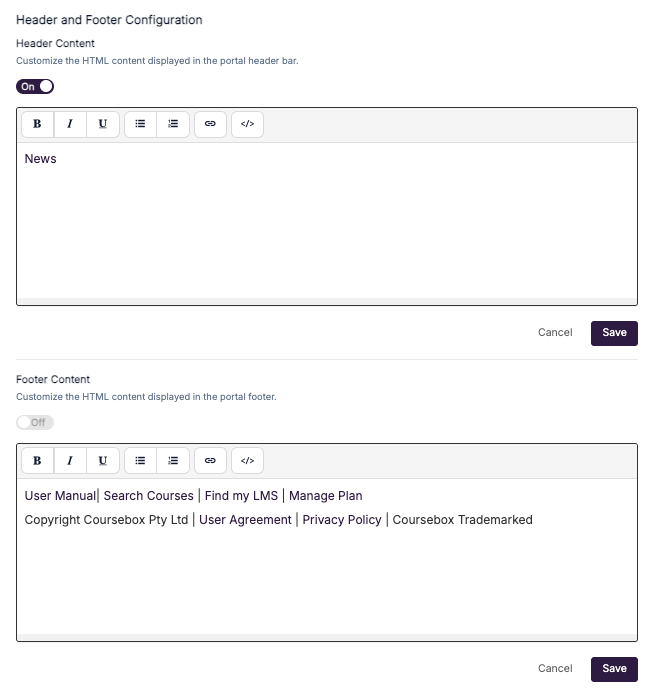
In the Header and Footer Configuration section you can add custom HTML content to your portal's header bar and footer — for example, quick links, a support contact, or copyright and policy links.
Go to Settings → Appearance. Header and Footer Configuration is at the top of the page.
Toggle Header Content or Footer Content to On to display it on your portal.
Click Edit to open the content editor. Use the toolbar (Bold, Italic, Underline, bulleted or numbered lists, Link, and the
</>HTML code view) to format your content, or switch to HTML view to paste custom HTML.Click Save to apply your changes, or Cancel to discard them.
Looking for the custom top menu instead? That is set in Theme Settings — see Platform Theme.
Manage Left Hand Menu Items Visibility
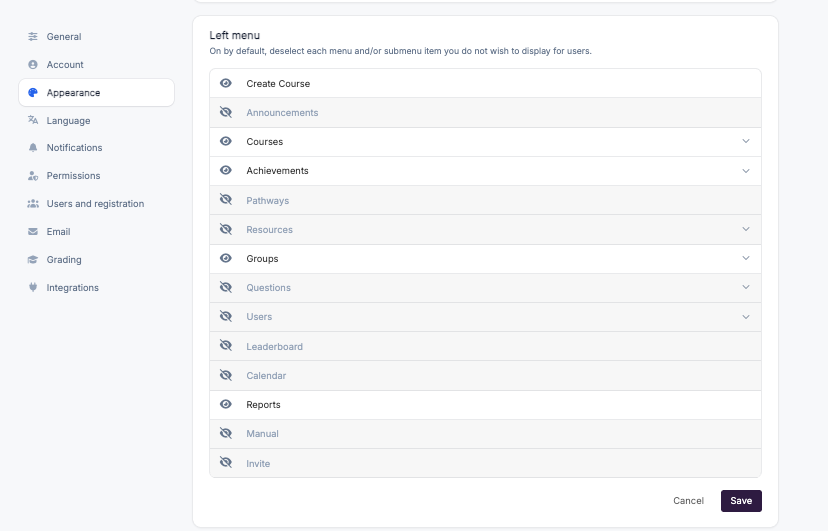
This setting allows a Super Admin to control which items appear in the left-hand navigation menu of the portal. By default, all menu items are visible to learners.
Show or hide menu items
Use the visibility (eye) icon next to each menu item to show or hide it.
Hidden items will not appear in the left-hand menu for learners.
Control sub-menu visibility in Dashboard
Click the expand arrow next to a menu item to reveal sub-pages.
You can show or hide individual sub-menu items (for example, specific sections under Courses, Groups, or Questions).
This gives you fine-grained control over navigation, helping you simplify the menu and show only what's relevant to your users.
Reordering menu items
On the live left-hand menu itself, click the three-dot menu next to any item for quick actions — Hide, Up, and Down. Use Up and Down to move that item higher or lower in the menu order without leaving the page.
Finding hidden items again
Items you hide move down into a Hidden features section at the bottom of the left-hand menu, shown greyed out. Open the three-dot menu next to a hidden item there to make it visible again at any time.
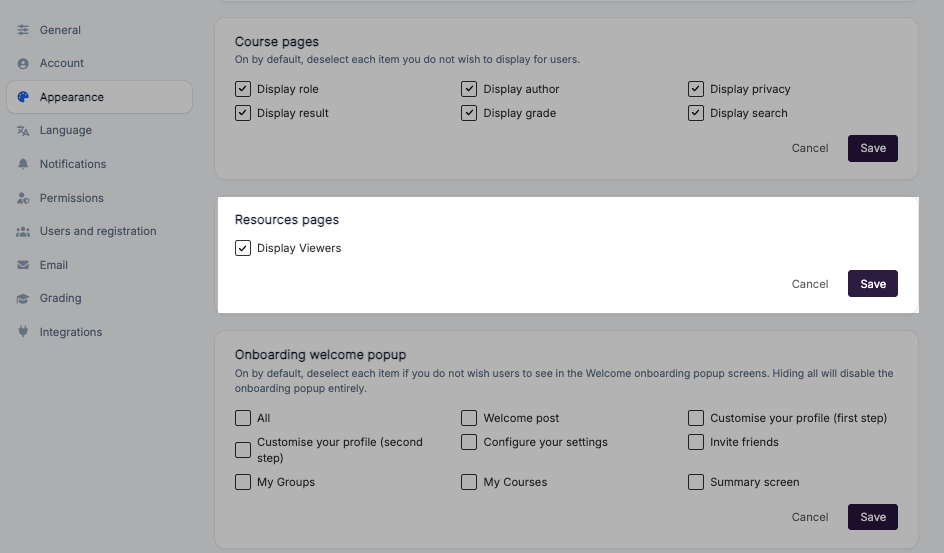
Manage Course Pages Visibility
This setting allows super admin to control the visibility of content on your course details and description. By using the check boxes you can easily control the visibility of individual course content.
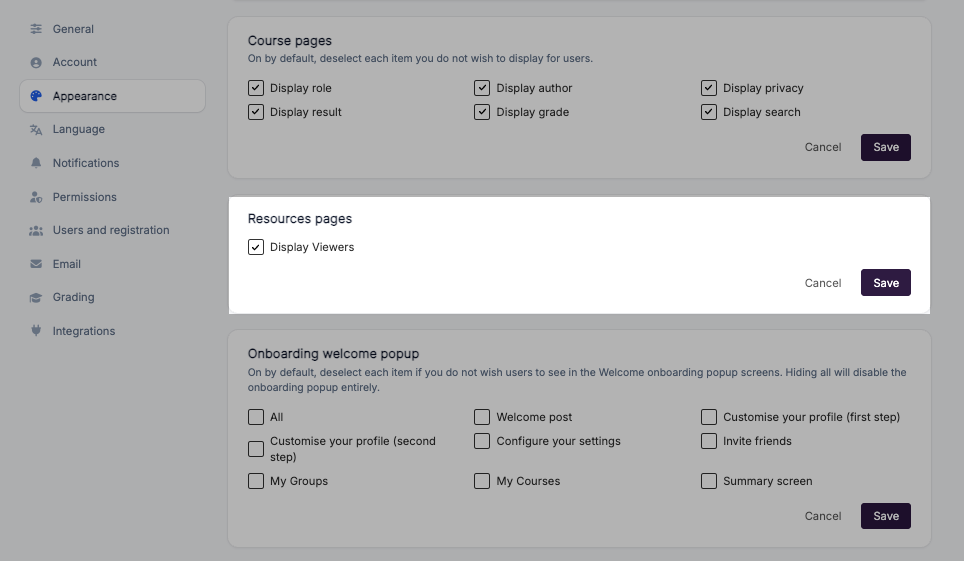
There are several content items you can control, such as role, result, author, grade, privacy, and search.
Manage Resources Pages Visibility
This setting allows super admin to control the visibility of resources on your course. Use the Display Viewers checkbox to show or hide viewers on resources pages.
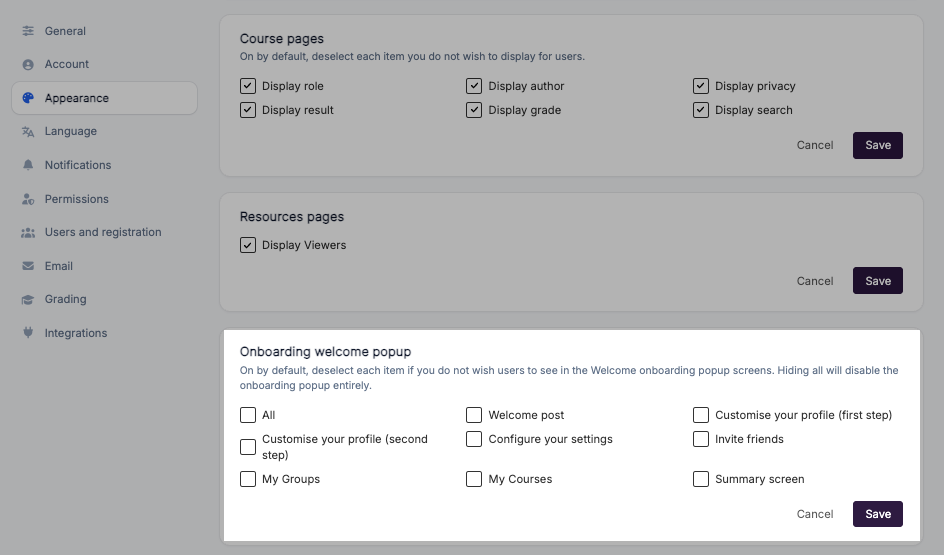
Manage Onboarding Welcome Popup
The Onboarding Welcome Popup greets new users when they first join your platform. By selecting or deselecting the individual items in the settings, you can control the visibility of each section. Options include All, Welcome post, Customise your profile (first step), Customise your profile (second step), Configure your settings, Invite friends, My Groups, My Courses, and Summary screen. Hiding all items will disable the onboarding popup entirely.
To edit the welcome message shown in the first onboarding step, click the pencil (edit) icon next to the Onboarding section on the Announcements (home) page. This also updates the first post that new users see. Once edited, click Setup to test the popup.