Create a Course using AI
Coursebox offers flexible ways to create engaging online courses—whether you prefer the speed of AI or the control of manual design.
Watch the tutorial videos found in our YouTube Video Library.
You can start from scratch and build your course step by step, or accelerate the process using Coursebox AI, which helps generate a course structure and content based on your topic and learning goals.
This section will guide you through both methods:
Using AI to instantly generate course outlines and content
Manual creation for fully custom-built pages, lessons, and learning activities
No matter which method you choose—you’ll have full control to refine, reorganise, and personalise your course for your audience.
Create a course using 'Ask Coursebox'
This section outlines how Learning Designers, Creators, and Administrators can quickly generate a course structure and content using the AI-powered tools available in Coursebox.
Starting Course Creation
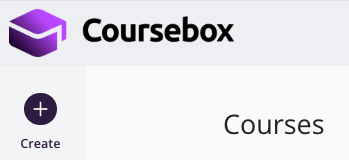
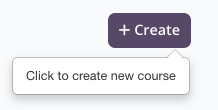
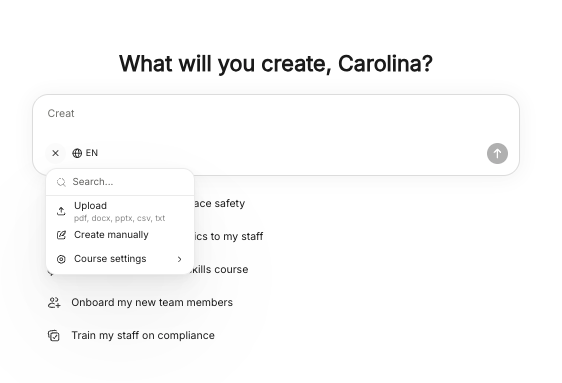
In the Dashboard Page, look for the dark circular + button in the left sidebar, labelled Create beneath it. This replaces the previous button that appeared in the top menu.
Clicking the button opens a dropdown menu with available actions. The options shown will depend on your role and plan subscription.
Step 1: Start from the Dashboard
From the main dashboard, you can begin immediately by clicking the + Icon
Or select Create
Use the central AI prompt box (“What will you create?”)
Or click Create manually if you prefer to build from scratch
You can also access My courses or Upload materials from the same screen
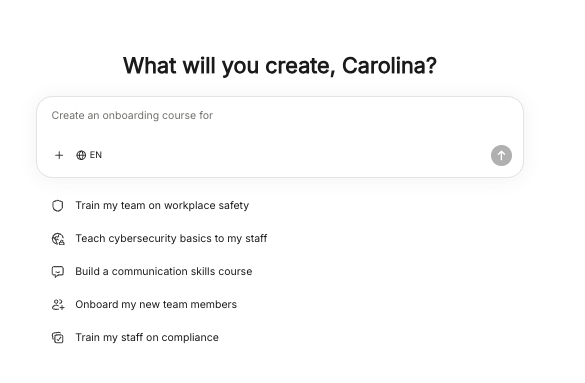
Step 2: Describe Your Course
In the AI prompt box:
Enter a clear description of your course (e.g. “Create a course on digital marketing for beginners”)
The more detailed your prompt, the better the generated content will be
Tip: For best results, include the audience, goals, and key topics in your prompt.
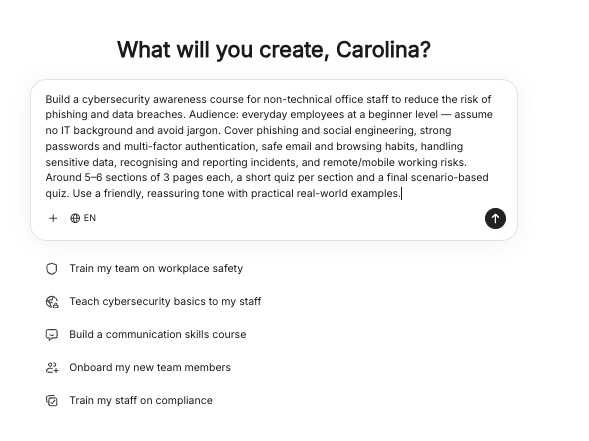
Step 3: Select Language
Click the language selector (EN) below the prompt box
Choose your preferred language (e.g. English AU, Spanish, German, etc.)
ℹ️ Updated May 2026: The selected language is now applied consistently across the About page heading, section summaries, and Further Readings. A course generated in a non-English language will no longer have stray English headings.

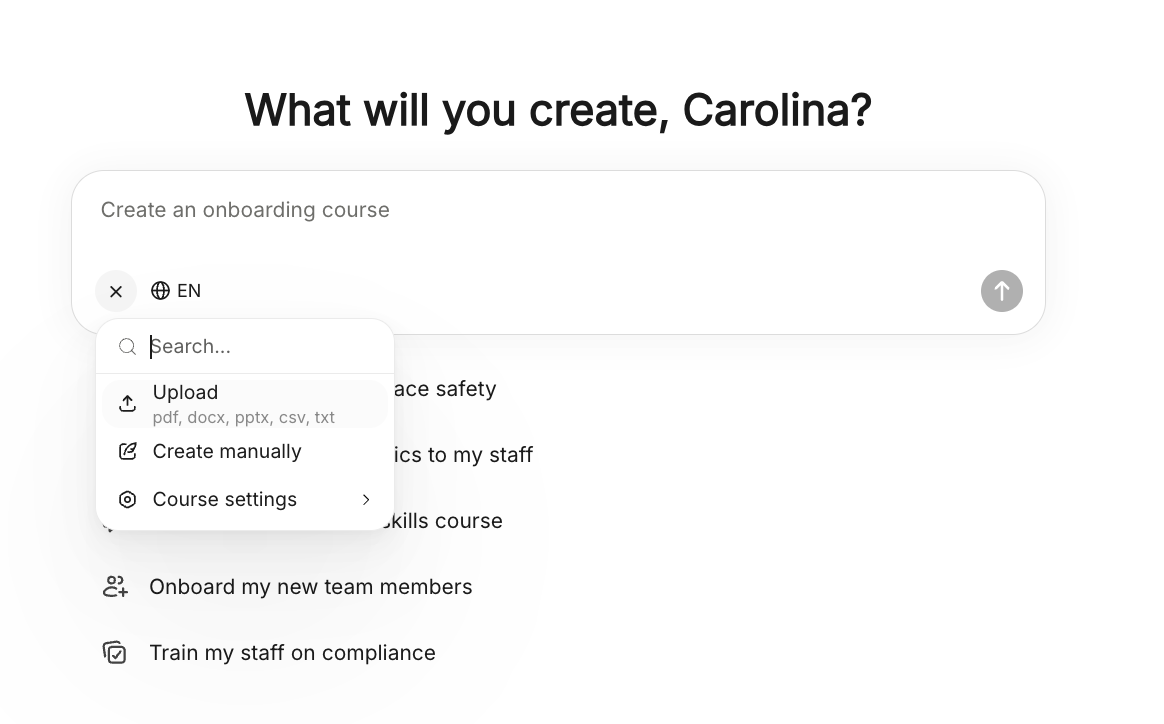
Step 4: Add Source Content (Optional)
Click the “+” icon to access additional options:
Upload files to train the AI (PDFs, docs, etc.)
Add web links to pull in external content
Access Course settings
This allows the AI to generate more accura
te and tailored course material.
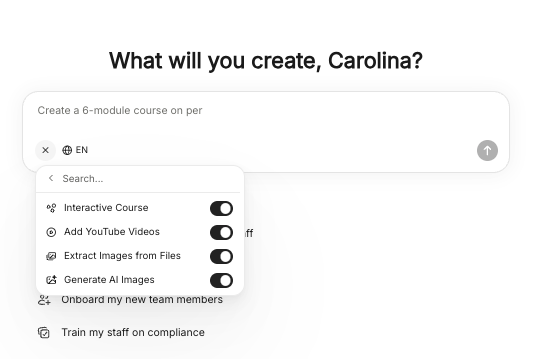
Step 5: Configure Course Settings (Optional)
Within Course settings, you can toggle features such as:
Interactive course elements
YouTube video integration
Extracting images from uploaded files
AI-generated images
These settings help customise how your course is built and presented.
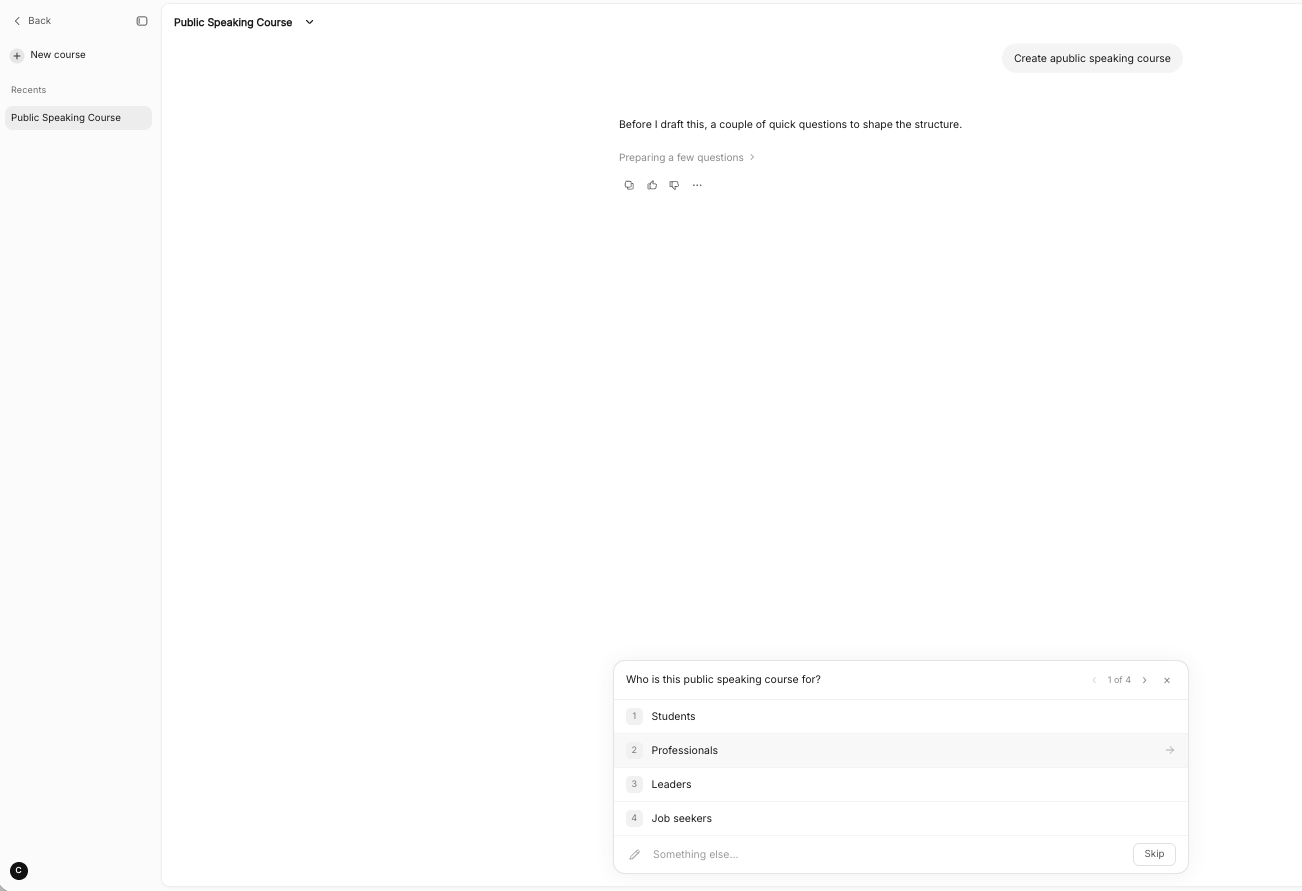
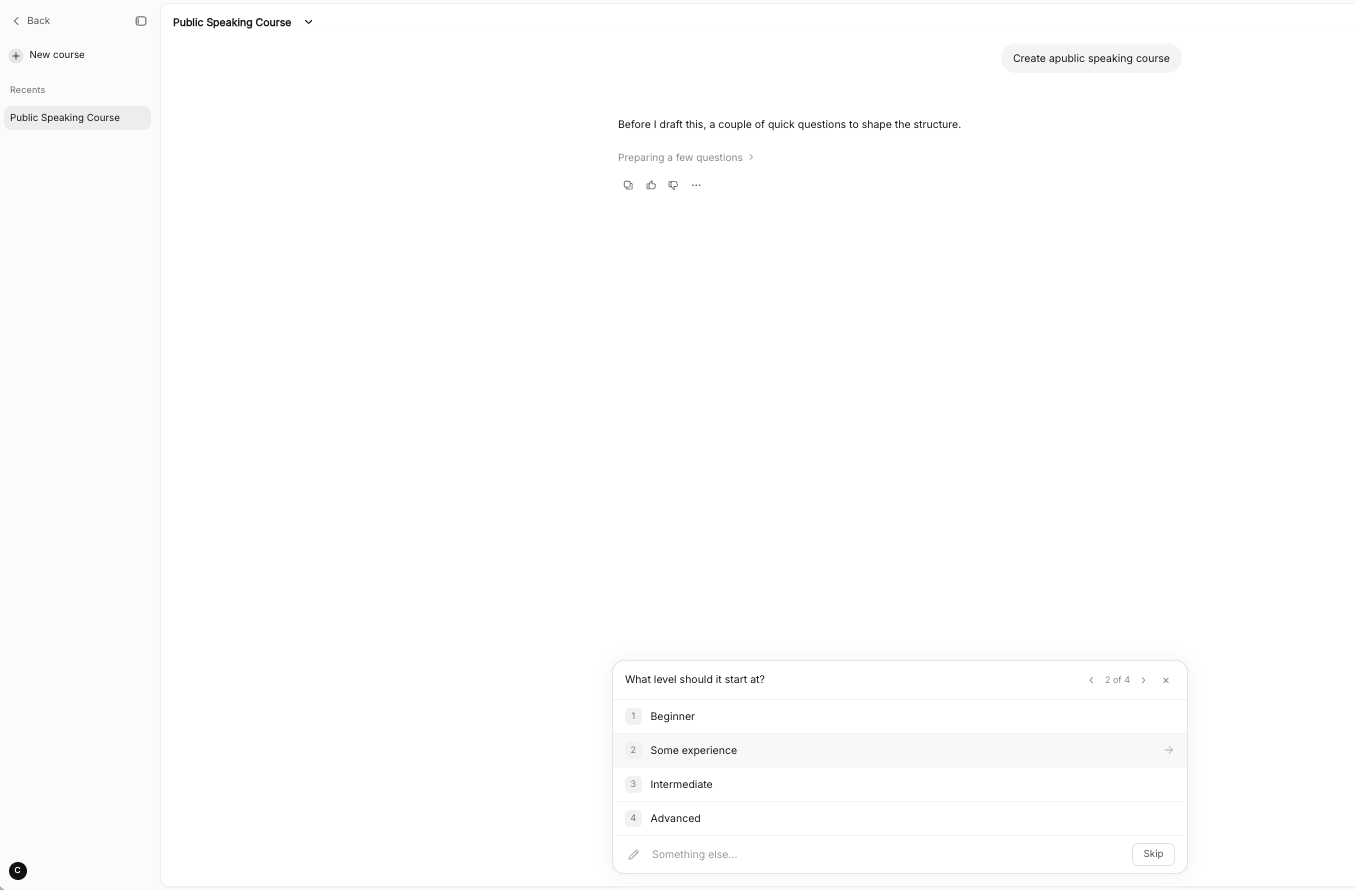
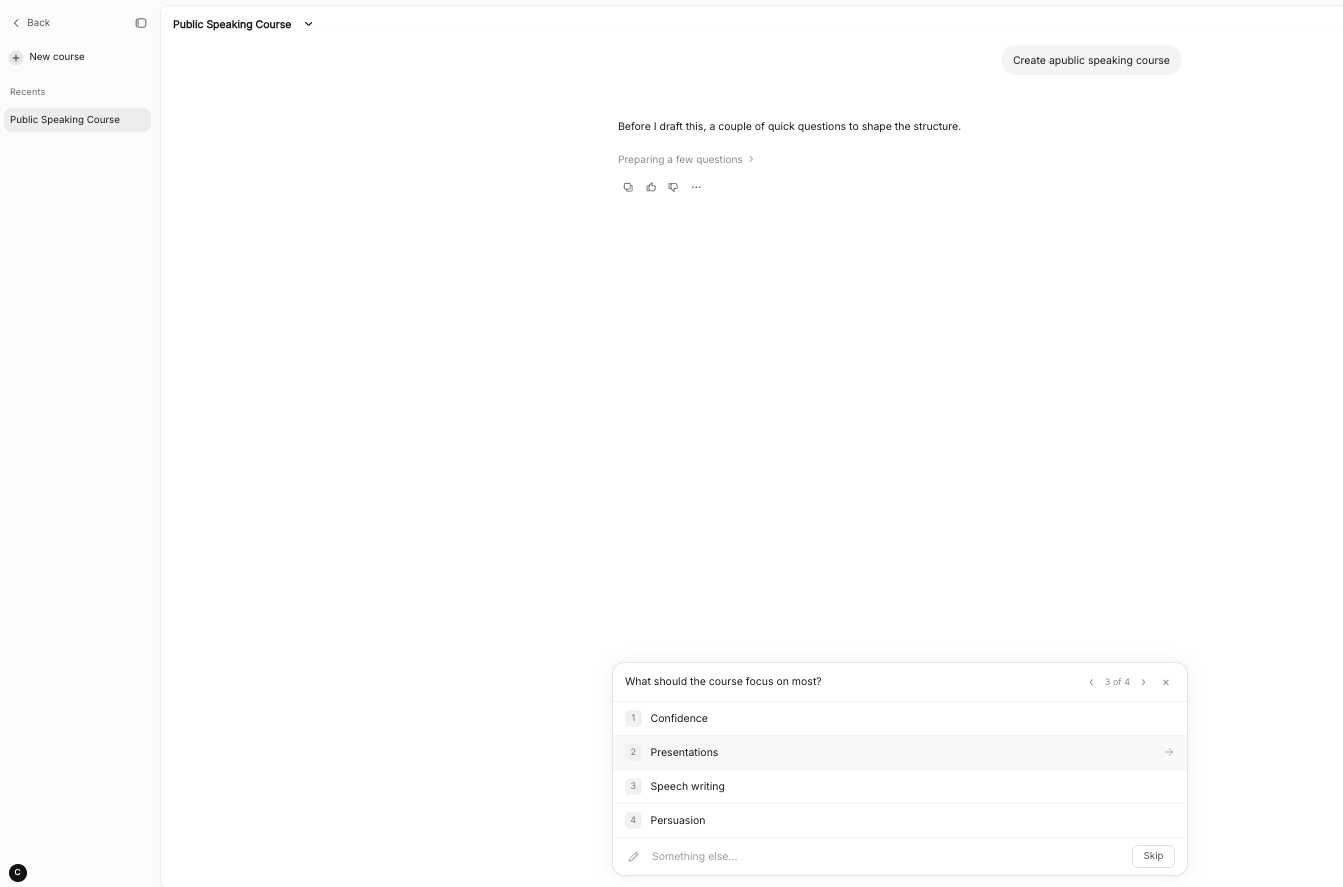
Step 6: Continue the Conversation
Once you’ve entered your prompt, continue refining your course by interacting with Ask Coursebox.
Answer follow-up questions to clarify your course focu (e.g. content, LMS setup, olling)
Review the suggested course structure and provide feedback or adjustments
The AI will progressively build your course, including:
Course structure
Sections and pages
Content and learning activities
Tip: The more you engage with the chat and provide feedback, the more tailored and accurate your course will be.
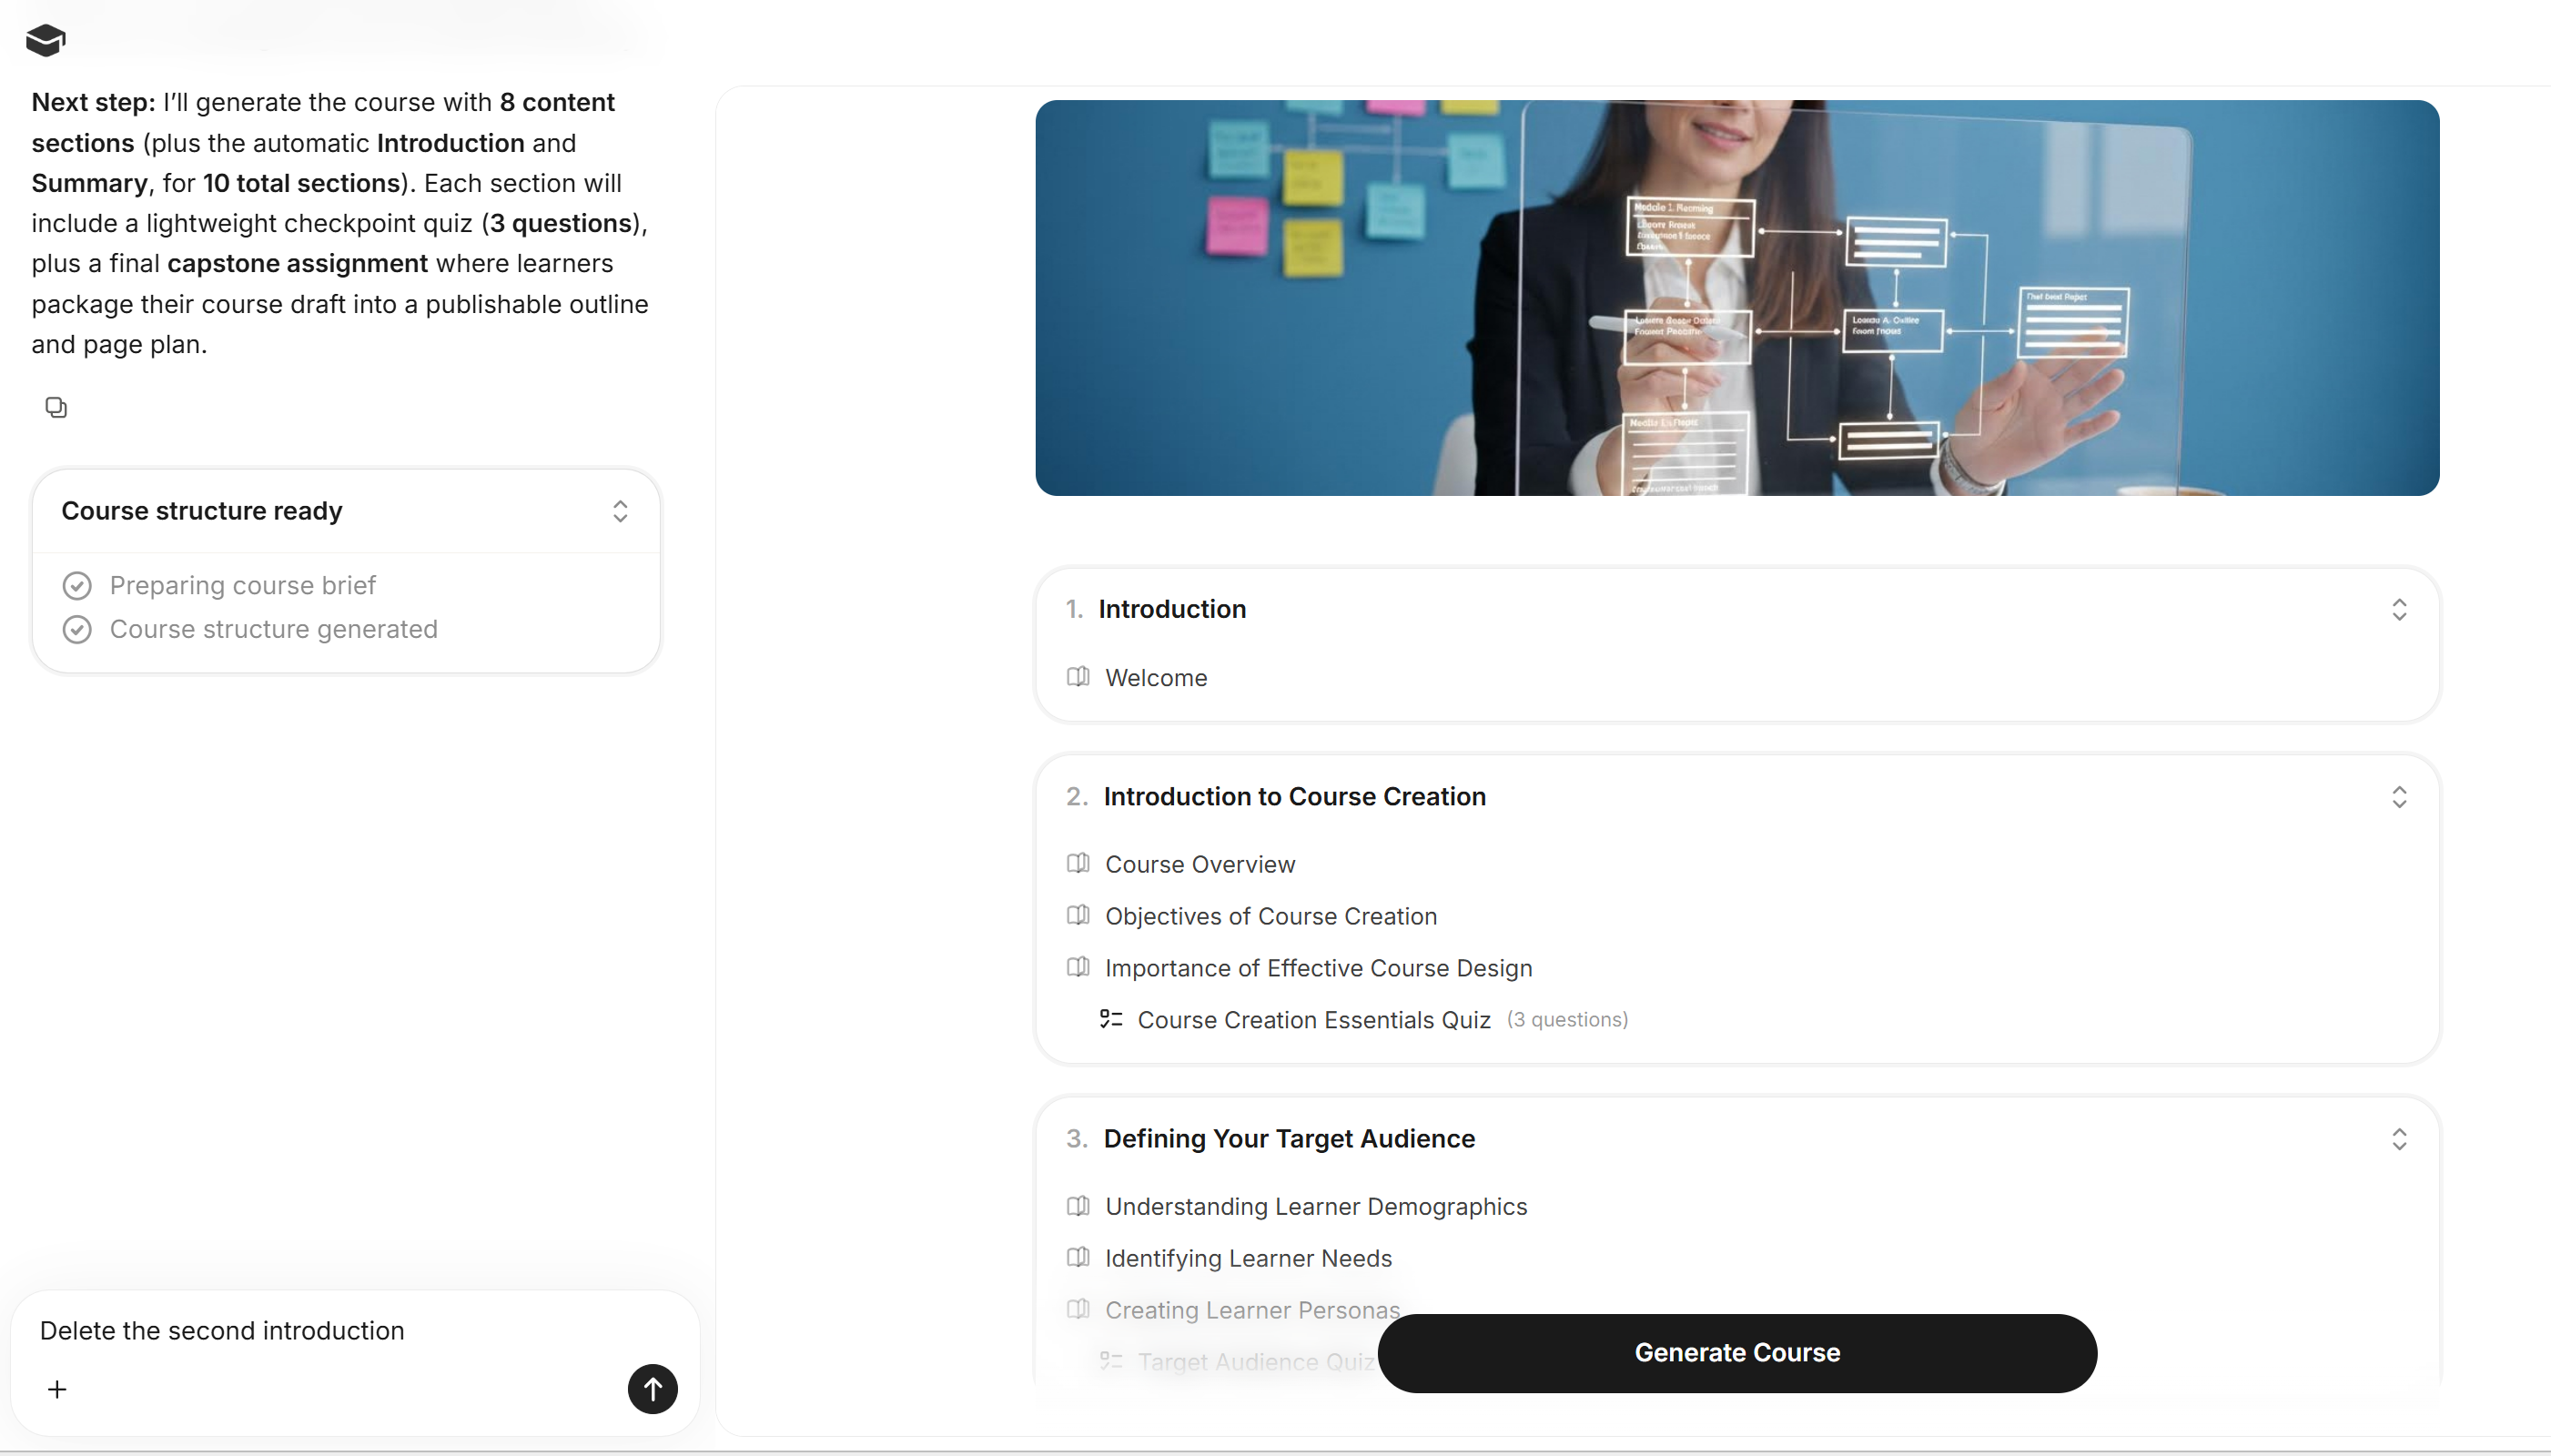
Modify Course Structure
Once your course structure is generated, you can review and refine how your course is organised before finalising it.
You may notice some sections or items still loading—this is normal. The structure will continue to populate as Coursebox completes each part.
Review and Adjust Your Structure
Continue to use the chat experience to review the structure:
Expand each section to view included pages and activities
Review section titles, page names, and quizzes
Ensure the flow and sequence align with your learning goals
Tip: Getting the structure right first will make your content more organized and easier to refine later.
Generate Your Course
Once you're happy with the structure:
Click “Generate Course” to finalise and build out the full content
Editing and Refining Your Course After Generation
Once your course has been generated, the Ask Coursebox chat is no longer the place to make changes. Instead, use the dedicated editing tools described below to refine and expand your content.
Option 1: Use the AI Editor Icon (Recommended)
To make targeted edits to any page after your course has been generated, use the AI editor icon located in the top-right corner of each course page. This allows you to rewrite sections, expand content, adjust tone, and more — directly within the course editor.
Option 2: Export and Re-upload for Major Overhauls
If you want to significantly restructure your course or add substantial new source material, you can export your course as a PDF and start a new course creation. Upload the exported PDF along with new instructions at the initial AI course creation prompt stage to build on your existing content with fresh guidance.
Tip: The Ask Coursebox chat is designed for the initial course creation stage only (before you click "Generate Course"). Once a course is drafted, use the AI editor icon for page-level refinements instead.
Prompt Memory
Coursebox AI uses prompt memory to maintain context throughout your course creation session. This means the AI remembers your previous instructions, preferences, and course details as you continue to build and refine your content—so you don't need to repeat yourself with every new request.
For example, if you specify early on that your course is aimed at beginners or should use a particular tone, the AI will apply that context to all subsequent content it generates. You can also update or override these remembered settings at any point during the session by simply providing a new instruction in your prompt.
Document to Course Creation - Improved!
Coursebox 2.1 brings a major improvement to course creation — you can now generate a course directly from a single uploaded document, whether that's a Word file, PDF, or similar, while fully preserving your original content structure. This makes it faster and easier than ever to turn existing training material, policy documents, or course outlines into interactive online courses — no rewriting required.
How it works
When you attach a document during course creation, Coursebox reads the file and uses your headings, text, and images as the foundation for the course structure. Rather than generating new content from a topic prompt, it maps your existing content into lessons and pages.
Steps to create a course from a document
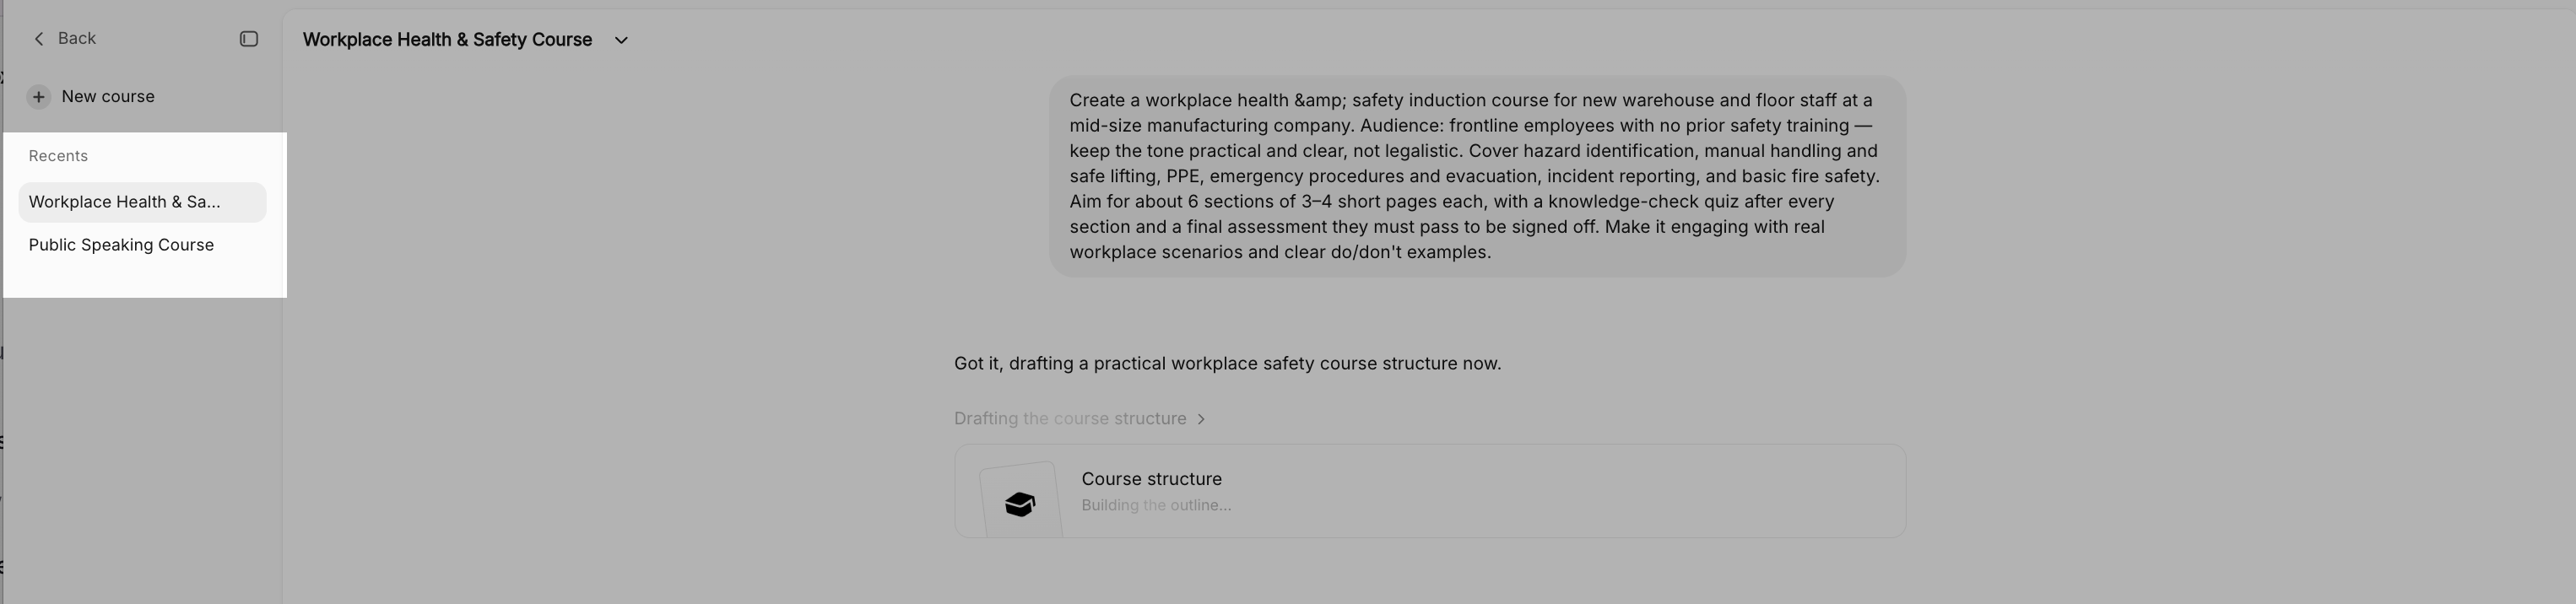
From the Create screen, start a new course as you normally would via Ask Coursebox.
Attach your document by clicking the + and selecting the file upload dropdown in the menu (supports Word .docx and PDF).
Select the file from your drive and click open
You will see the file attached in the Ask Coursebox experience
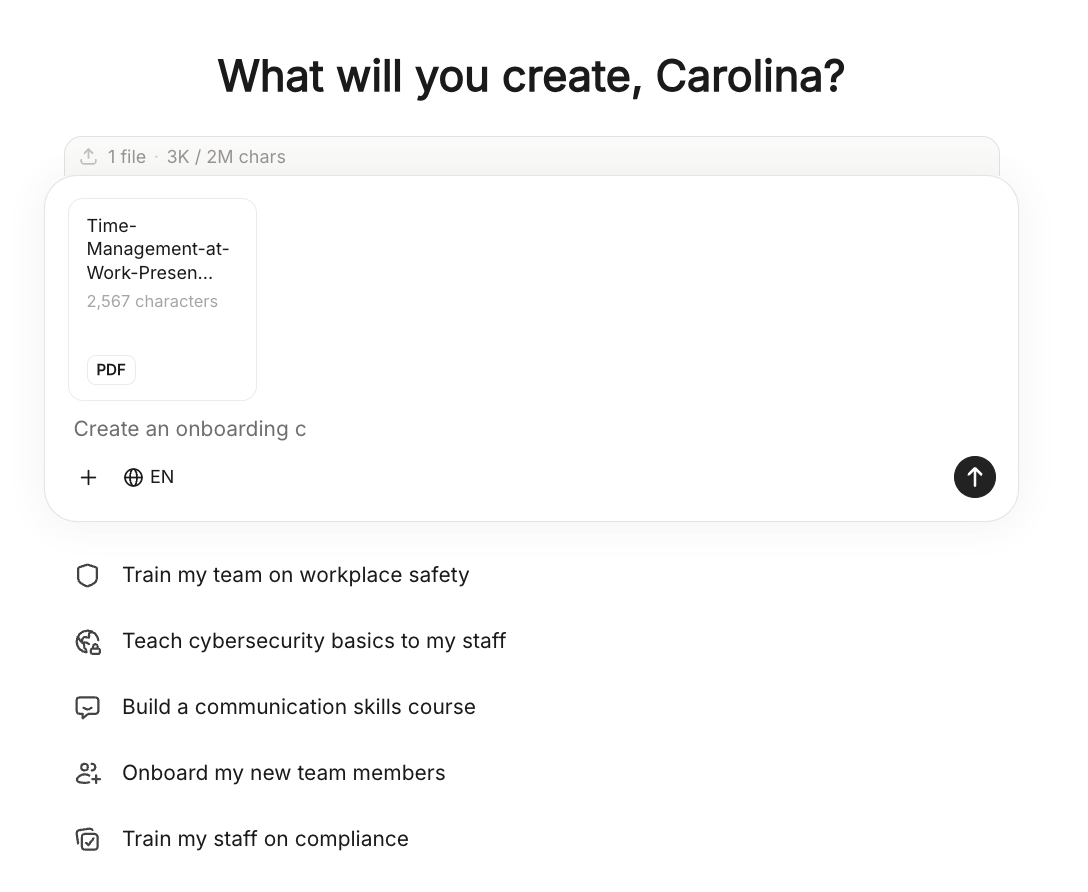
Then select the language and click the arrow up icon to create the course structure.
What's retained from your document
Headings and subheadings become lessons and pages
Body text is carried through and formatted as course content
Embedded images are preserved in the relevant pages
Tips
Documents with clear heading hierarchy (H1, H2, H3) produce the best structure
Large documents may be split across multiple lessons automatically — review the outline before confirming
You can still use the prompt to add context (e.g. audience level, tone) alongside the document
AI generation is taking too long or appears stuck
Coursebox AI typically generates a course structure within 1-3 minutes. If the process appears stuck after 5 minutes, refresh the page - your course draft is usually saved and you can continue from where you left off.
AI-generated content is inaccurate or low quality
The quality of AI output depends on your prompt. For best results: be specific about your audience, include the key topics you want covered, and upload source materials (PDFs, docs) to guide the AI. After generation, use the editor to refine and correct any content.
Supported file formats for upload
You can upload the following file types as source material for AI generation: PDF (.pdf), Word documents (.docx, .doc), PowerPoint presentations (.pptx, .ppt), Plain text files (.txt). Maximum file size: 50MB per file.
Video and web content
You can add YouTube links or web URLs as source material. Coursebox will extract the text content to inform the AI generation. Note: video transcripts are used, not the video itself.
Upload fails or gets stuck
If your file upload fails: check the file is under 50MB, ensure it is in a supported format, try a different browser, or compress/split large documents before uploading.
Course generation fails with an error
If you see an error message during generation, note the error text and contact support at support.coursebox.ai with your course title and the error message.