What's New in Coursebox
A roundup of the latest features and improvements in Coursebox. Each section covers what's new, how it works, and what you can do with it.
Security Settings: Password Policy and Passwordless Login (August 18, 2026)
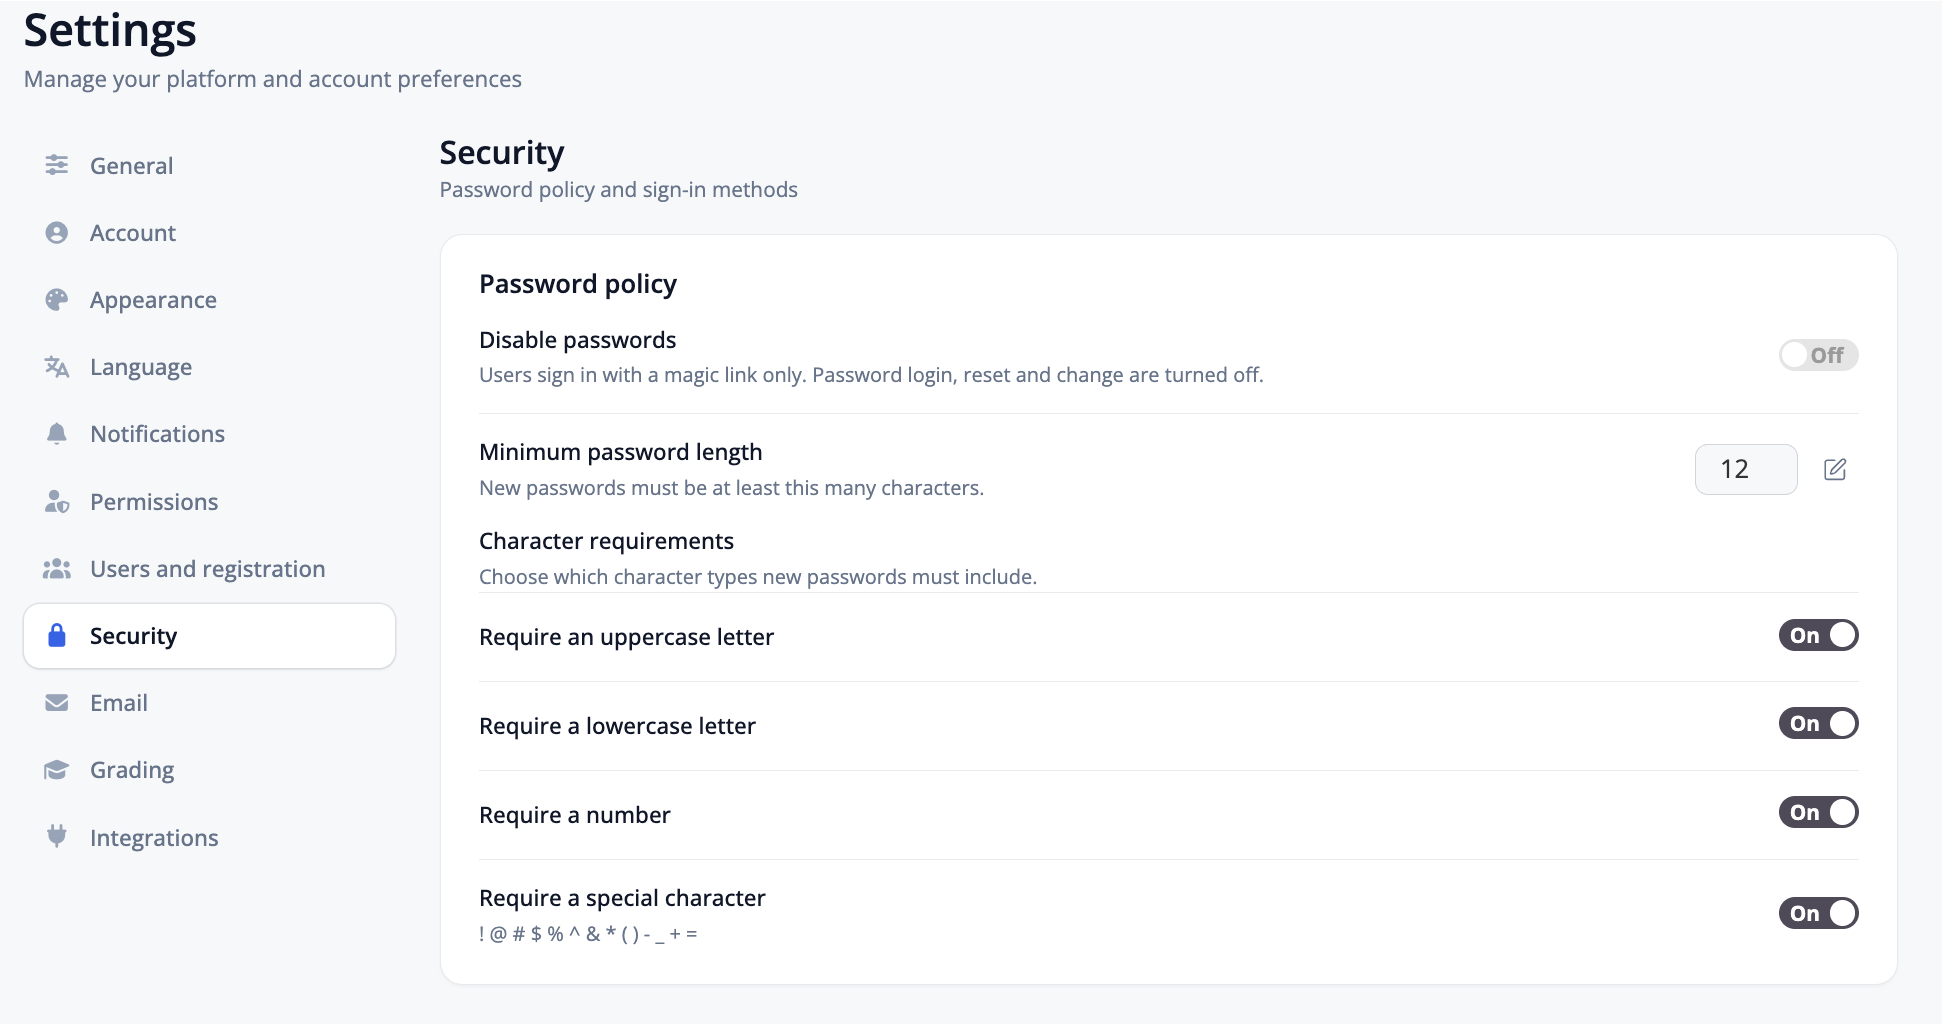
Super Admins can now set their platform's password policy, or switch to passwordless sign-in with magic links, from a new Security page.
What's new
Set a minimum password length (12 by default)
Require an uppercase letter, a lowercase letter, a number, and a special character, each as its own toggle
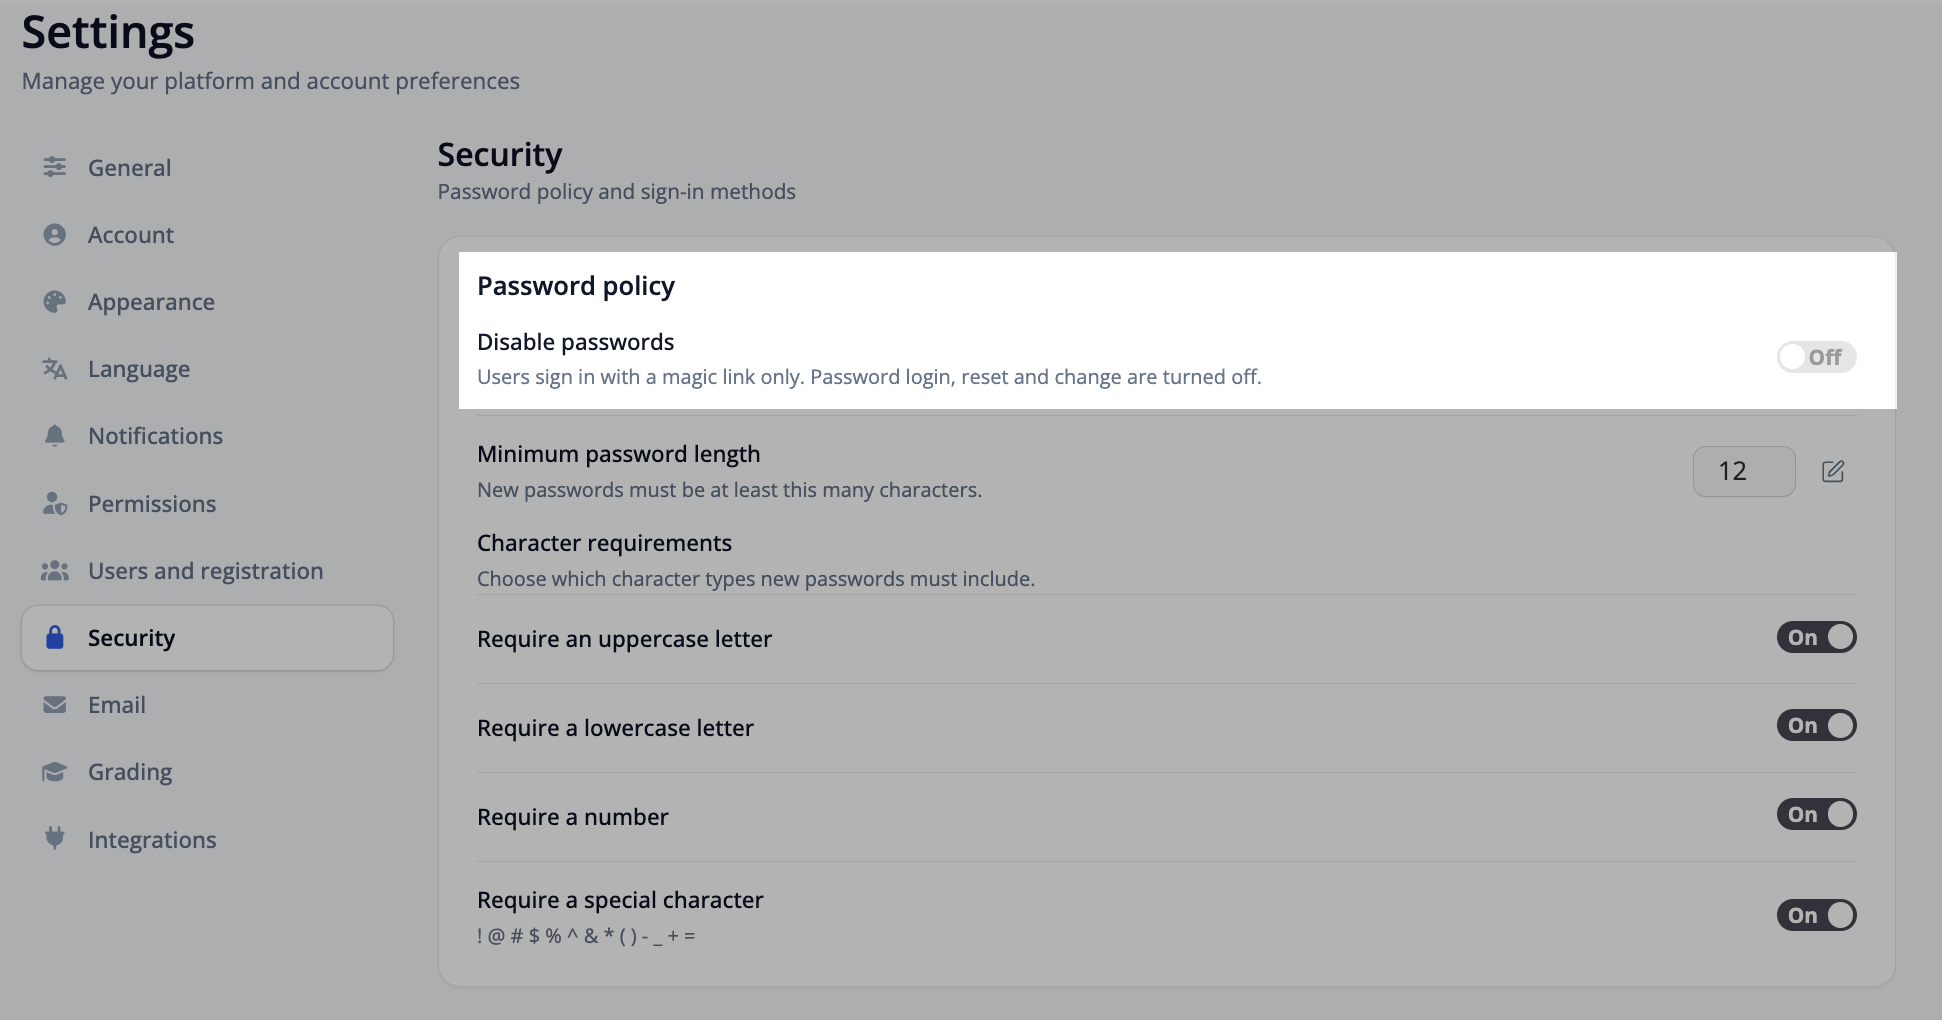
Turn off passwords entirely so users sign in with a magic link only
How it works
Click the dropdown menu next to your profile icon and select Settings
In the left-hand menu, click Security
Set the Minimum password length with the pencil icon, and switch on the Character requirements you want
To go passwordless, turn on Disable passwords for magic-link sign-in only
What you can do
Meet a corporate or compliance password standard
Remove weak and reused passwords by going passwordless
Cut down on password-reset support requests
For LMS, Business, and Enterprise accounts. Super Admin only.
Certificates: New Drag-and-Drop Editor (August 16, 2026)
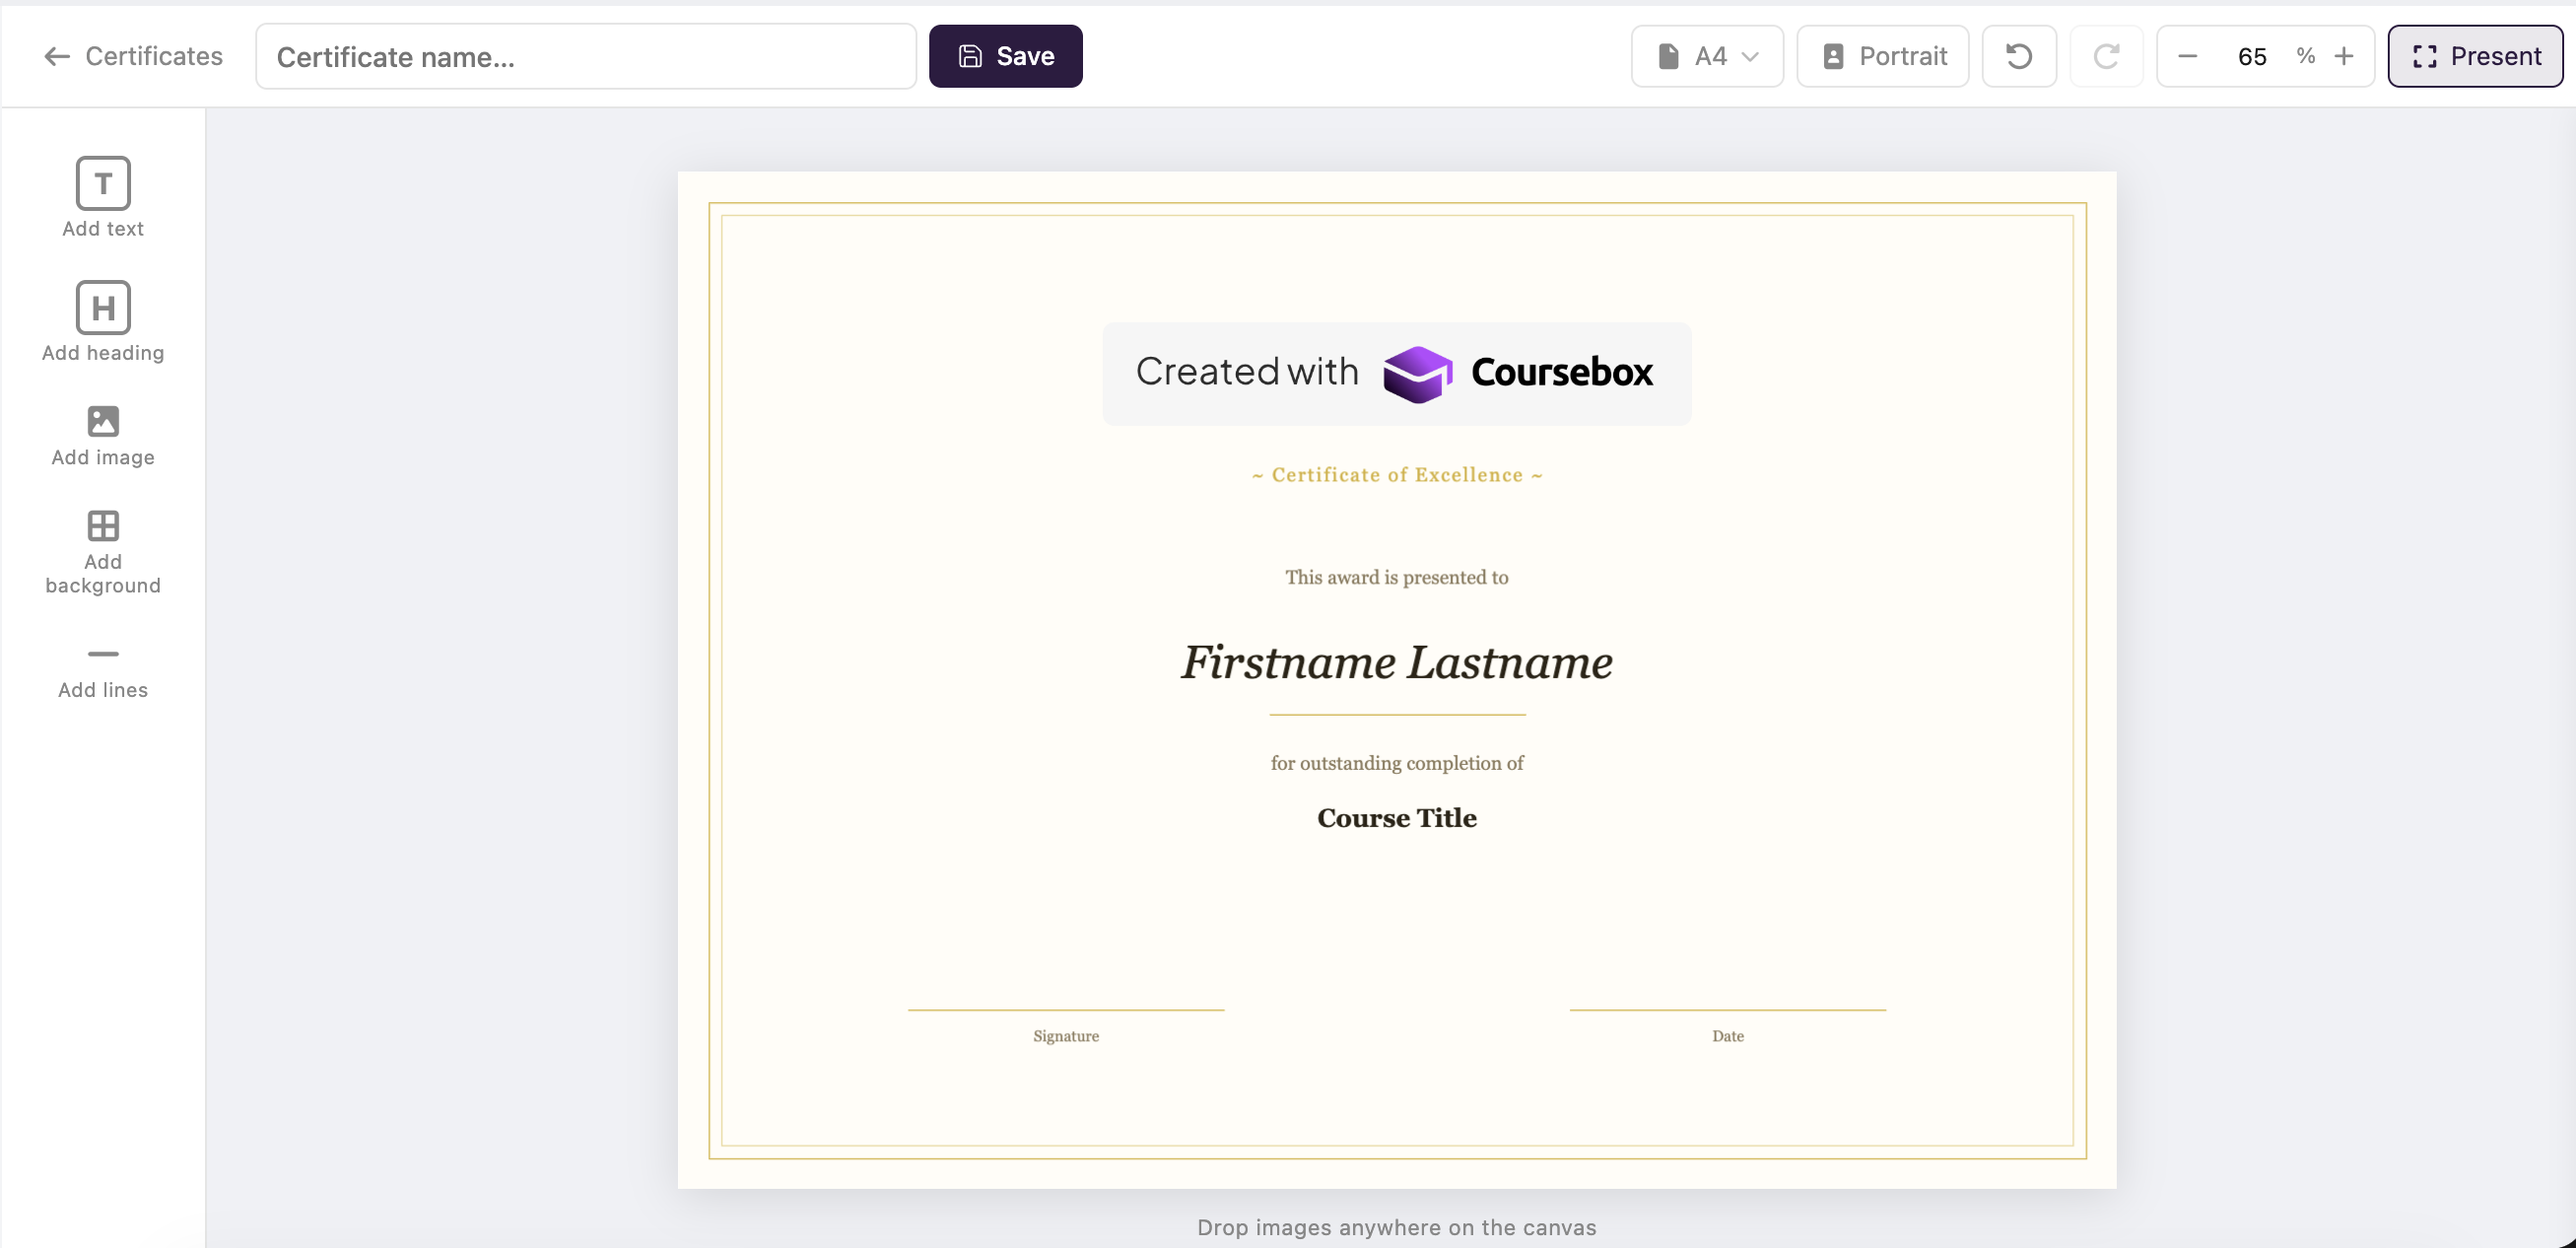
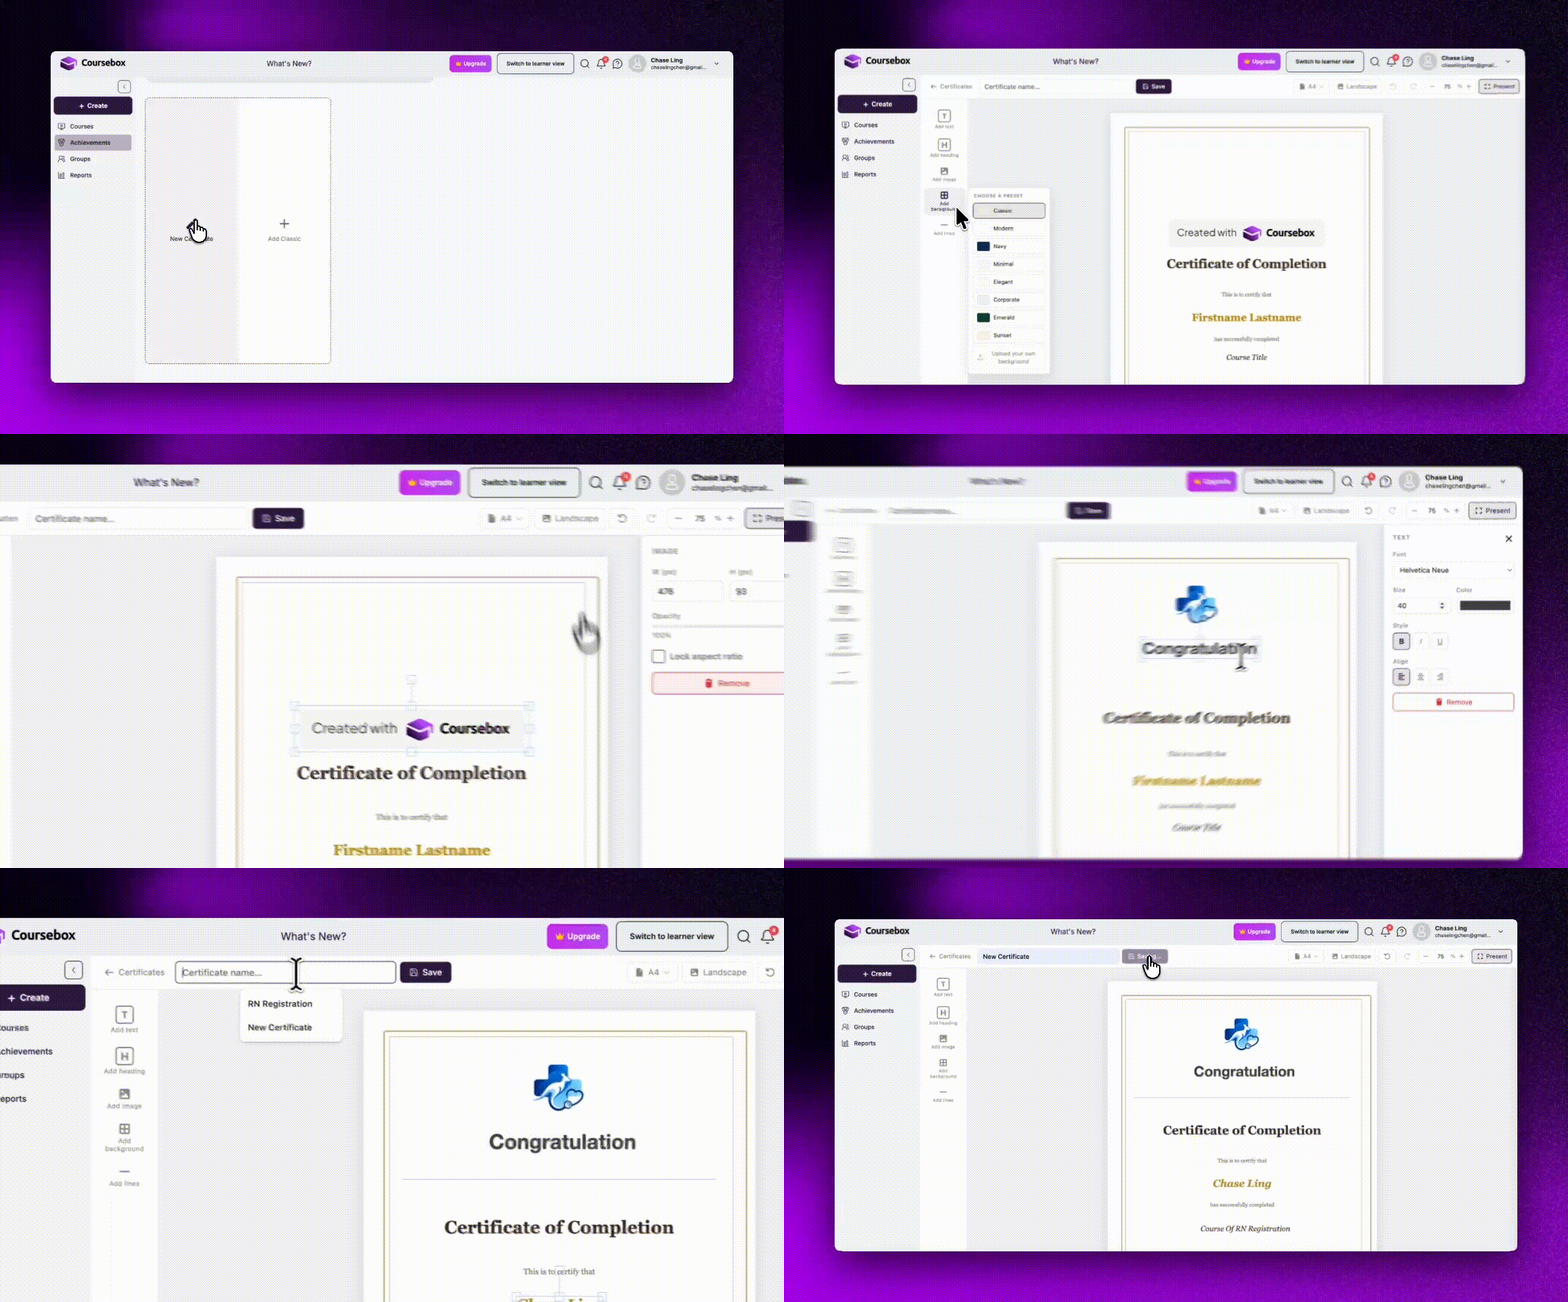
The certificate editor has been rebuilt as a drag-and-drop canvas, so you can design and brand your certificates directly.
What's new
Design certificates on a drag-and-drop canvas
Switch between preset templates and choose your paper size
Edit text inline, and set fonts from your course font library
Resize and reposition any element, and drag images straight onto the certificate
How it works
Open the certificate editor for your course
Choose a template and a paper size
Edit the text inline, and set the fonts from your course font library
Drag images onto the certificate, and resize or reposition any element
Save your certificate
What you can do
Design a certificate that matches your brand, without a designer
Reuse your course fonts for a consistent look across the course and its certificate
Build certificates for different courses from ready-made templates
Audio Submissions: Now Graded by Rubric (August 07, 2026)
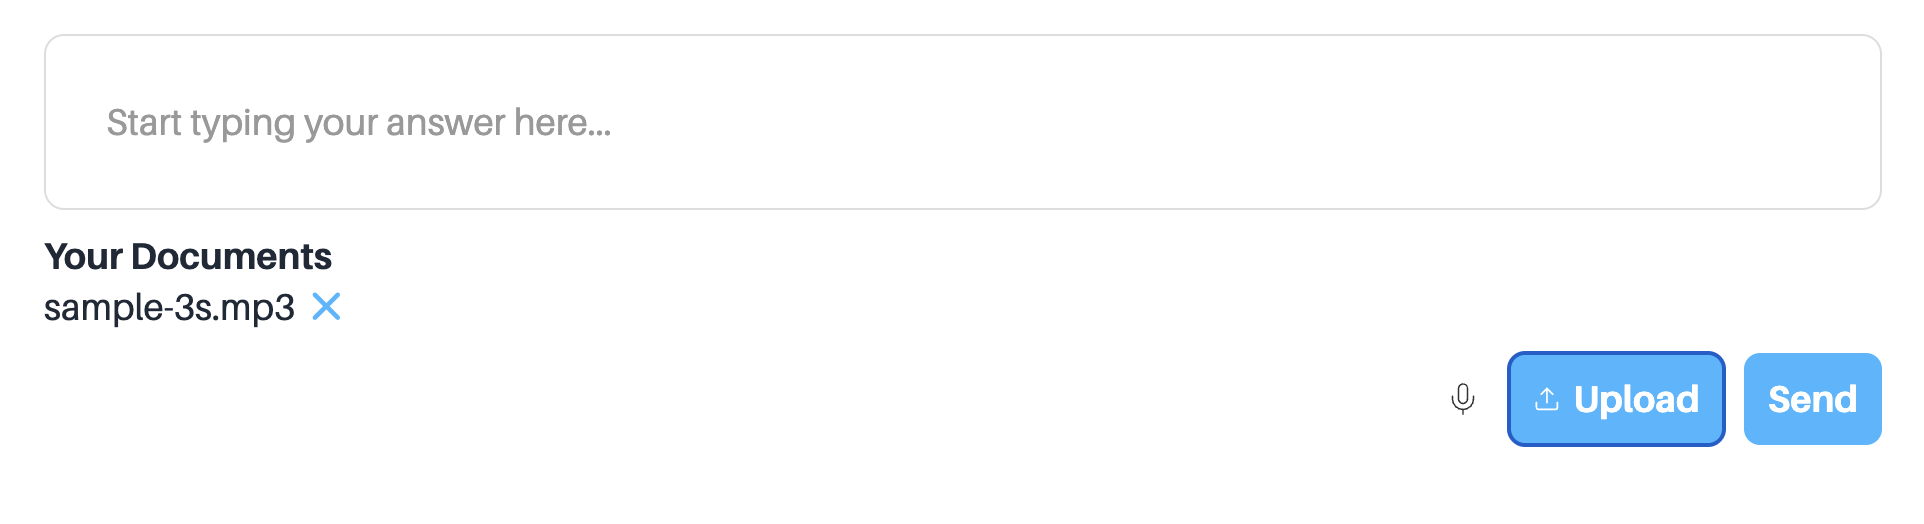
Learners can now submit an audio recording for an assignment, and the AI grades it on the content as well as how it is delivered: tone, sentiment, and engagement.
What's new
Learners upload an MP3 recording as their assignment answer
The rubric grades the content and the delivery: tone, sentiment, and engagement
Well suited to teacher training, presentation skills, and language practice
How it works
Add an assignment to your course
Set it to accept an audio submission
Learners record and upload an MP3 as their answer
The AI grades it against the rubric, covering content, tone, sentiment, and engagement
What you can do
Assess how learners speak, not only what they write
Grade delivery skills such as clarity, tone, and engagement for teacher training or presentations
Use voice submissions as a verification step, since a recorded voice is harder to fake than text
Settings: Now Organised Into Clear Sections (August 07, 2026)
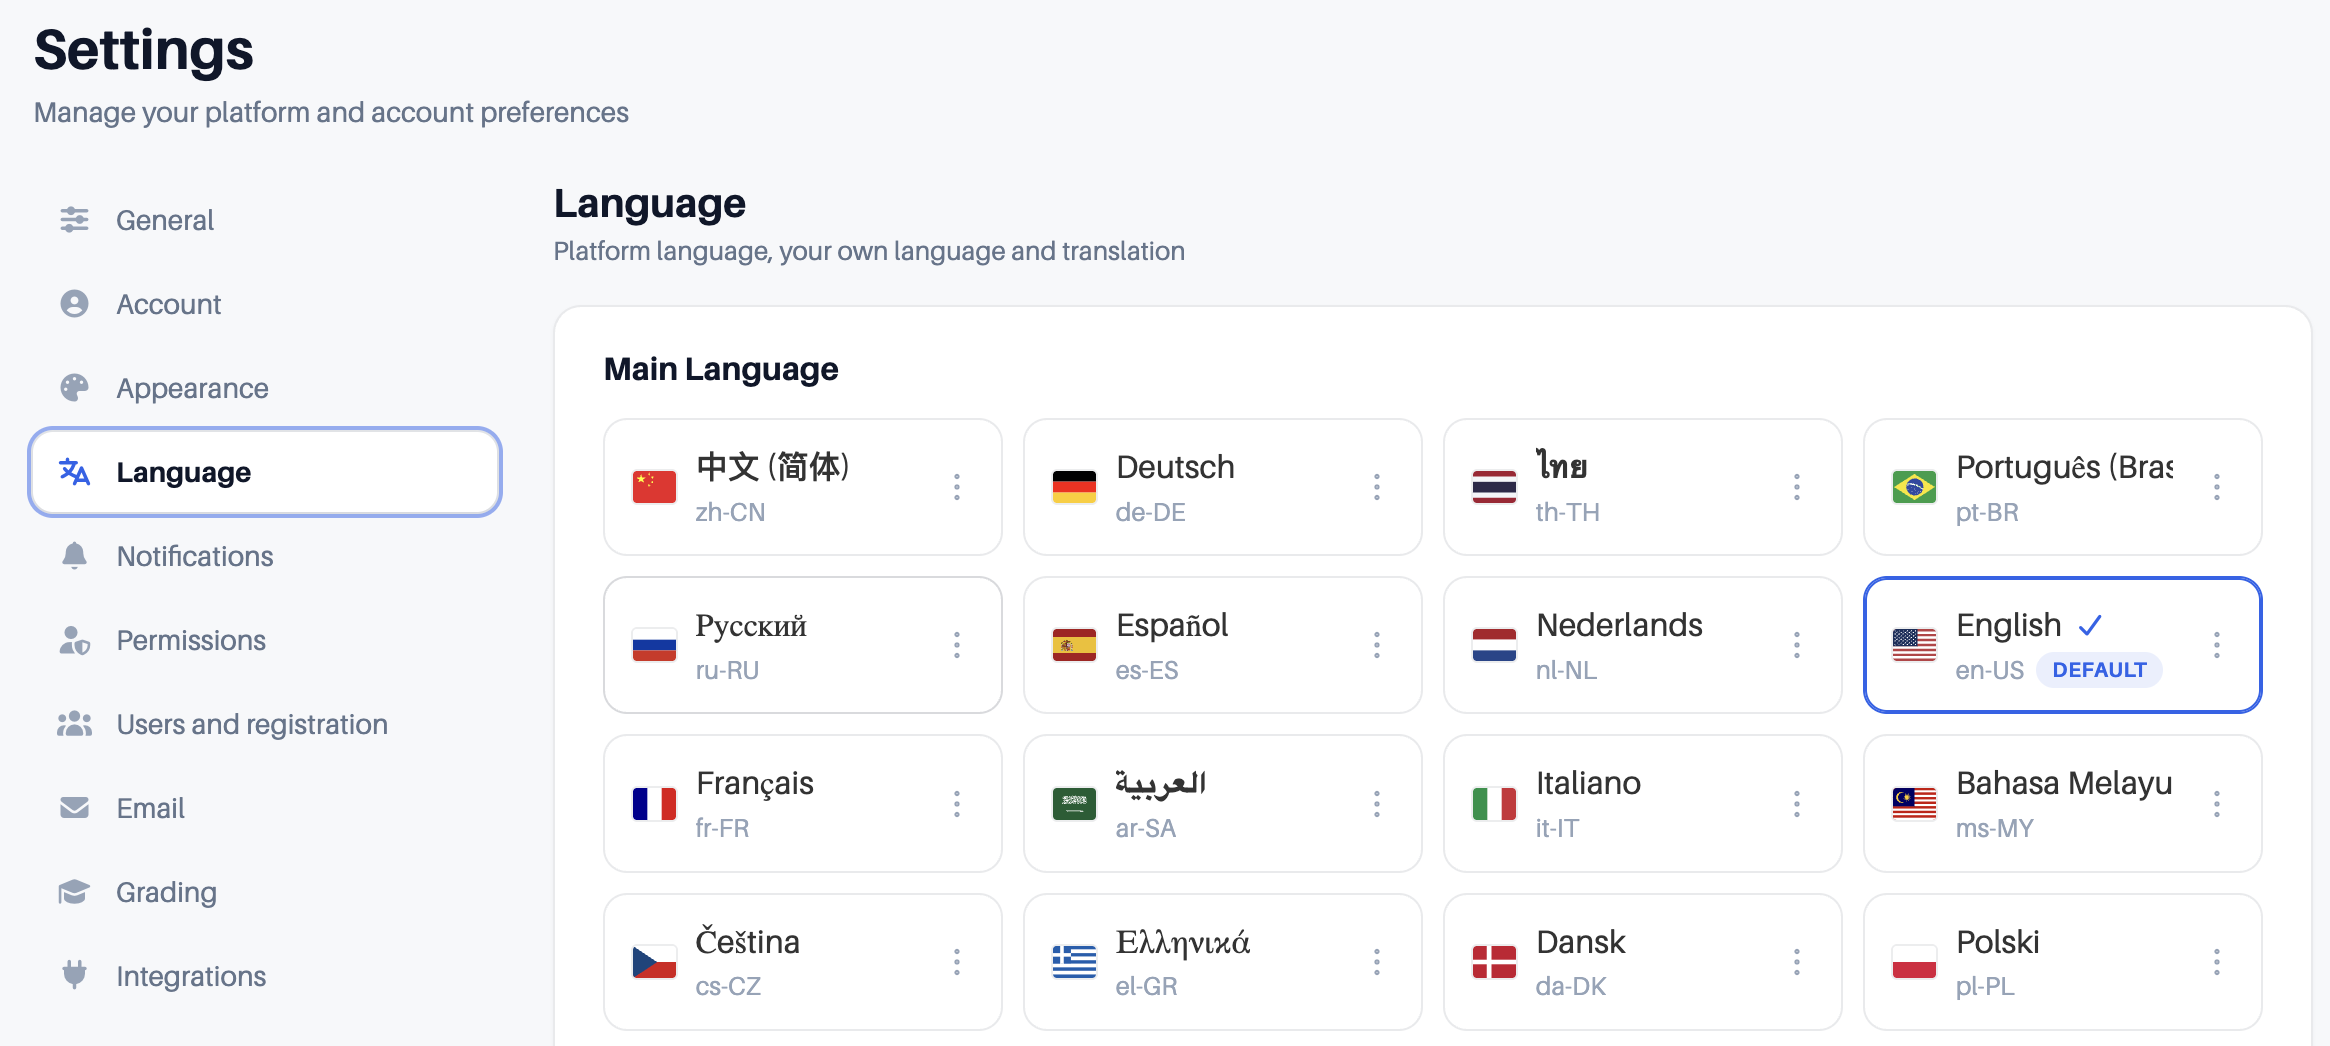
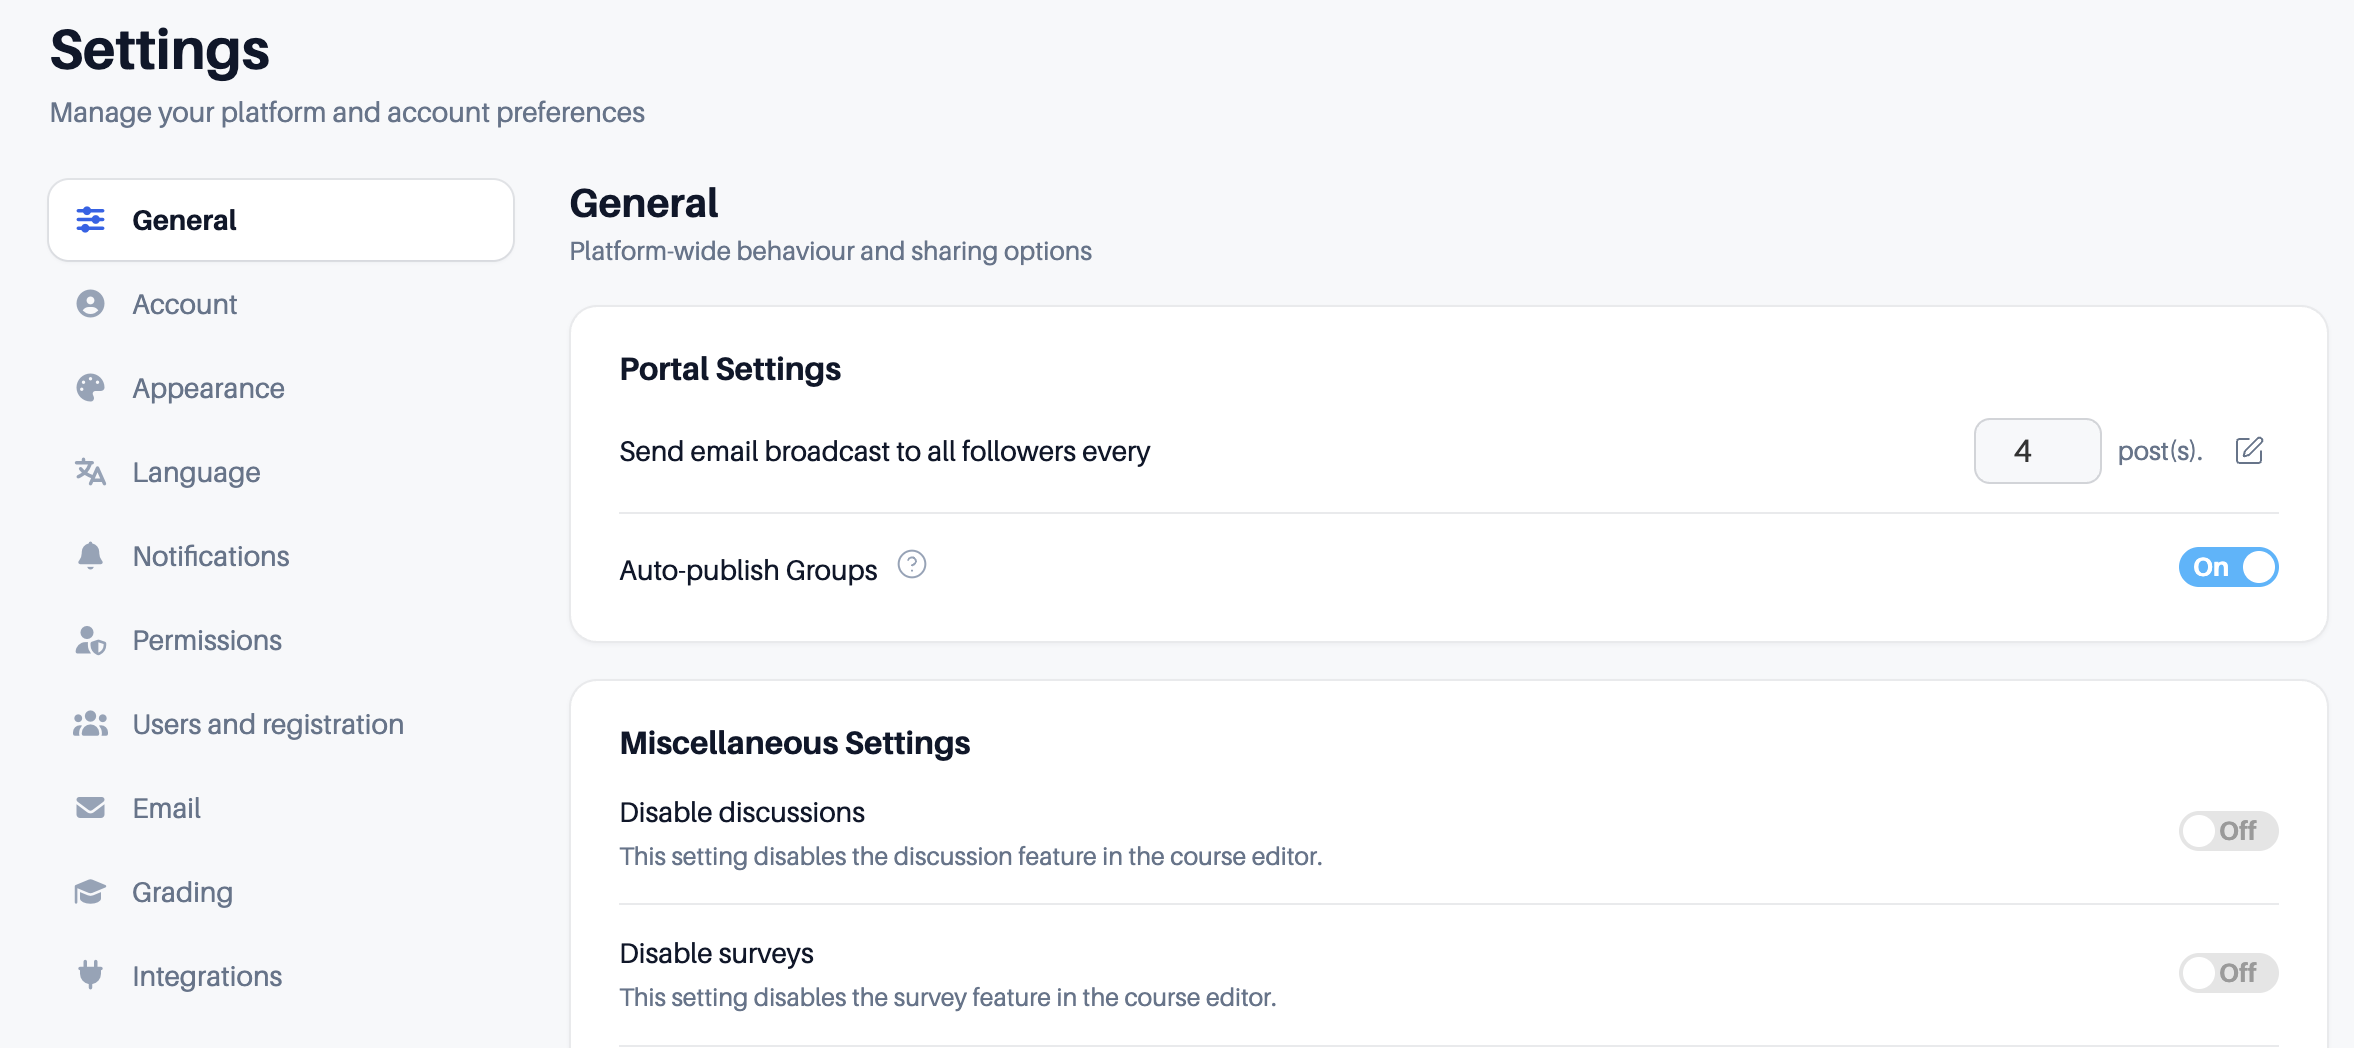
The Settings page has a new design that groups everything into clear sections, so options are easier to find.
What's new
Settings are now grouped into clear sections: registration, grading, language, appearance, and permissions
The permissions section shows what learners and admins can each do, side by side in a grid
Each area has its own section, so you spend less time scrolling
What you can do
Find the setting you need faster, by section
See learner and admin permissions at a glance in the permissions grid
Manage a growing portal without hunting through one long page
Recycle Bin: Restore a Deleted Course (August 07, 2026)
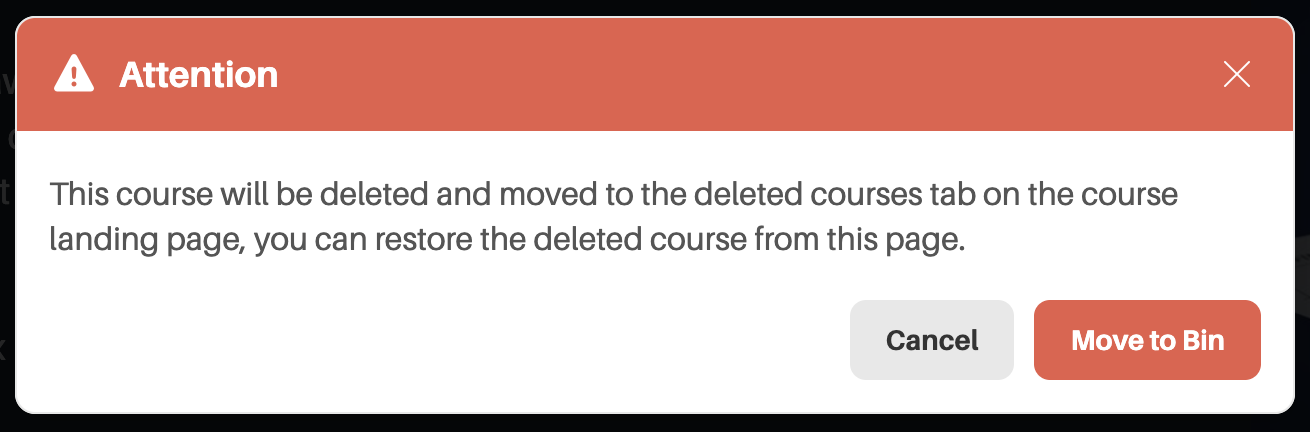
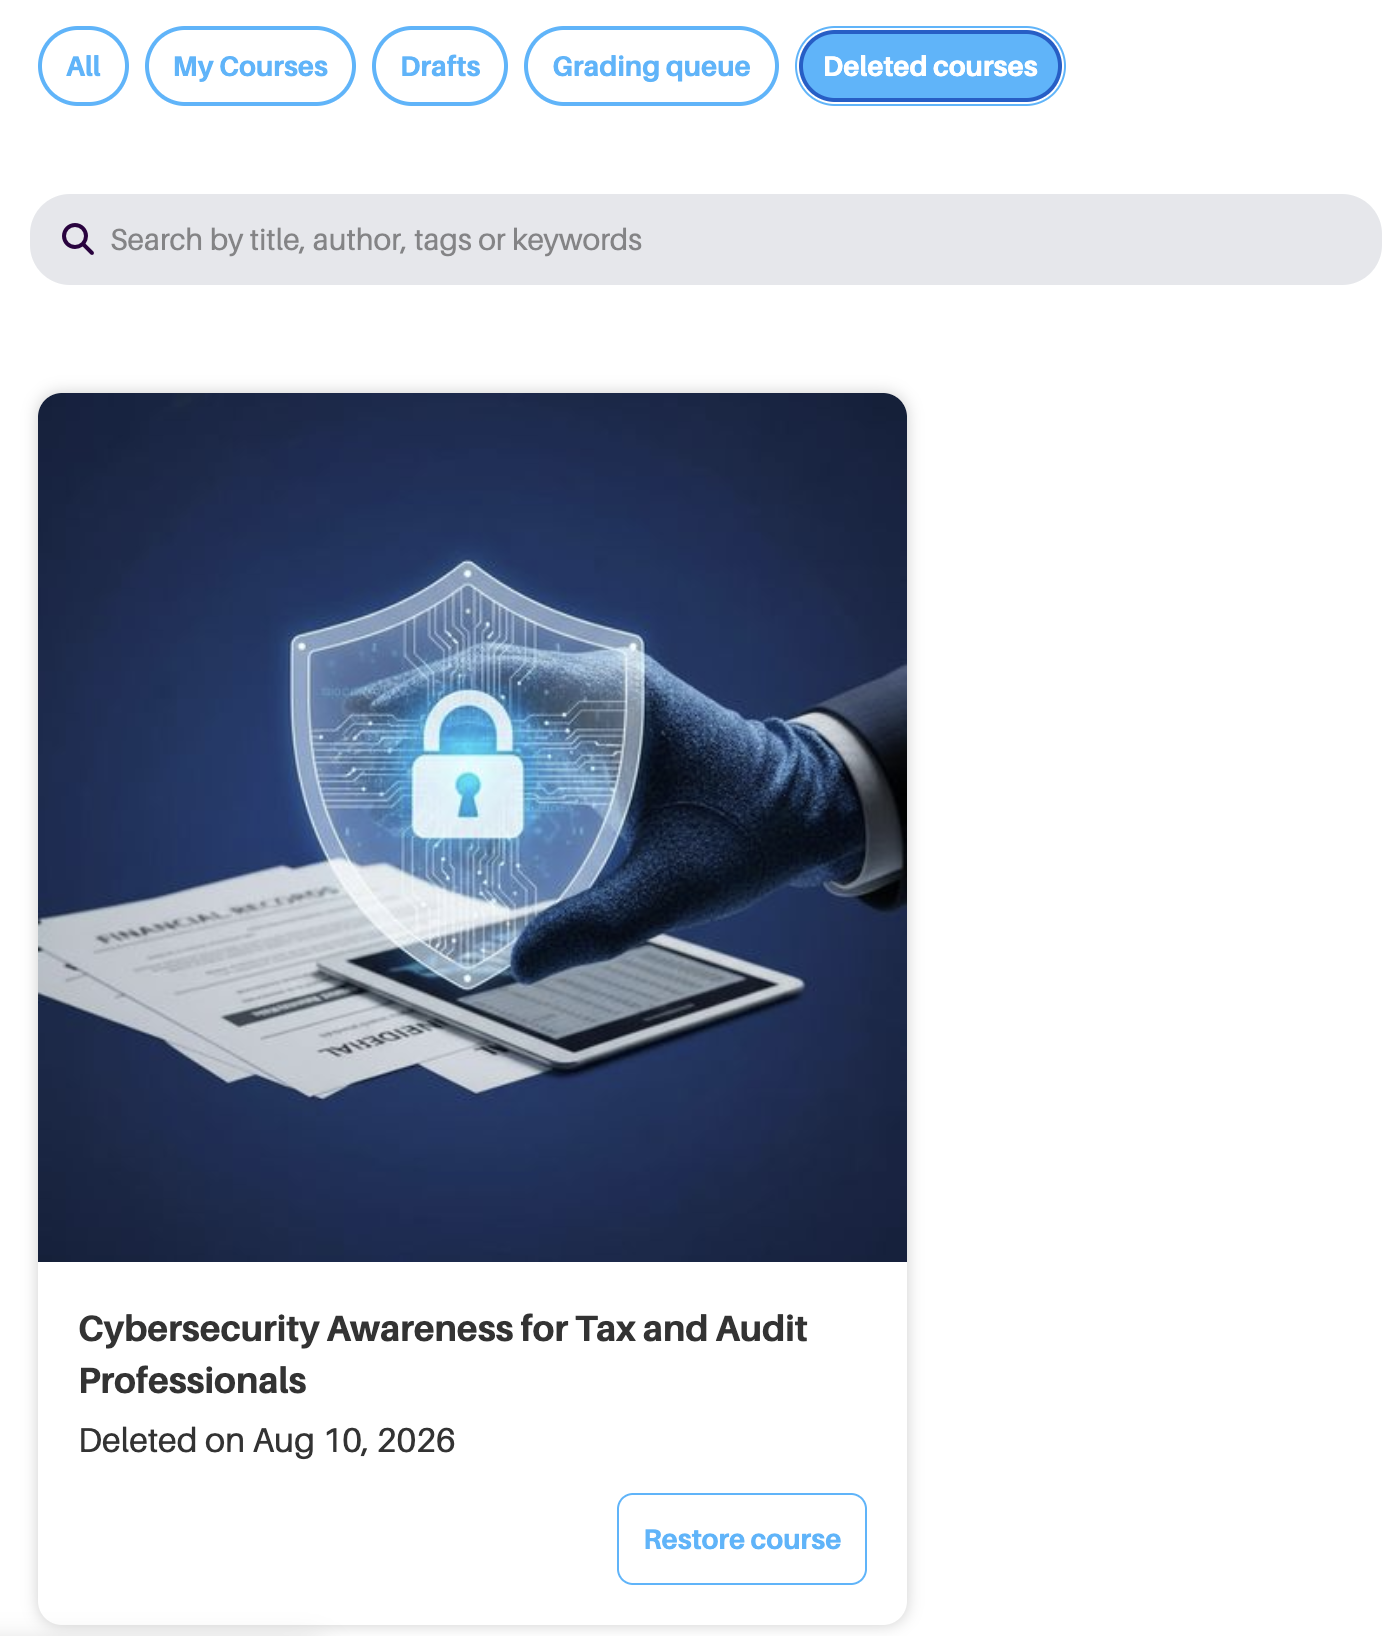
Deleted courses now go to a Recycle bin, so you can restore one if you change your mind.
What's new
Deleted courses move to a Recycle bin instead of being removed permanently
Restore a course from the Recycle bin, with its content and data intact
How it works
Delete a course as you normally would
Open the Recycle bin to find the course
Choose Restore to bring it back
What you can do
Recover a course you deleted by mistake
Delete with confidence, knowing you can restore from the Recycle bin
Role Selection on User Invite (August 07, 2026)
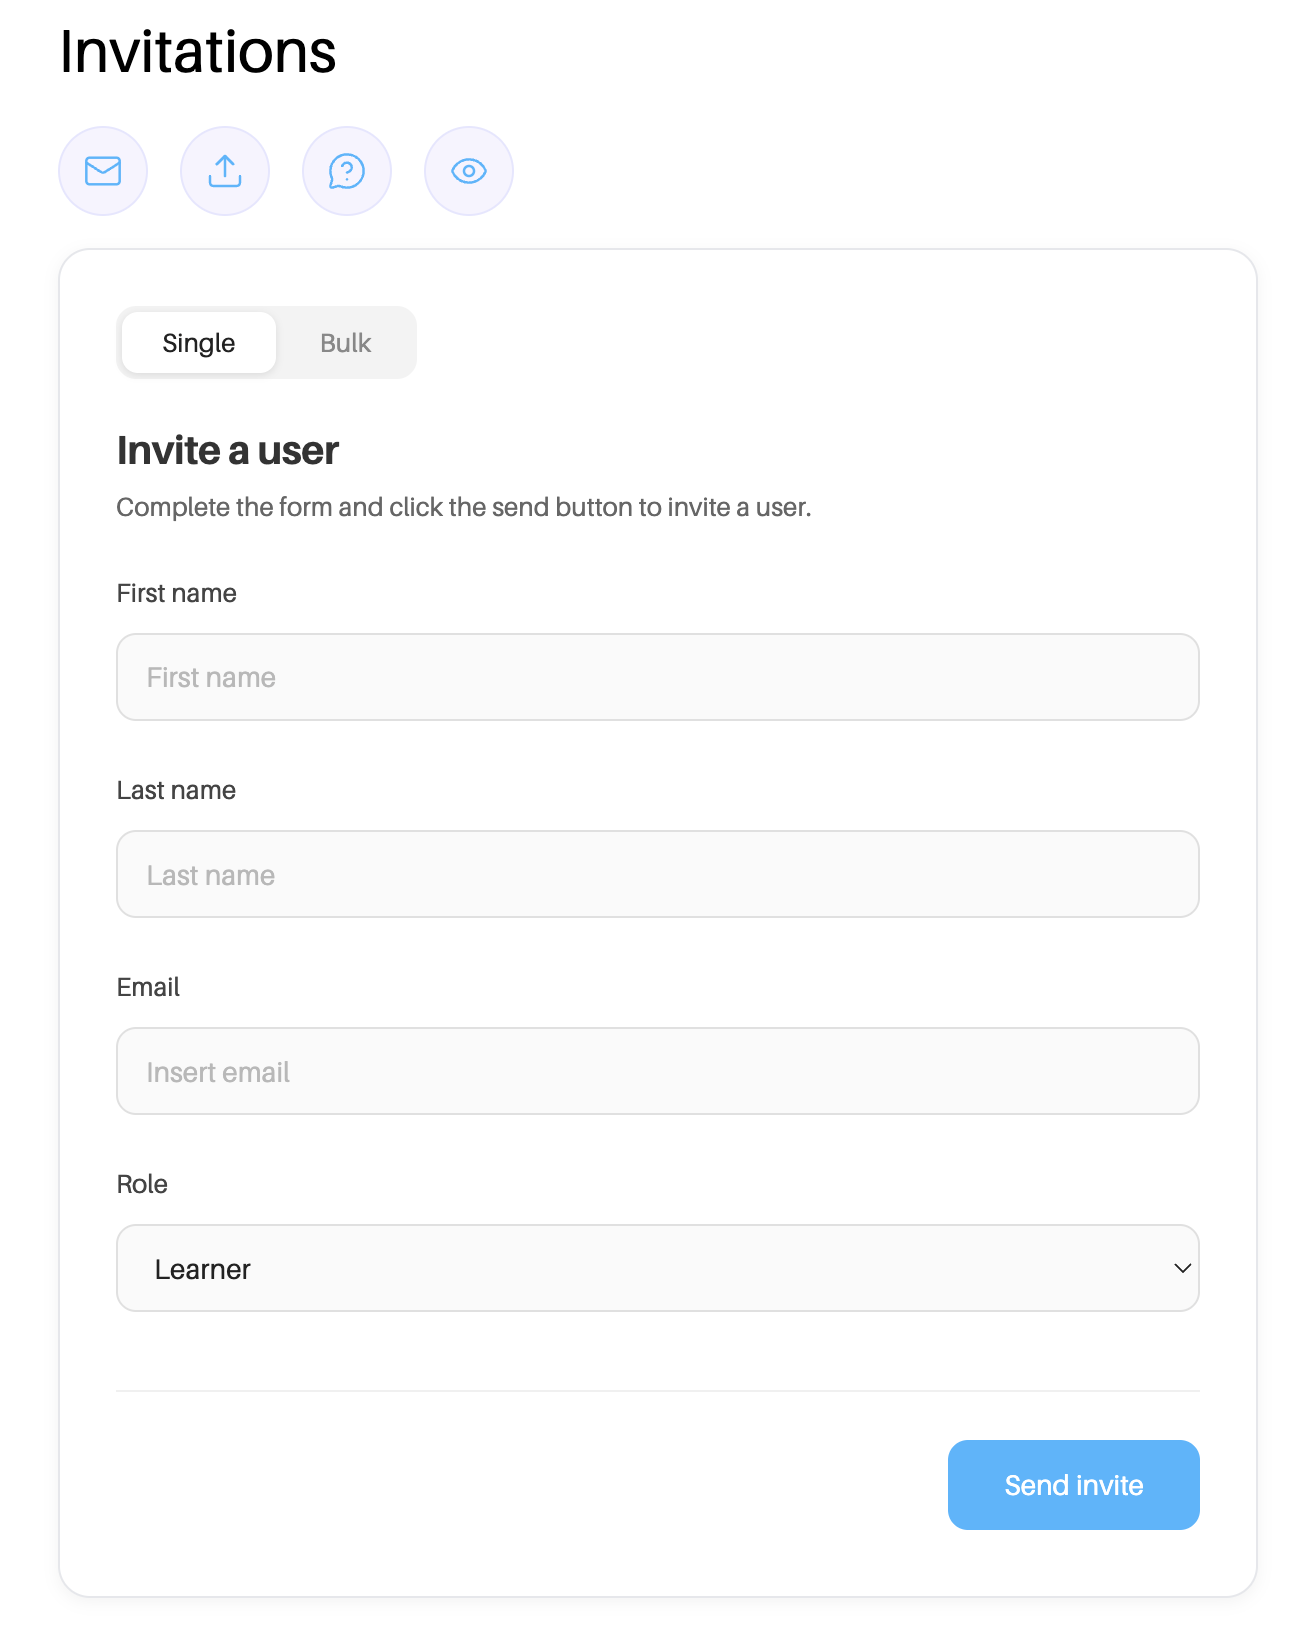
Set a person's role right when you invite them to your portal, so they have the correct access from their first login.

What's new
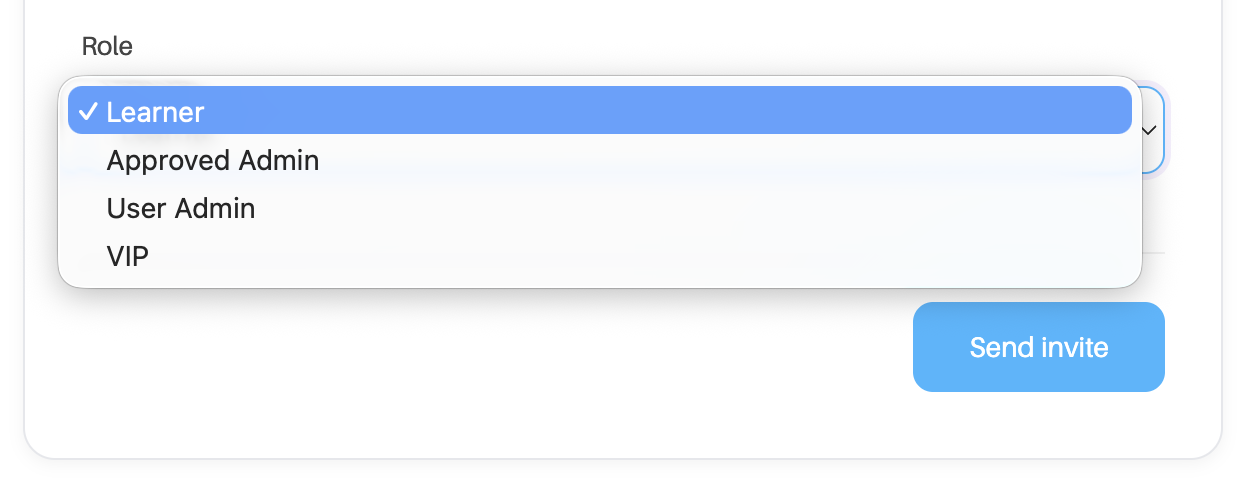
Choose a role as you invite someone: Creator, Admin, or Learner
Learner stays the default, so a standard invite works just as before
If you reach your admin seat limit, a prompt lets you add more seats before you invite another admin
How it works
In the Users section, open the Invitations popup
Enter the person's email address, or switch to Bulk to invite several at once
Choose their role from the Role dropdown: Creator, Admin, or Learner (Learner by default)
Click Send invite; they get that role from their first login
If your admin seats are all in use, a prompt appears to add more before you invite another admin
What you can do
Give new users the right access from the start, in a single step
Set creator, admin, or learner access as you invite
Keep admin invites in line with the seats you have
LTI Integration: Launch Coursebox From Your LMS (August 07, 2026)
Launch a Coursebox course from your own LMS, such as Moodle or Canvas, and pass learner grades back to it.
What's new
Launch a Coursebox course from an external LMS, with Coursebox acting as an LTI 1.3 provider
Grades from the course pass back to your LMS
Works with Moodle, Canvas, Schoolbox, and other LTI platforms
How it works
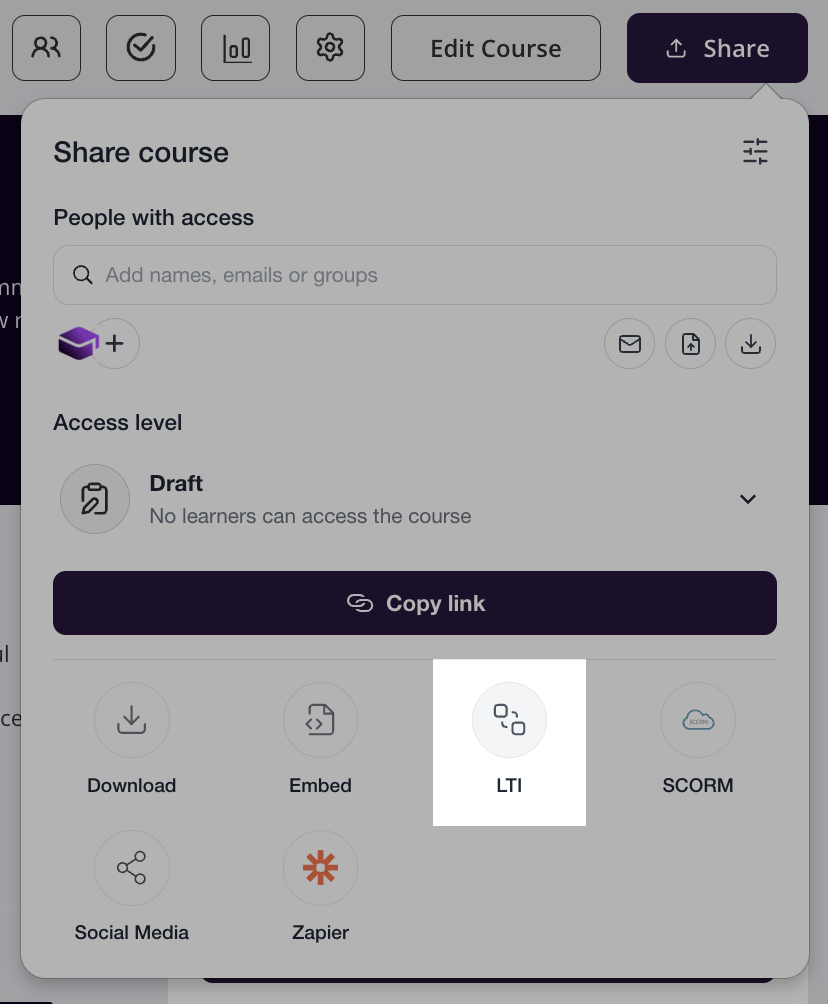
Open the course in Coursebox, click Share, then click LTI
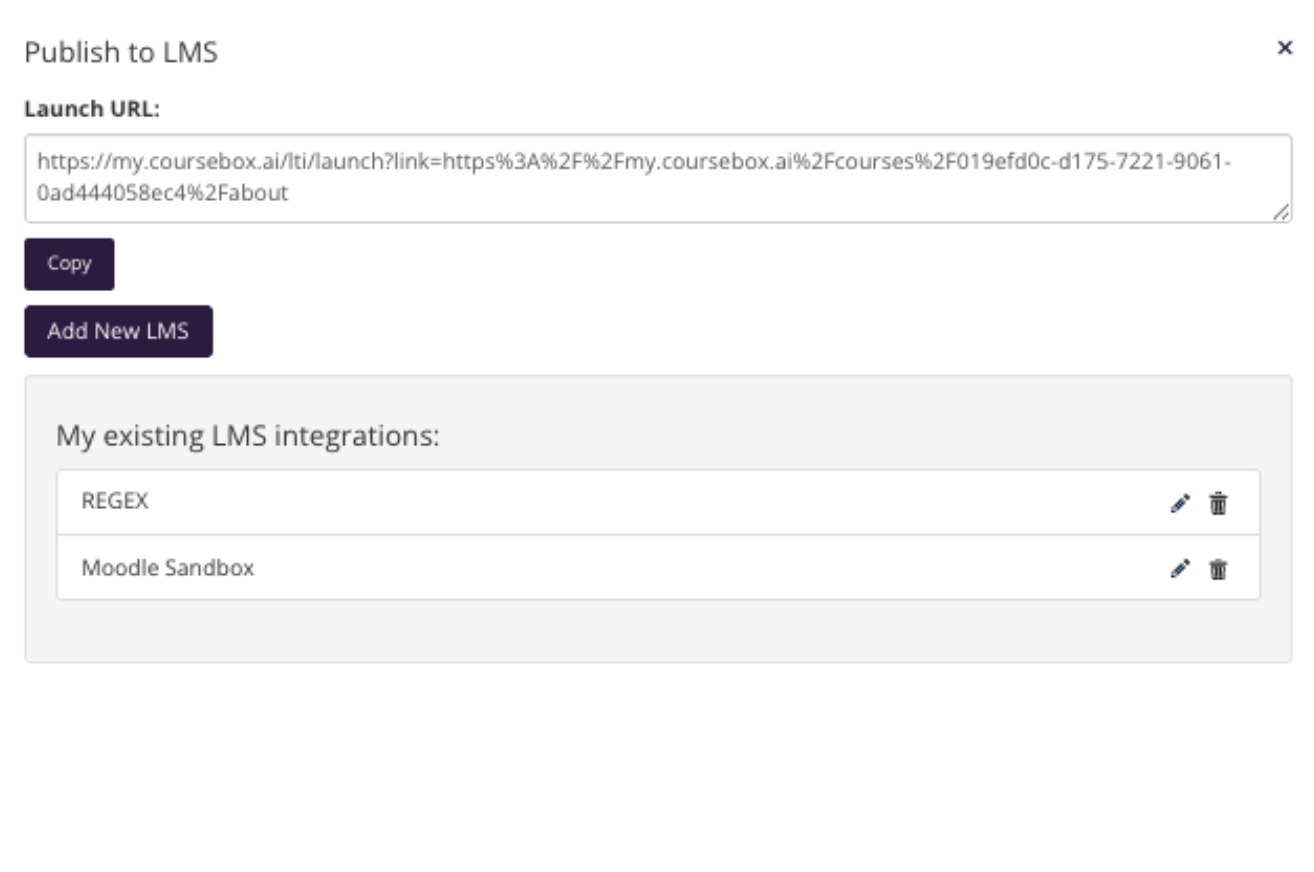
In the popup, click Add New Branded Training Platform
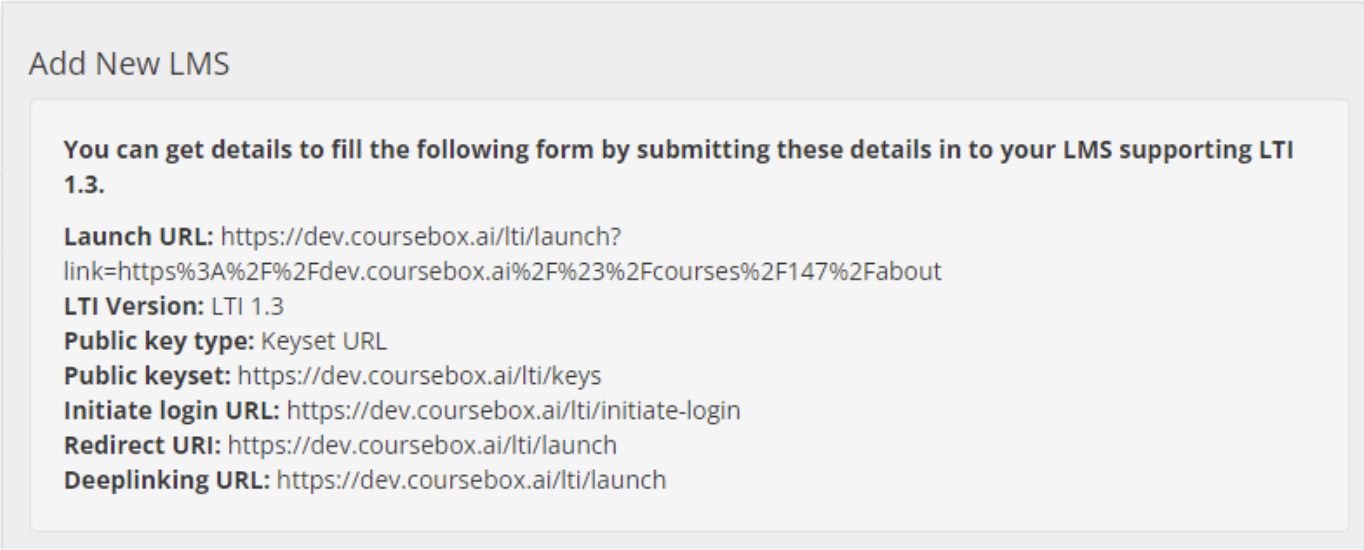
Use the Coursebox LTI details shown to create an LTI tool in your platform
Enter the details your platform gives back into the form in Coursebox
Start adding courses through the LTI tool, following your platform's documentation
What you can do
Deliver Coursebox courses inside the LMS your learners already use
Pass grades to your LMS gradebook, without exporting or re-entering results
Run AI-built Coursebox content alongside your existing LMS courses
For the full setup, including the field-mapping chart for Moodle, Schoolbox, and Canvas, see the Share, Publish and Export a Course guide.
Left Menu: Reorder and Hide Sections (August 07, 2026)
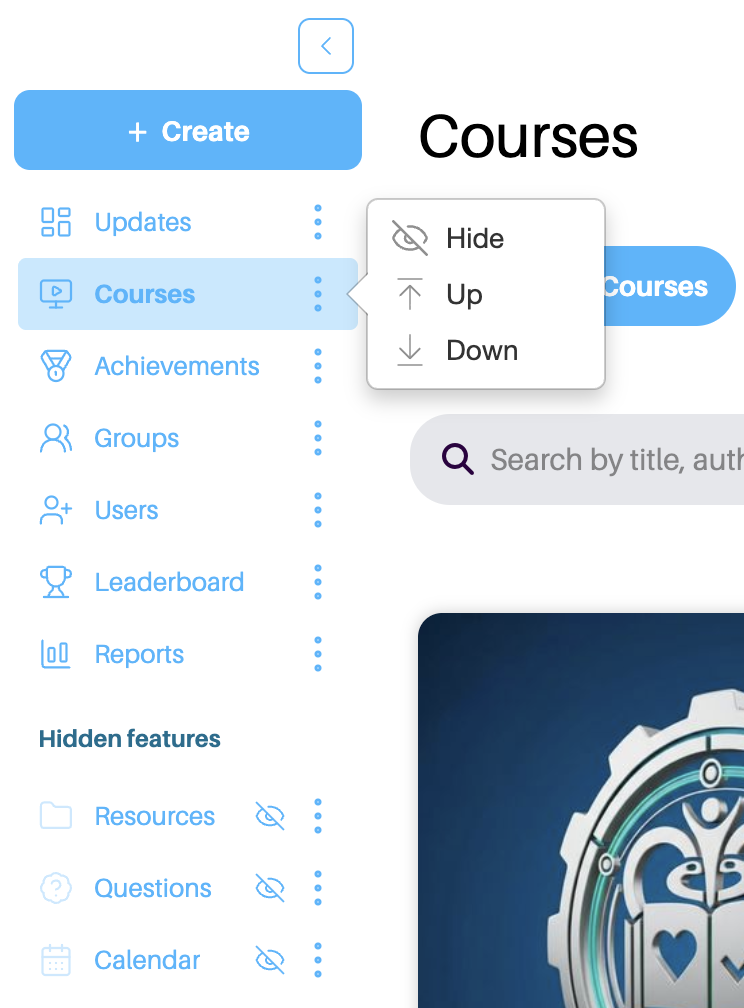
You can now personalize the left-hand menu to match how you work: reorder its sections, show or hide them, and collapse it to icons only.
What's new
Reorder the sections in your left-hand menu to match how you work
Show or hide any section from the menu
Collapse the menu to icons only when you want more space
Hidden sections move to a "Hidden features" group at the bottom, ready to restore
How it works
Open the left-hand menu
Use the three-dot icon on a section to drag and reorder it
Use the eye icon to show or hide a section
Click the collapse arrow at the top to shrink the menu to icons only
Find hidden sections in the "Hidden features" group at the bottom, and restore them anytime
What you can do
Set up the menu around the sections you use most
Hide the sections you do not need, and bring them back later
Give yourself more room with the icons-only view
Groups: Sell Paid Monthly Memberships (August 04, 2026)
You can sell access to a group as a paid monthly membership, with learners subscribing through Stripe.
What's new
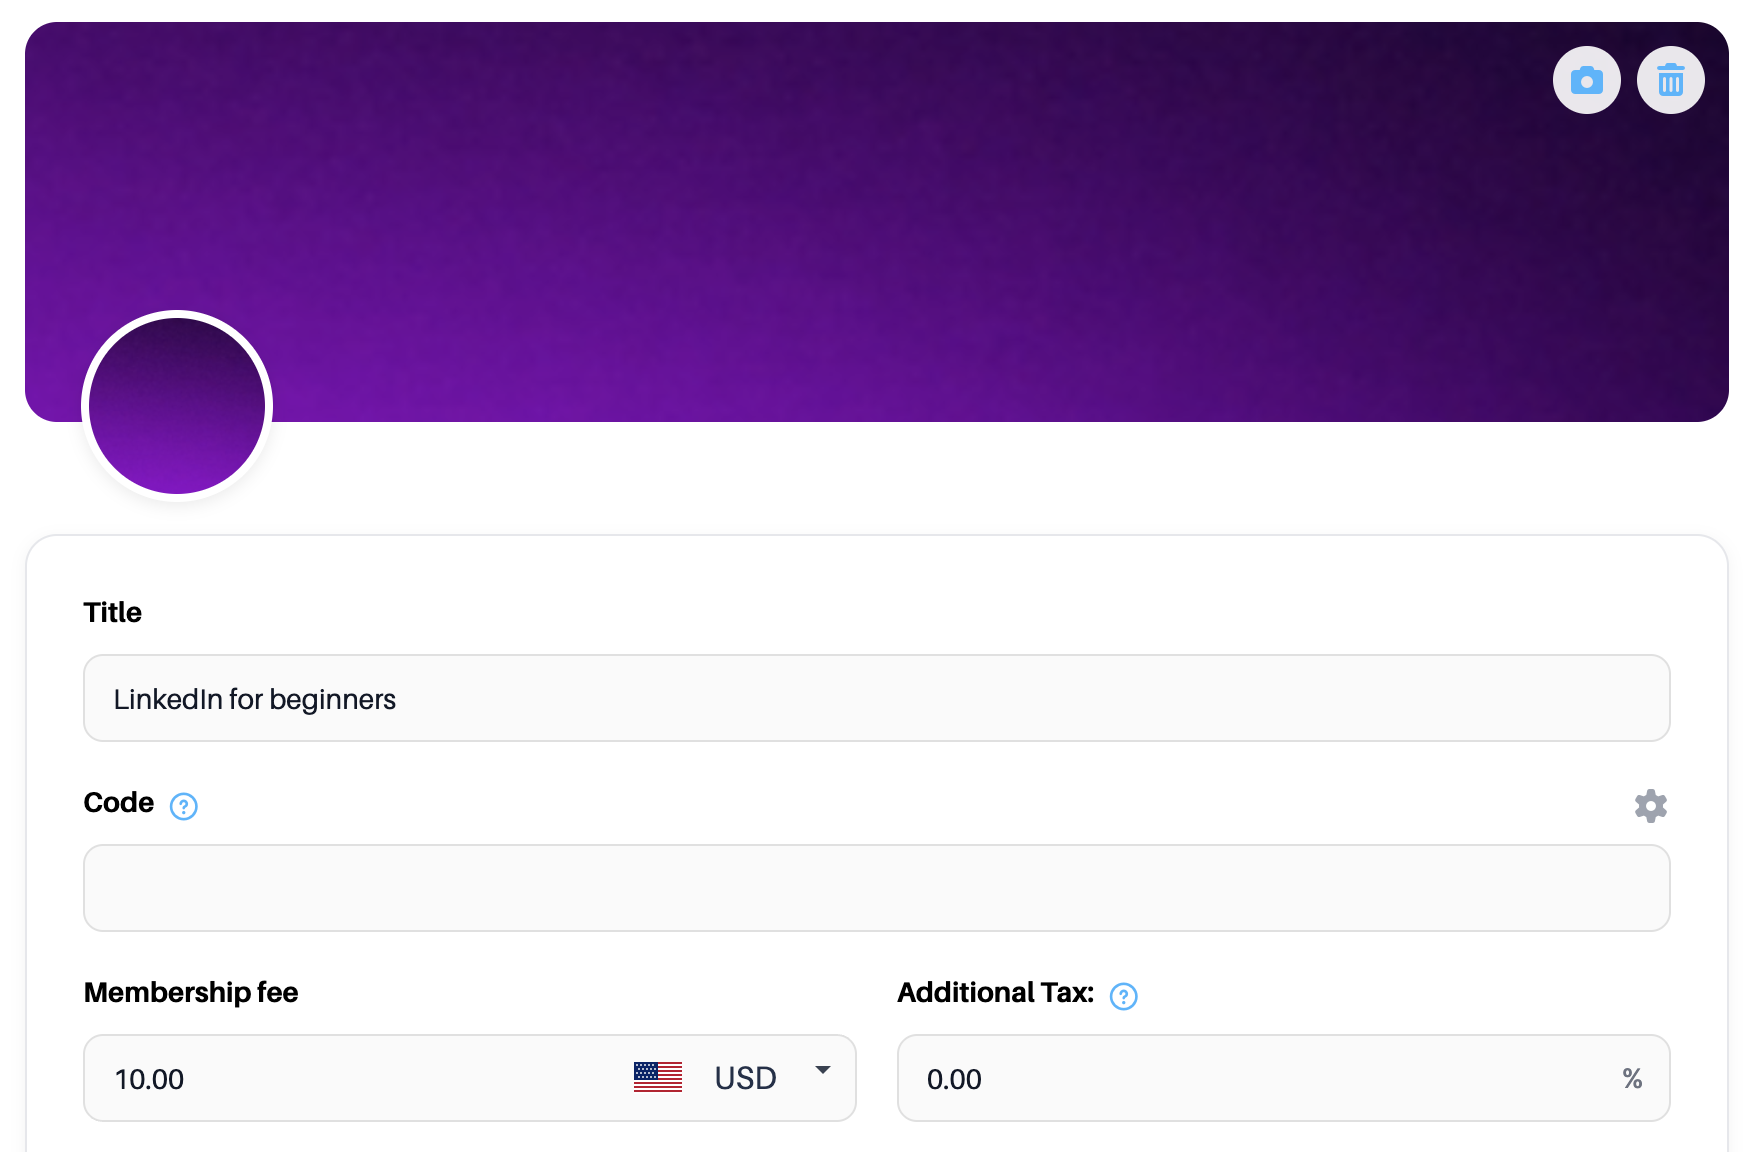
Charge a monthly Membership Fee for access to a group
Set the price, the currency, and any additional tax
Learners subscribe to join, with payment handled by Stripe
How it works
Connect your Stripe account first (required before you can charge)
Open the group, click the gear icon, and select Edit
In the Membership Fee field, enter your monthly price and choose the currency
Add Additional Tax (VAT or GST) if needed, and a Description of what members get
Click Save, then Publish the group as a Paid Membership
What you can do
Turn a group into a paid community or content bundle
Earn recurring monthly revenue from your members
Sell in your chosen currency, with tax handled at checkout
Theme Settings: New Font Controls on Global and Course Level (July 31, 2026)
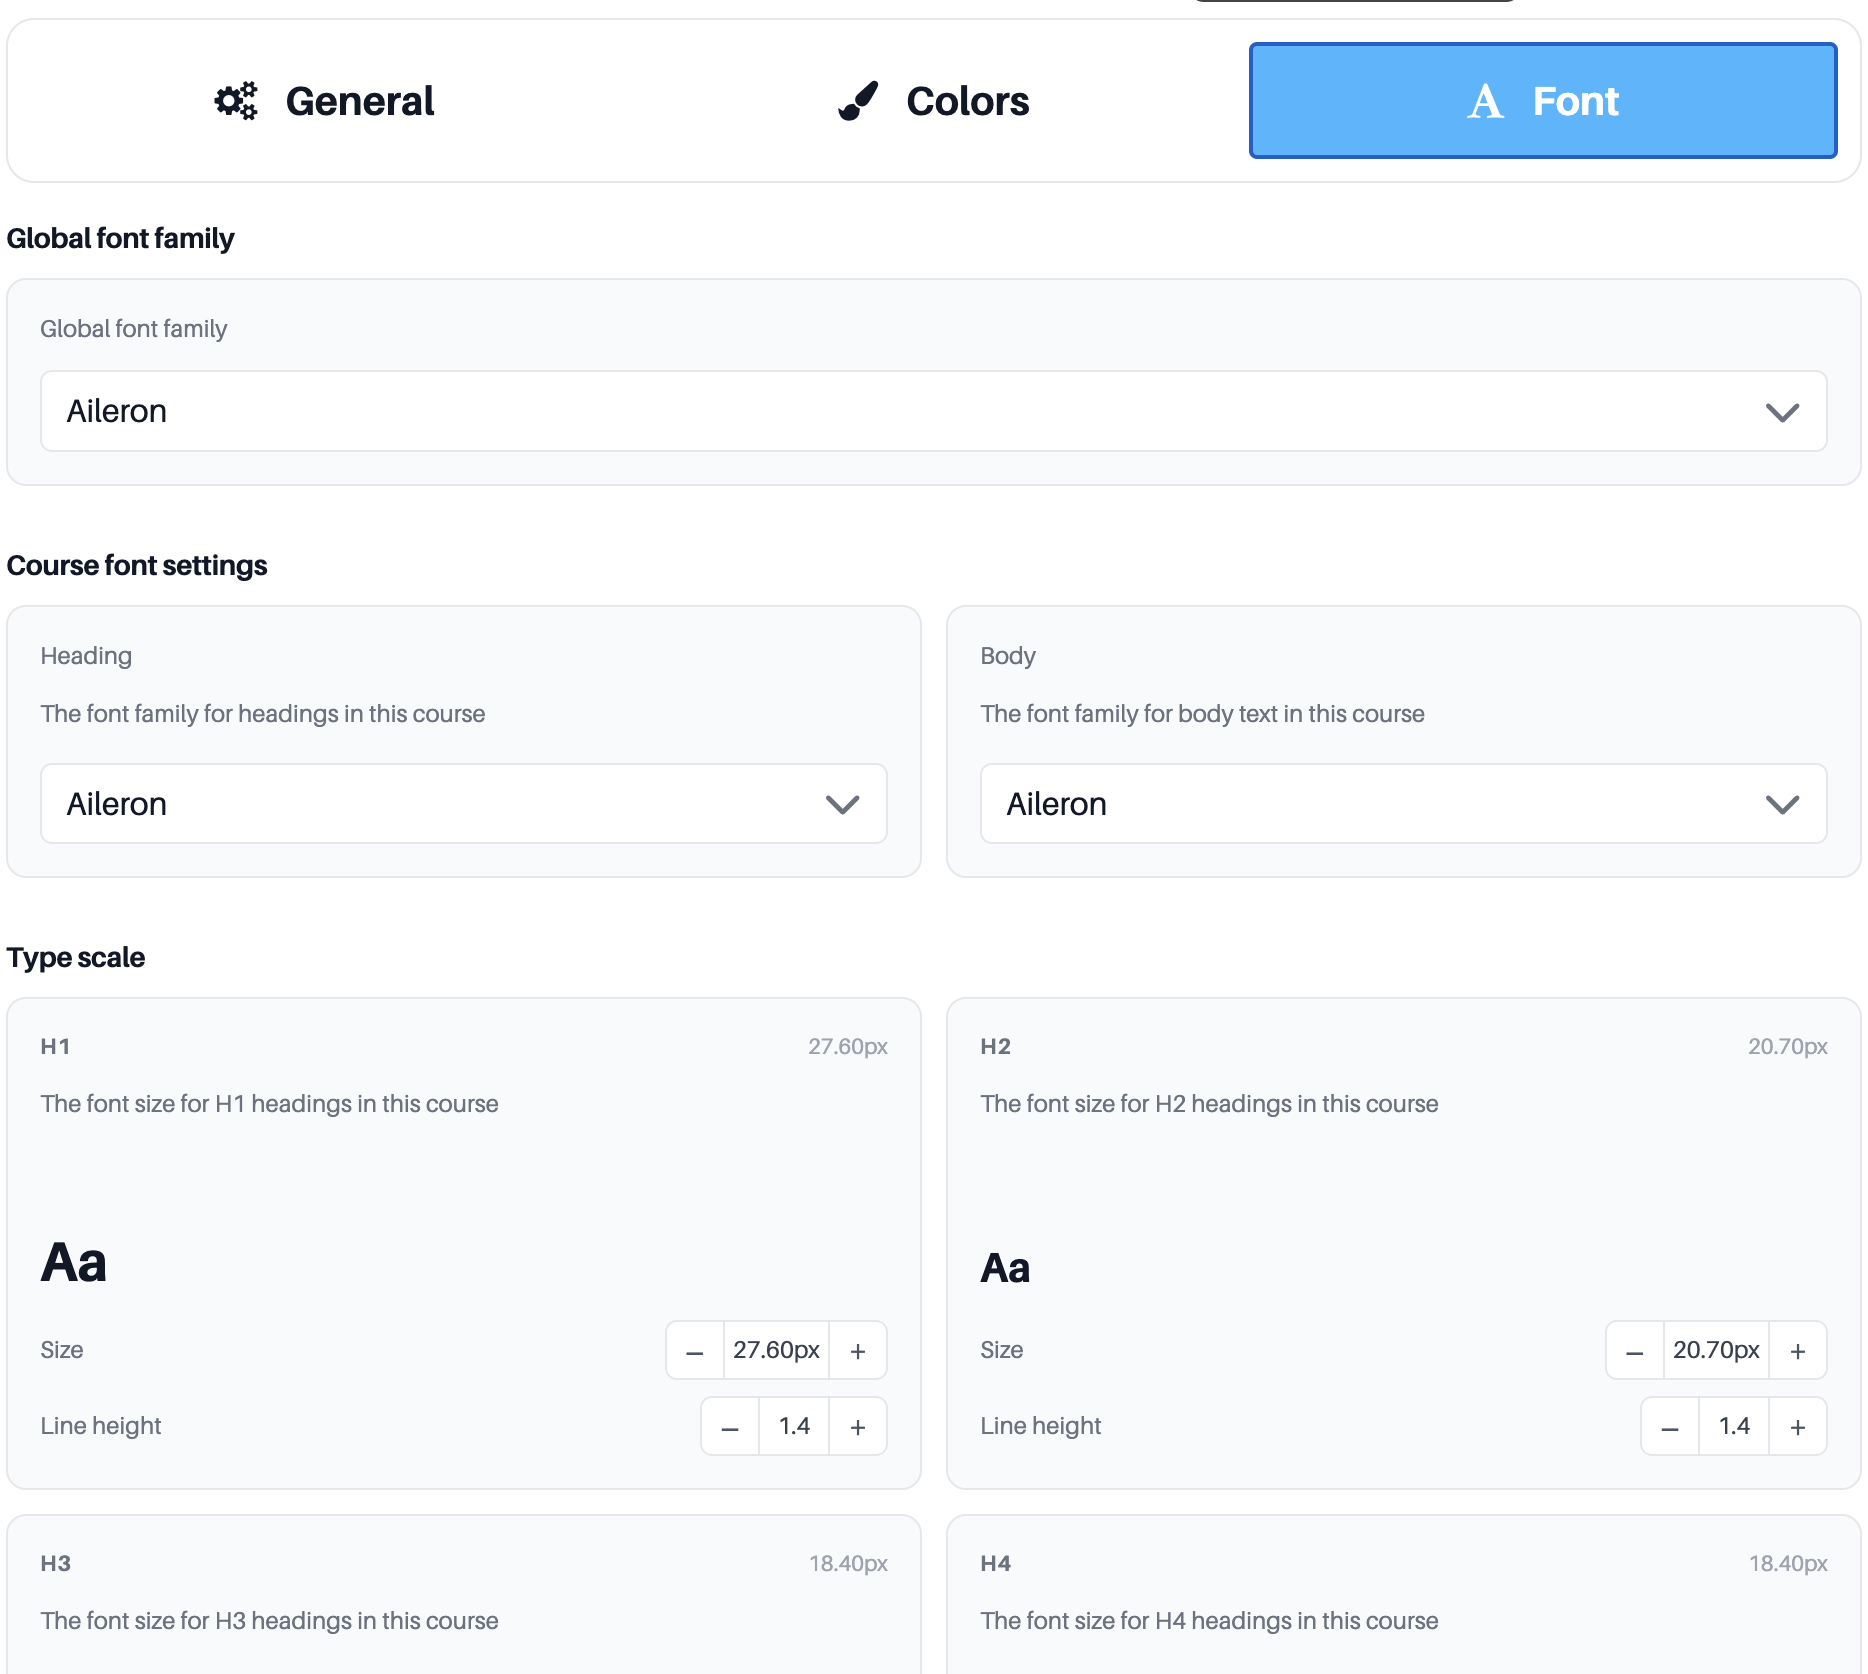
Set your fonts in Theme Settings at two levels: a global level that applies across your whole portal, and a course level that sets the heading and body fonts and the full type scale for each course.
What's new
A new Font tab in Theme Settings, next to General and Colors (Pro and above plans)
Set one global font family that applies across every course in your portal (Pro and above plans)
Set a separate heading font and body font for each course (on all plans)
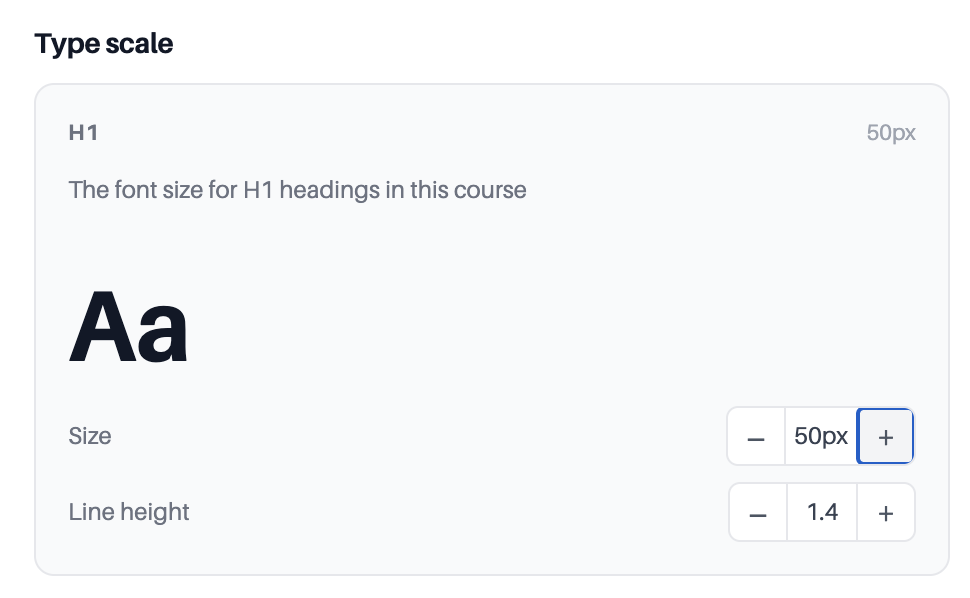
Control the full type scale: the size and line height for H1 to H6 and paragraph text, with a live Aa preview (on all plans)

How it works
Open Theme Settings, from the account menu at the top right or the palette icon in the course editor toolbar
Open the Font tab
Under the global font family, choose one font for your whole portal
Under Course font settings, choose a heading font and a body font for the course
In the type scale, set the size and line height for each level, H1 to H6 and paragraph text, with the minus and plus steppers; the Aa preview updates as you go
What you can do
Keep every course on-brand with one global font, or give a course its own heading and body fonts
Build a clear reading hierarchy by setting the size and line height for each heading level
Set line spacing once for the whole course, instead of adjusting each section by hand
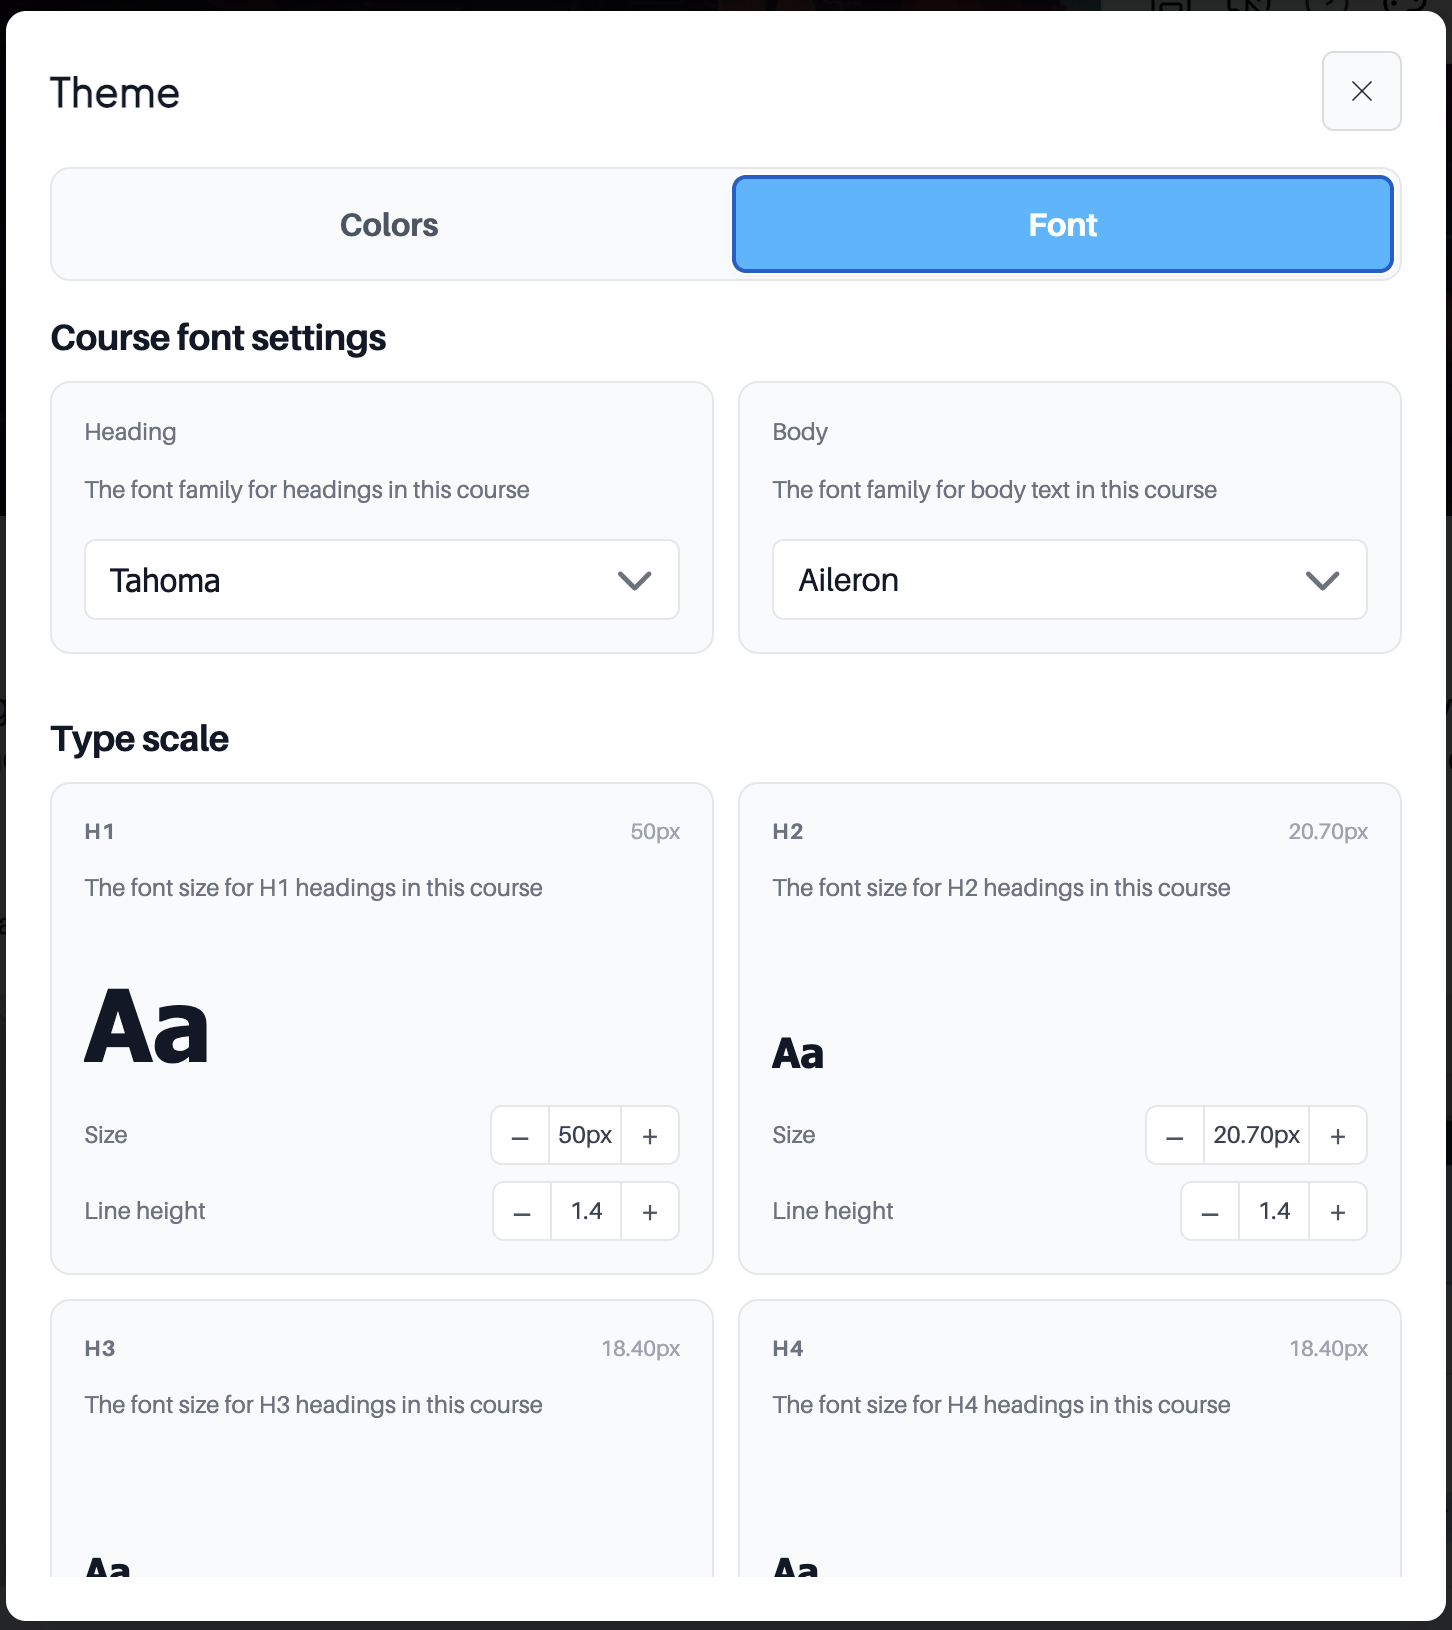
The course-level fonts are available to everyone, on all plans, from Theme Settings. The global font family, which applies across your whole portal, is on Pro and above.
Course Structure: Choose Your Page Blocks (July 22, 2026)
In the Course Structure stage, you now choose which blocks go on each page before you generate the course.
What's new
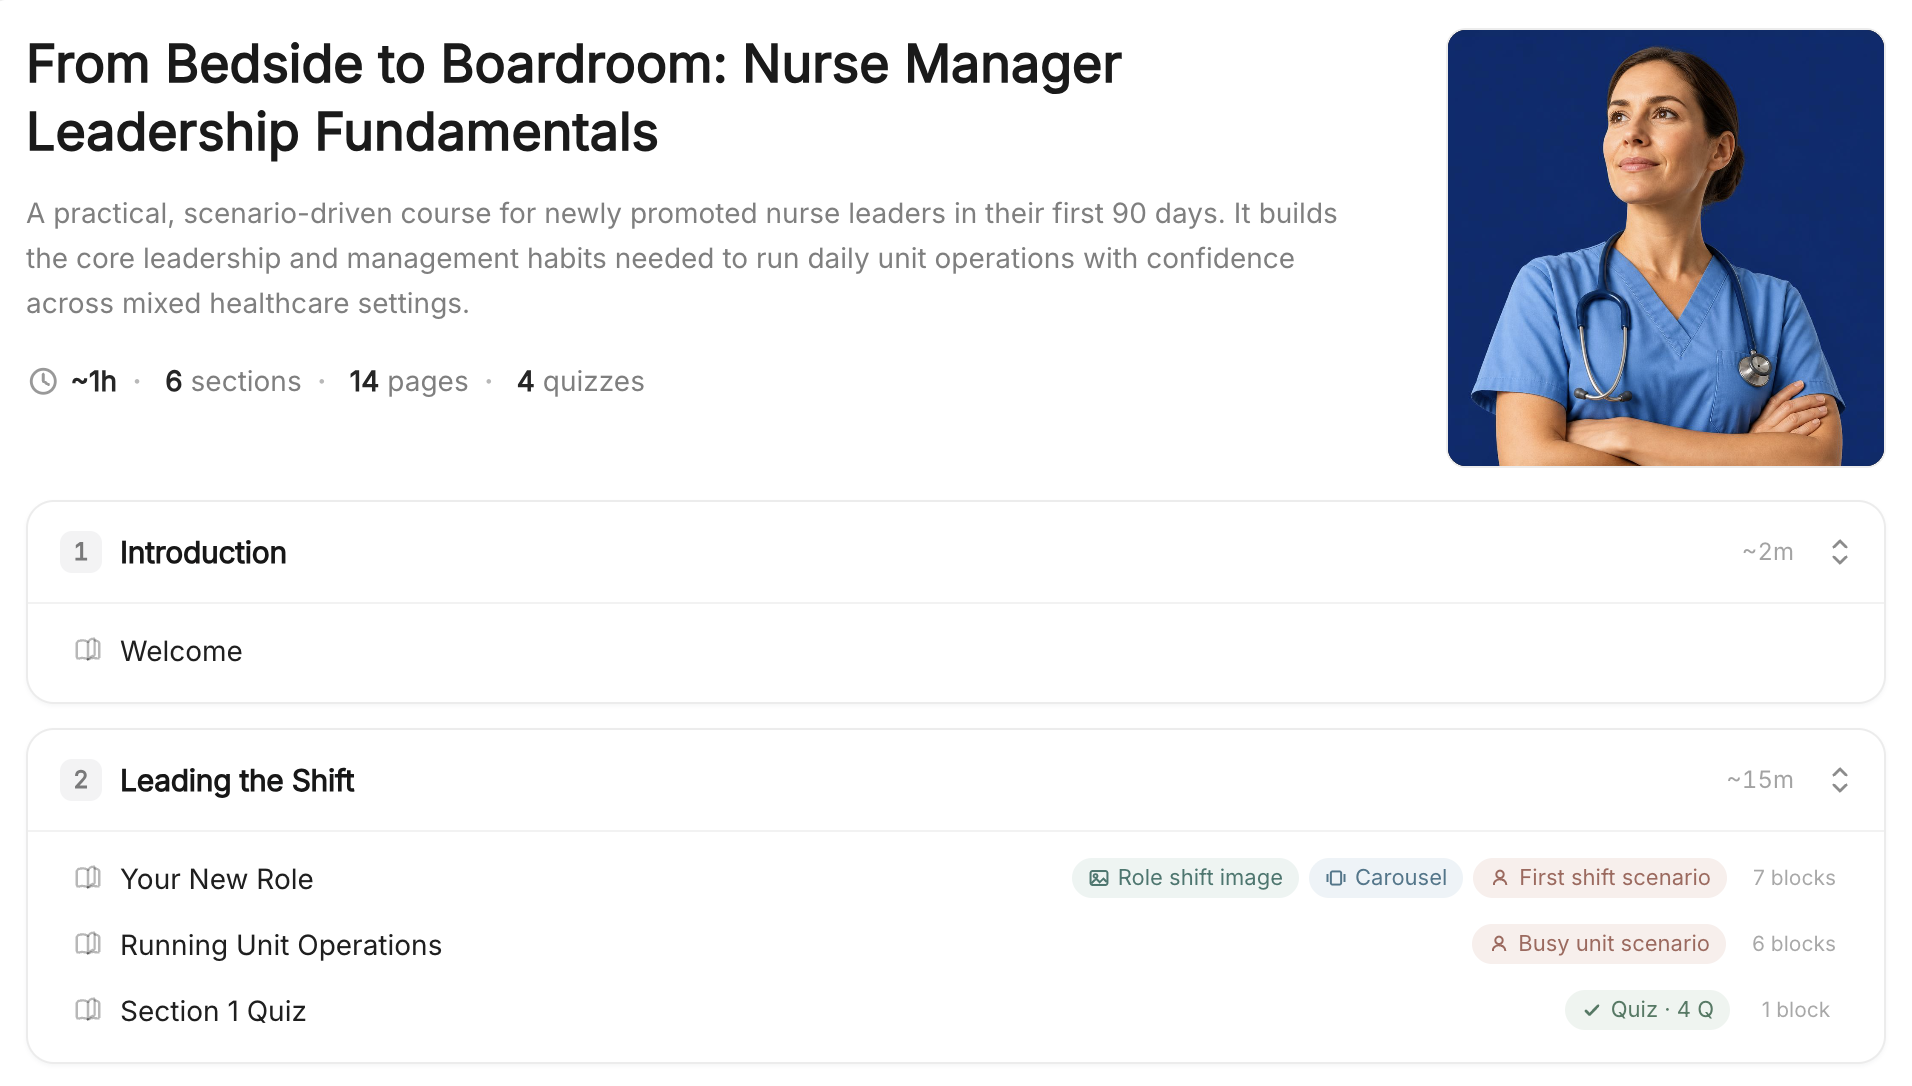
- In the Course Structure, you can now set the Page content blocks on each page, on top of renaming, reordering, and adding or removing sections and pages
- Each page shows a few of its blocks as colourful highlight tags, with the full total beside them, such as "7 blocks"
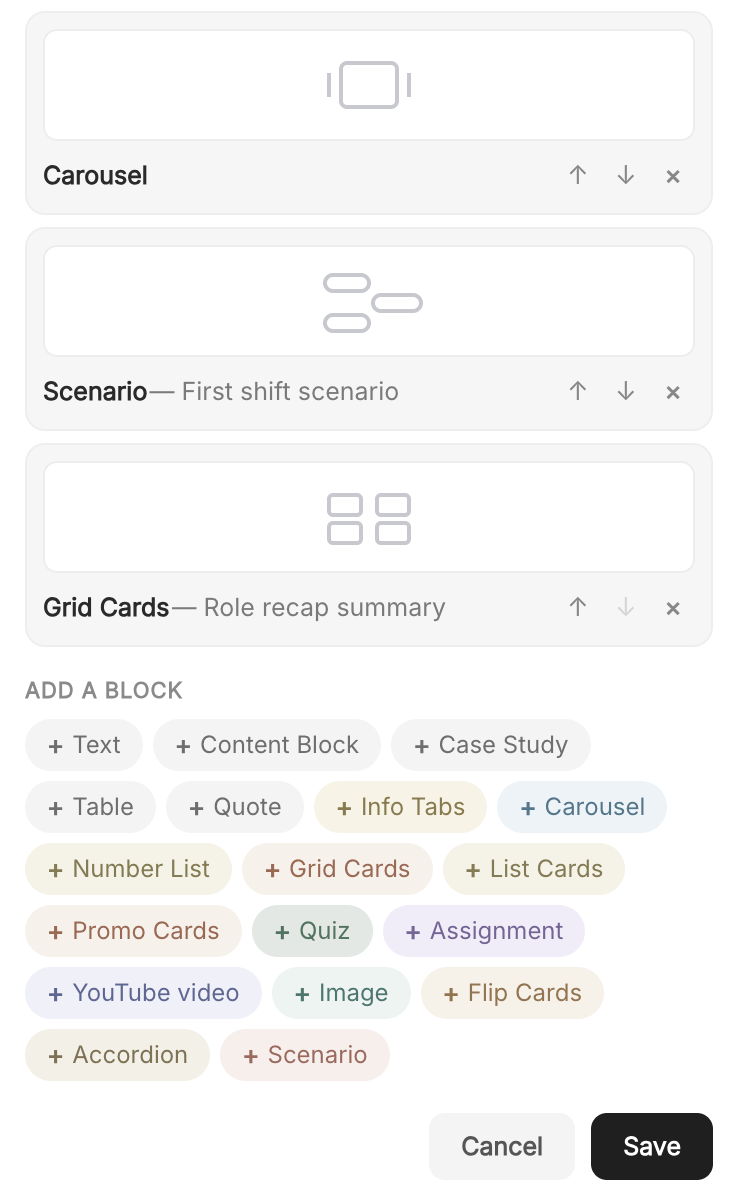
- Open a page's blocks to add, remove, and reorder them, choosing from the full library: Text, Content Block, Case Study, Table, Quote, Info Tabs, Carousel, Number List, Grid Cards, List Cards, Promo Cards, Quiz, Assignment, YouTube video, Image, Flip Cards, Accordion, and Scenario
How it works:
Write a prompt or upload a document to create your course with AI
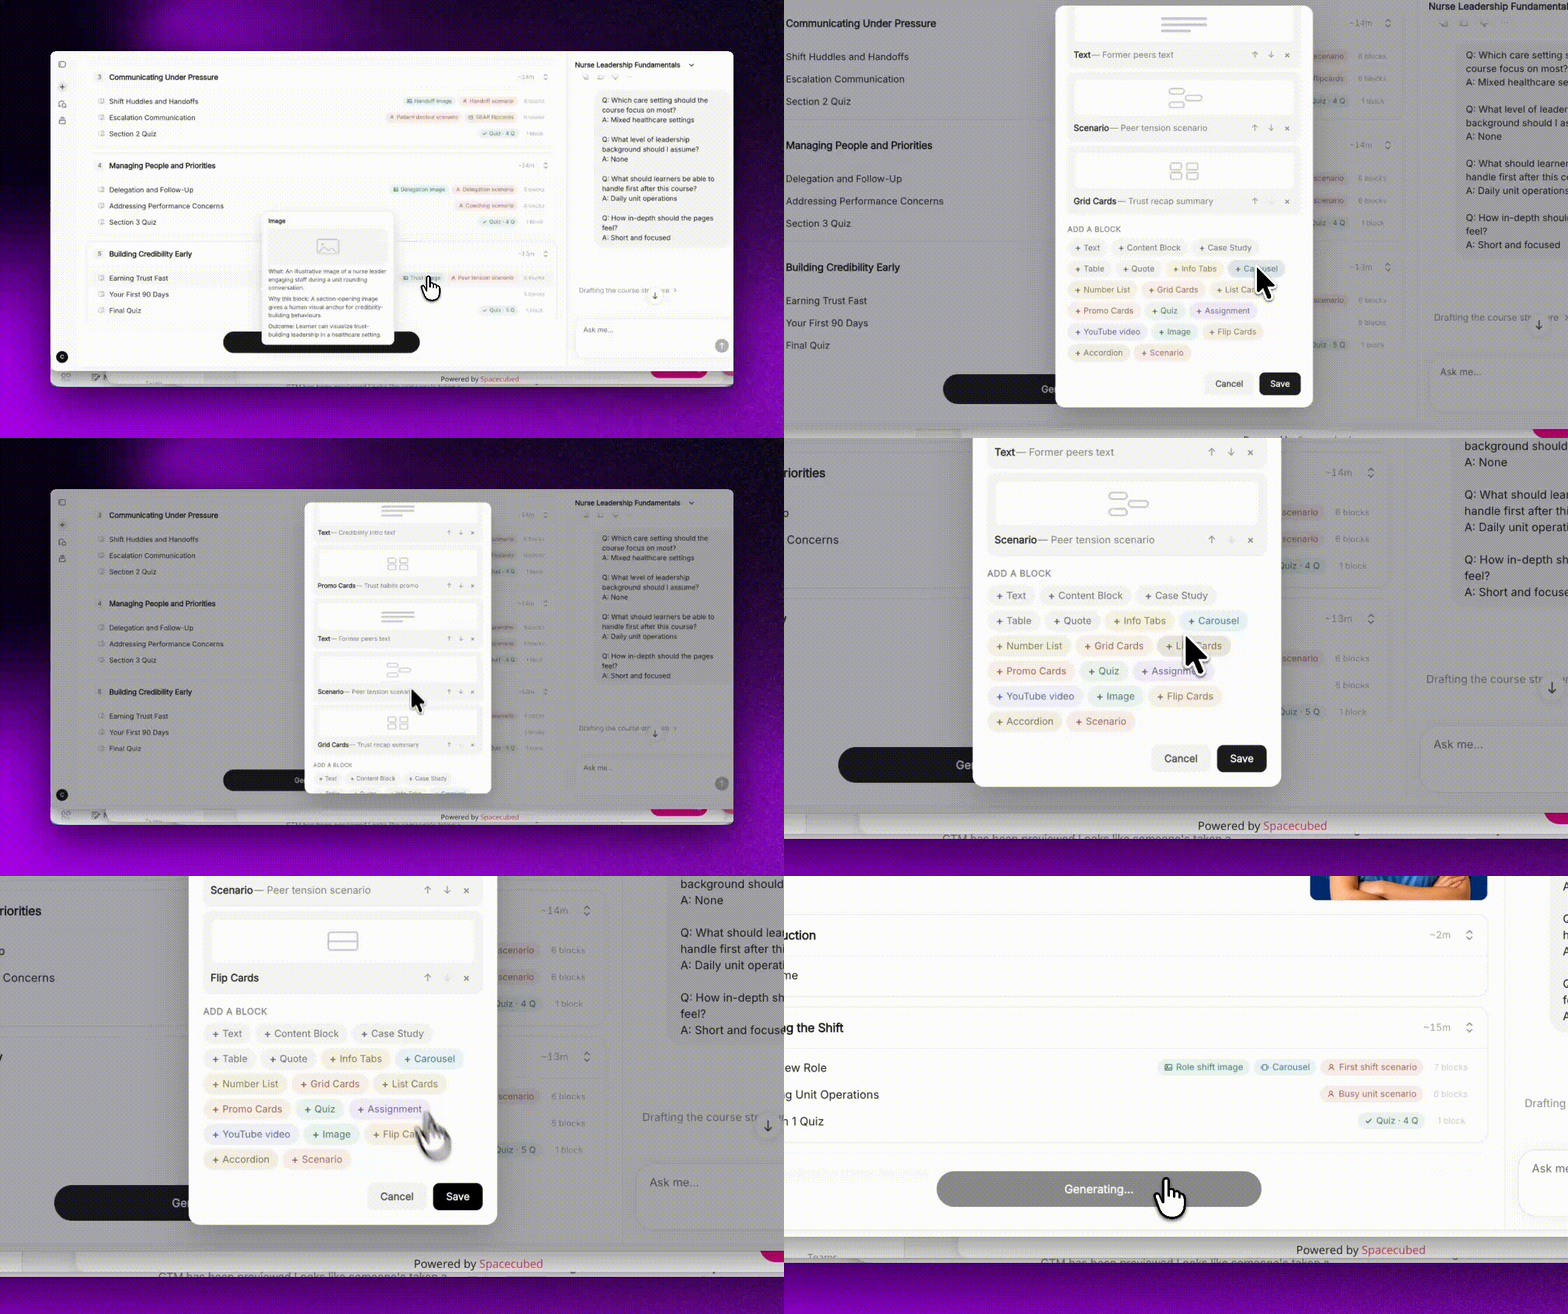
In the Course Structure, before you click Generate Course, find the page you want to change
Click the block count on that page, such as "5 blocks", or any of its colourful highlight tags, to open its Page content blocks
Under Add a block, click a block to add it; use the up and down arrows to reorder, and the x to remove a block
Click Save to keep your changes to that page
When you are happy with each page, click Generate Course to build your course
What you can do:
- Decide what each page looks like before the AI writes anything, so it comes out the way you want the first time
- Place quizzes, scenarios, and interactive blocks exactly where you want them from the start
Please note: Coursebox is currently migrating all accounts to a faster, upgraded platform. This feature is already available on newer accounts and will roll out to all remaining accounts by early August 2026.
AI Editor 2.2: Now Builds Interactive Blocks (July 17, 2026)
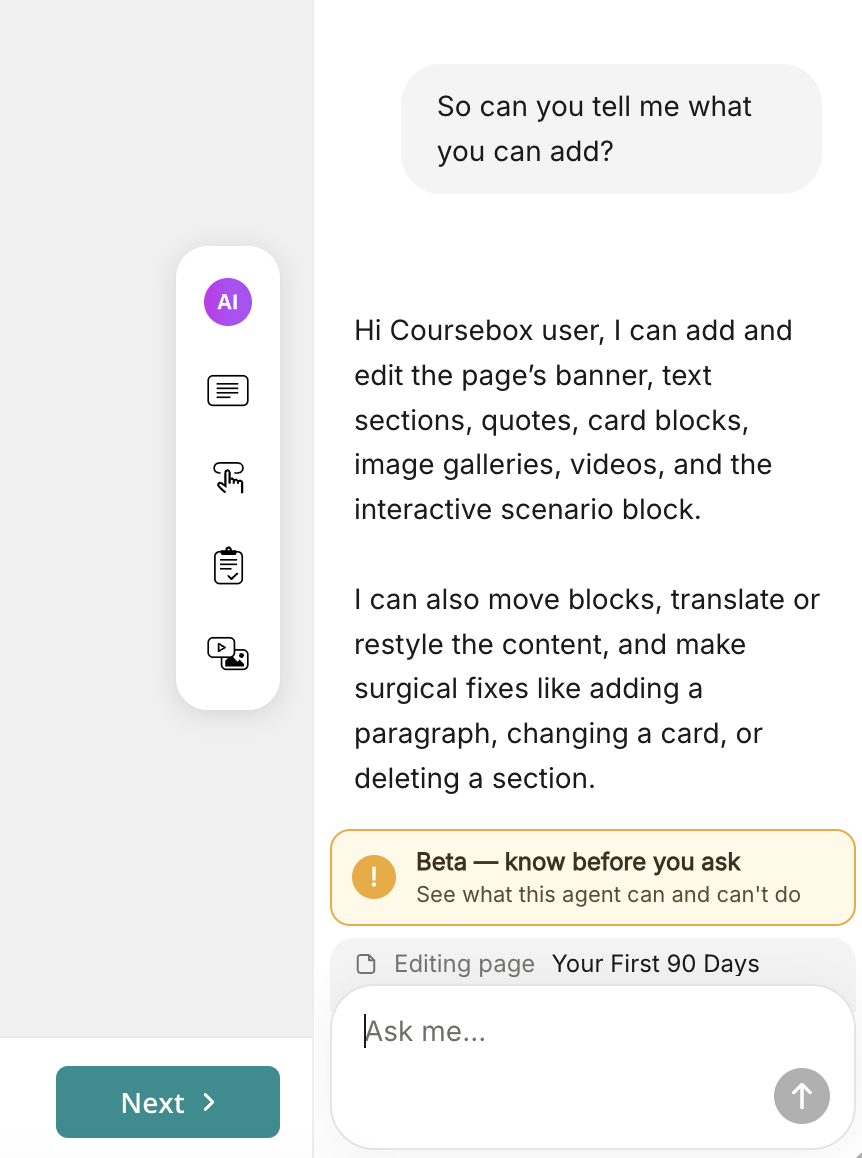
Describe the block you want and the AI Editor builds it for you, ready to use.

What's new:
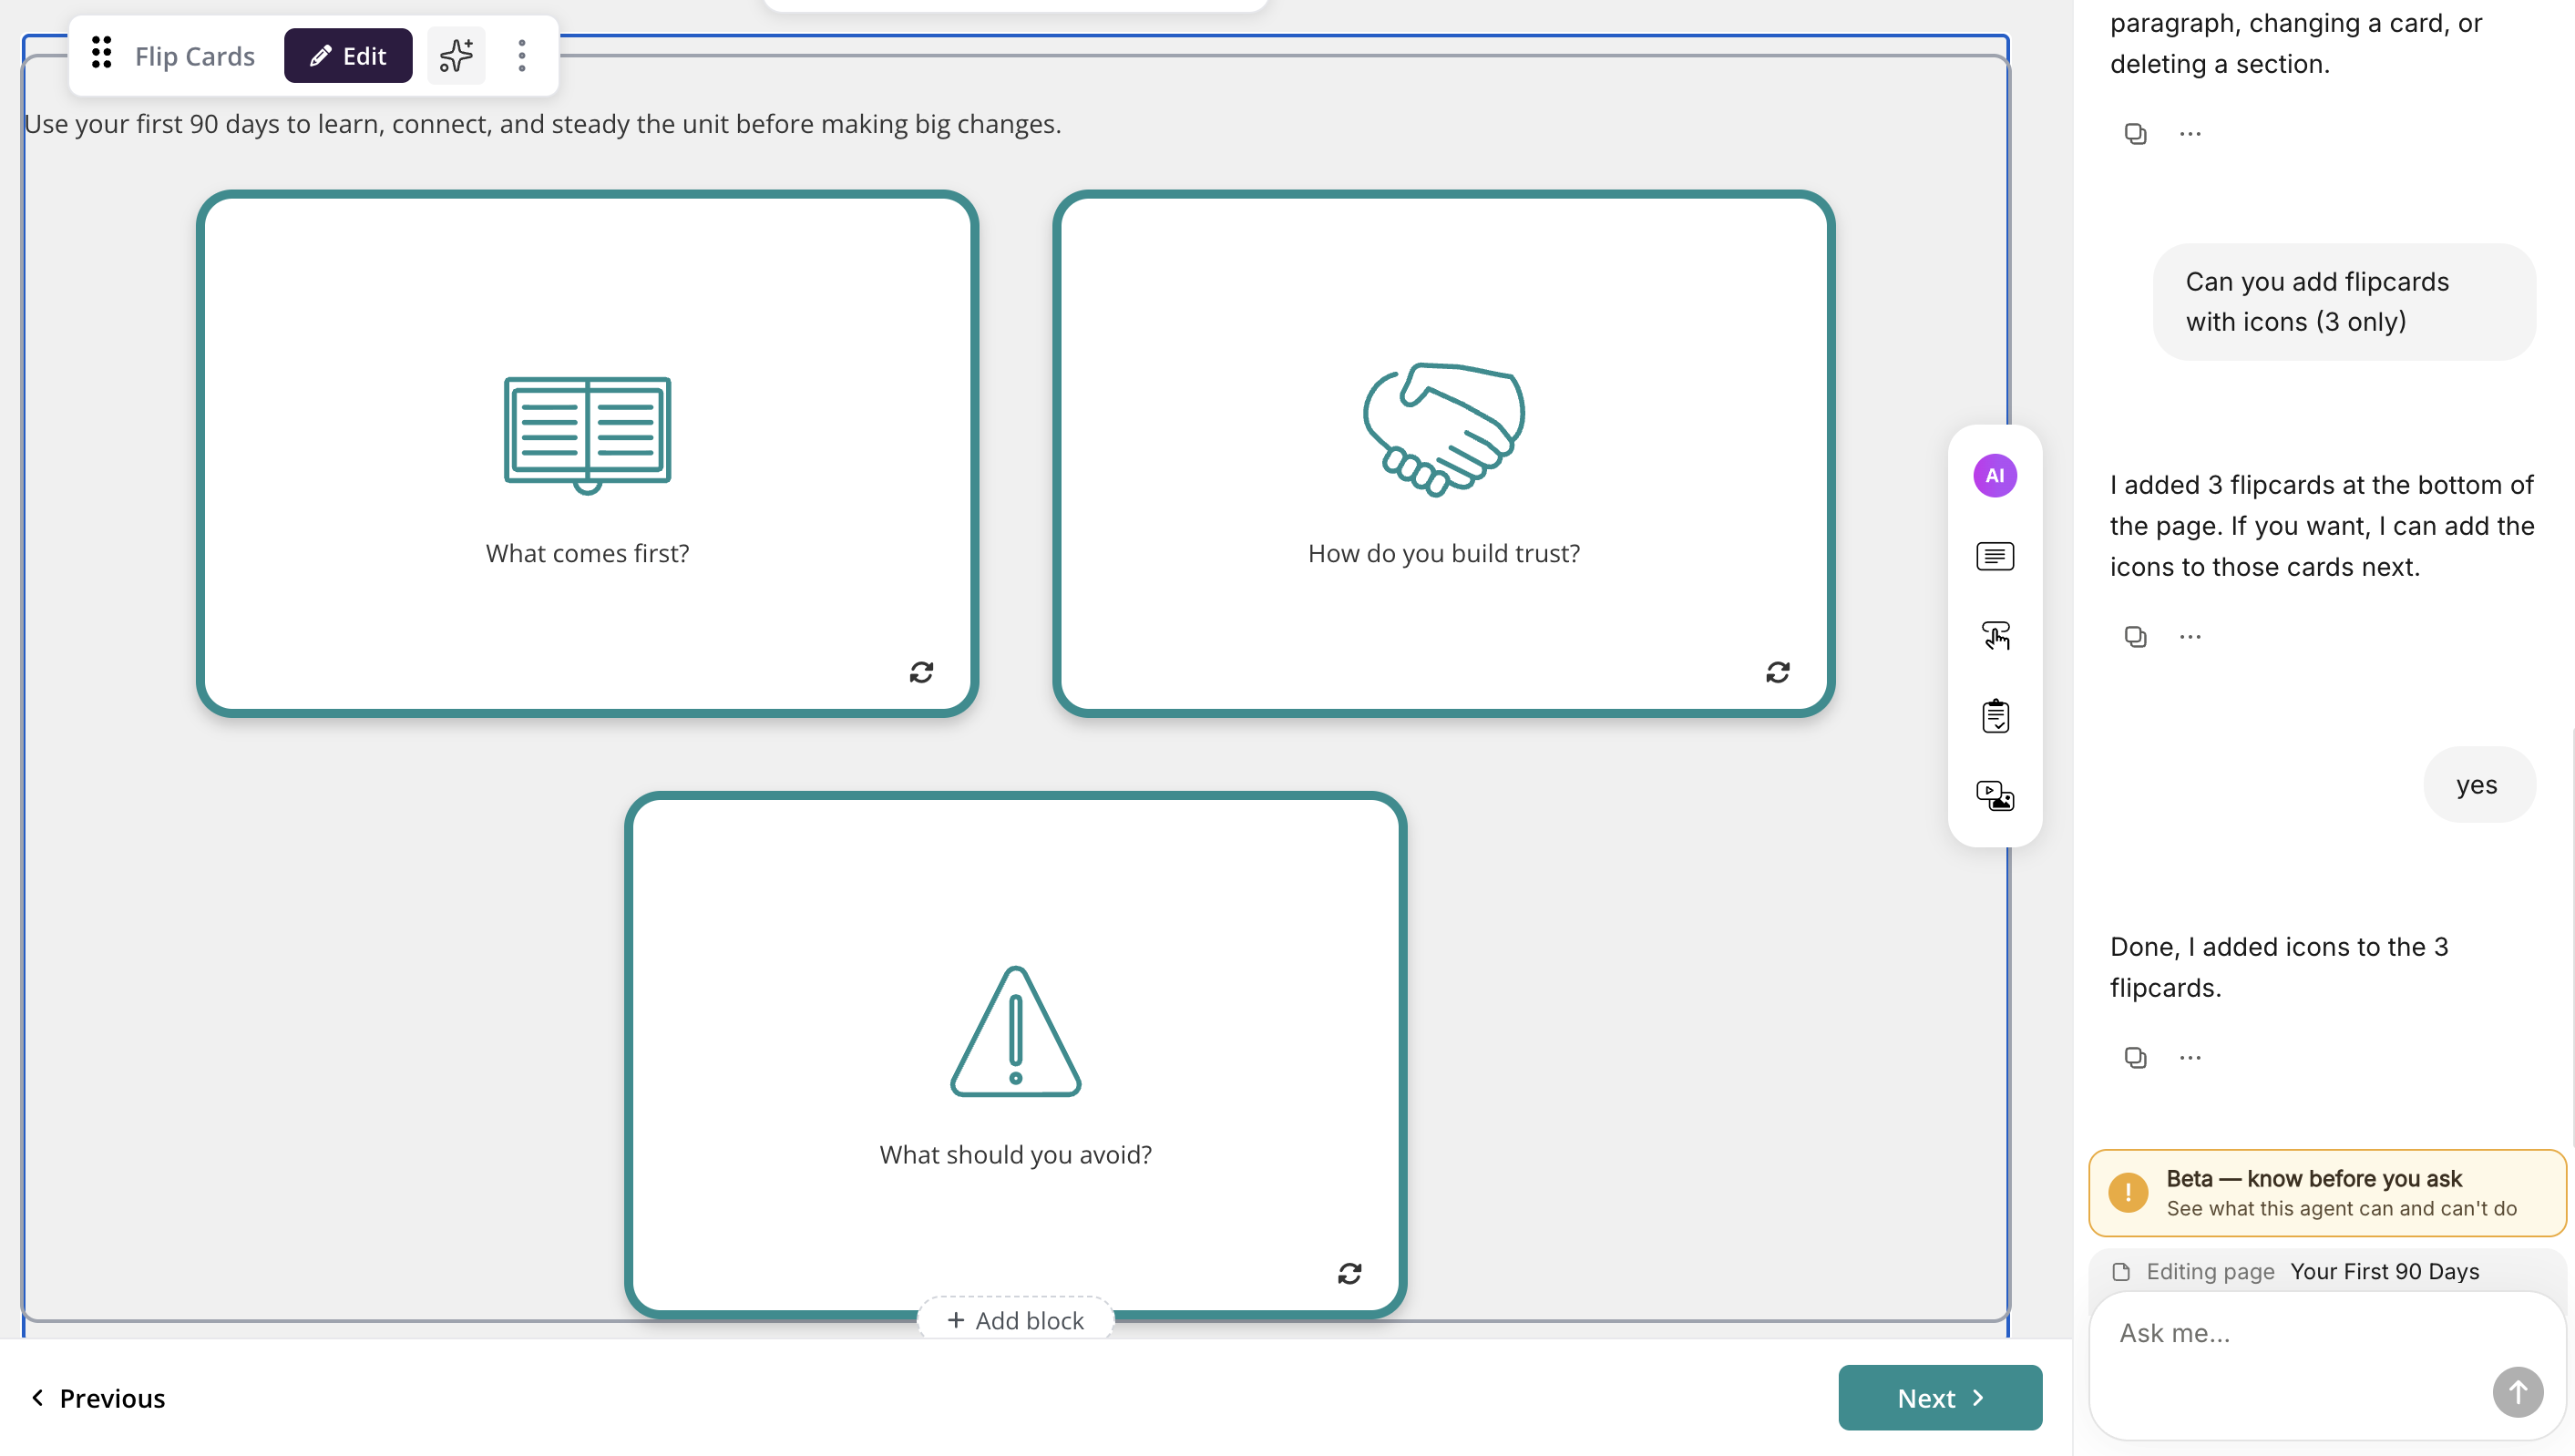
- Ask the AI Editor for a specific block and it will build it: Flip Cards, Accordions, Info Tabs, Grid Cards, List Cards, Quotes
- The generated blocks will have content and settings already filled in
- The AI Editor also adds or replaces images and videos, and can adjust the tone, language, and AI Tutor behaviour
How it works:
Open the page you want to work on
Click the AI Editor icon (the sparkle in the top toolbar) to open the AI Editor chat panel
In the "Ask me" box, describe the block you want, for example "create an accordion for each compliance category" or "turn these notes into a set of flip cards"
The AI Editor builds the block on your page, with its content and settings in place
Keep chatting to fine-tune any block until it is right
What you can do:
- Go from a plain description straight to a finished, interactive block
- Build varied, engaging pages with the block type that fits each idea
- Add or update images, video, and the tone of a page in the same chat
Please note: Coursebox is currently migrating all accounts to a faster, upgraded platform. This feature is already available on newer accounts and will roll out to all remaining accounts by early August 2026.
Fonts & Text Size: Now In Any Text Block (July 17, 2026)
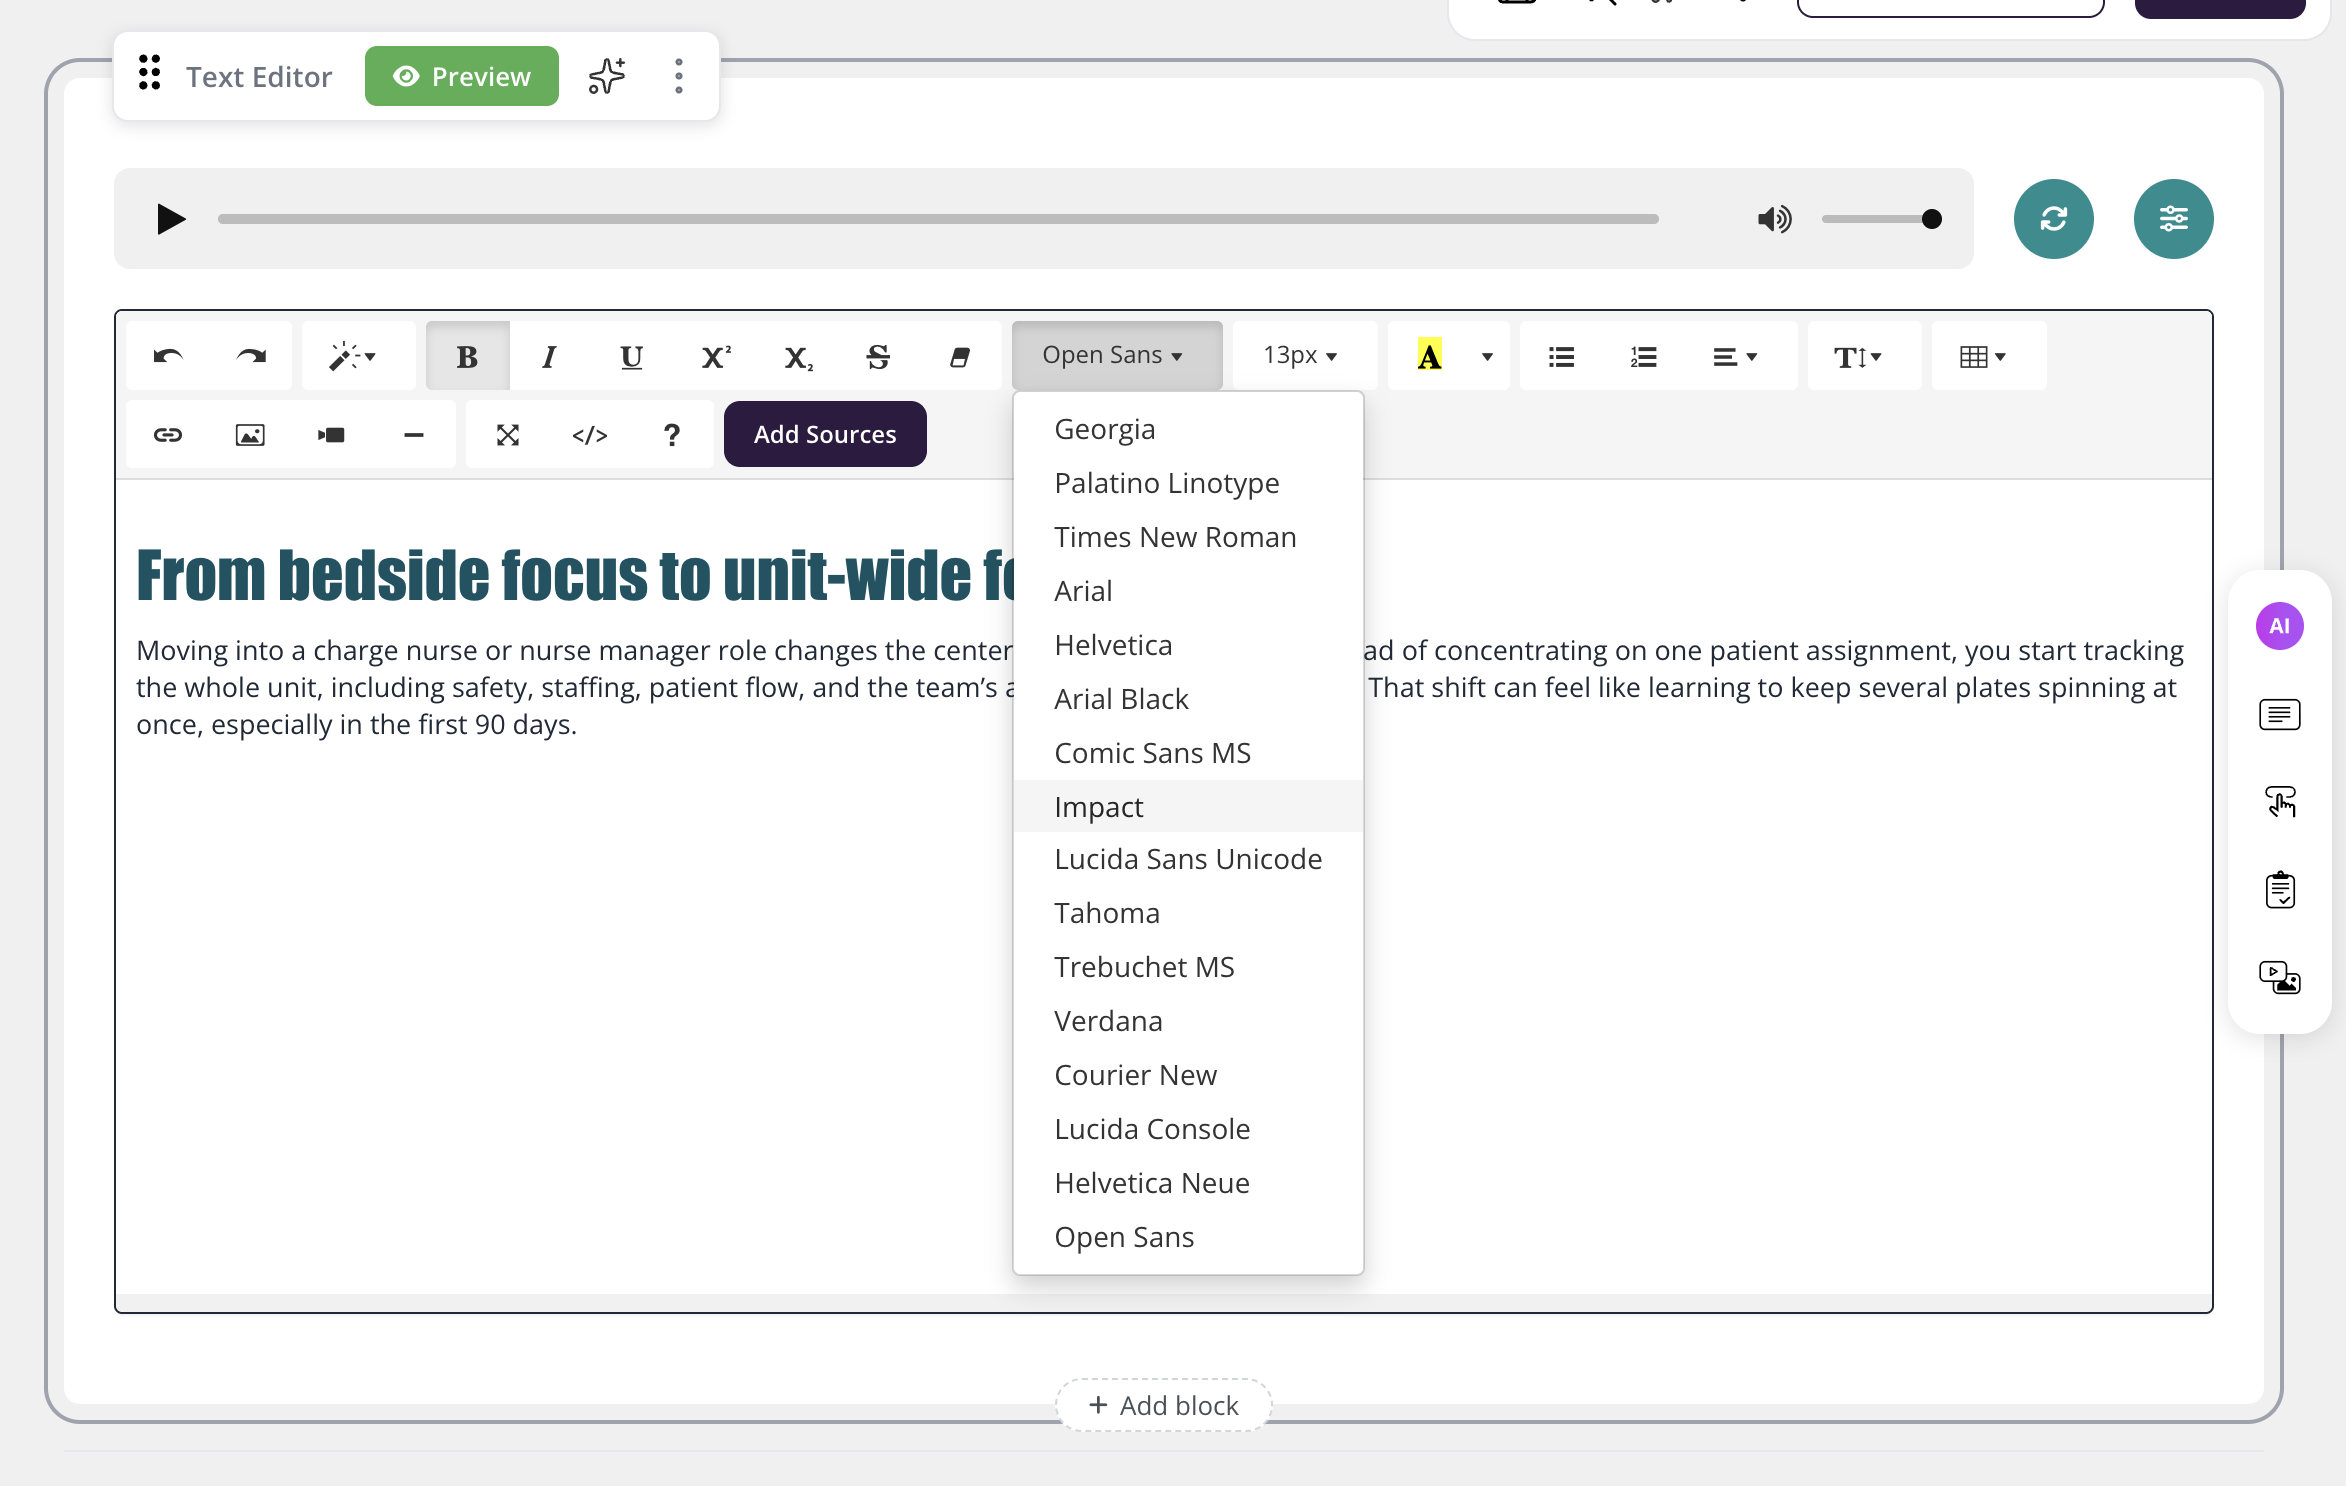
You can now set the font and size on text inside any text block.
What's new:
- Choose a font for text inside any text-based block
- Set the size of that text, right where you are editing
- Works in the editor across all text-based blocks
How it works:
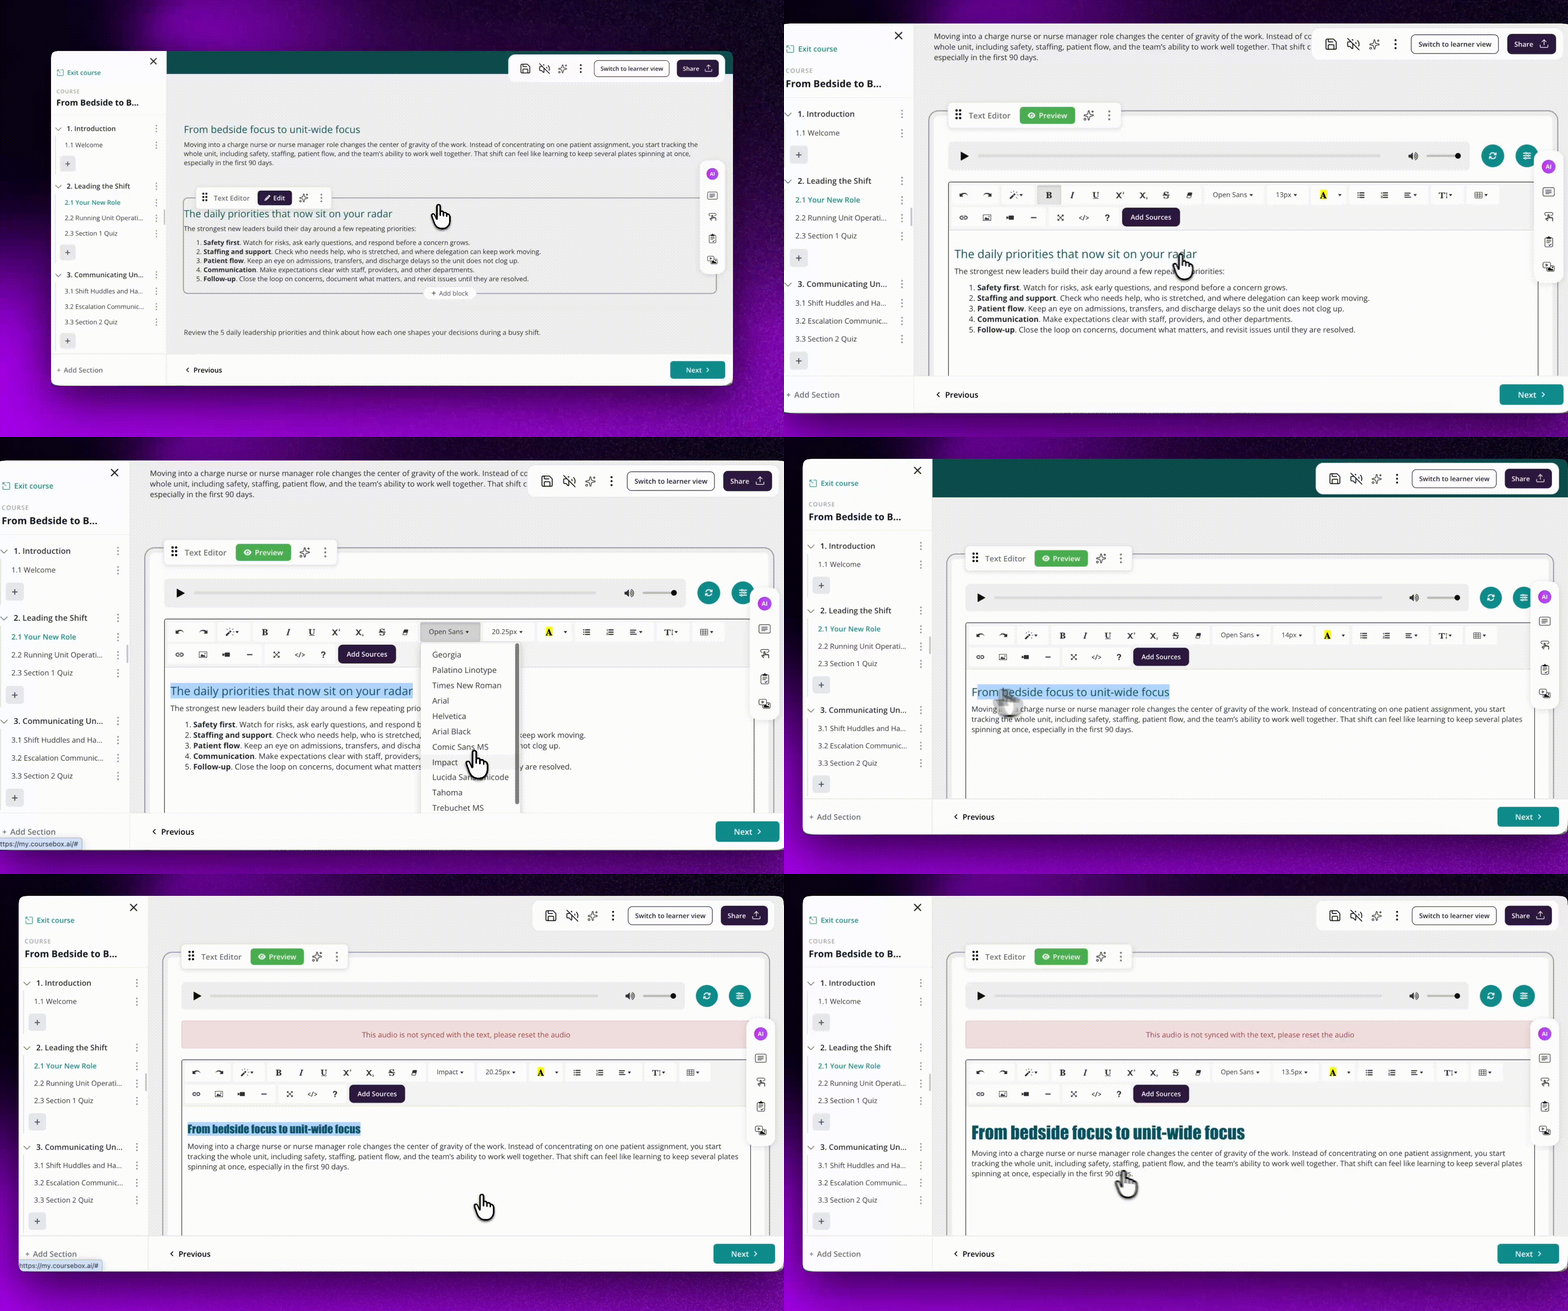
Open a course page in the editor
Click into a text-based block, or add one
Highlight the text you want to change
Choose a font from the font family dropdown
Set the size with the font size control
Your changes are saved and visible to learners immediately
What you can do:
- Match your text to your brand fonts
- Build clear visual hierarchy on a page
- Make text bigger where readability matters most
To set fonts for a whole course, use the Course Theme (available on LMS and white-label plans). This control changes the font on the text you select within a block.
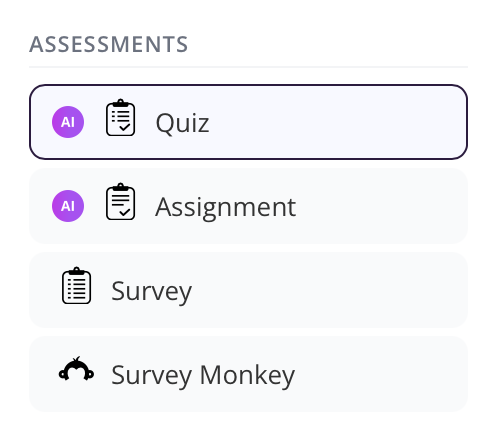
AI Quizzes & Assessments 2.2: Now Made From Your Course (July 16, 2026)
The AI quiz and assignment generators now read your course content before writing questions, so assessments are grounded in what your learners have studied.
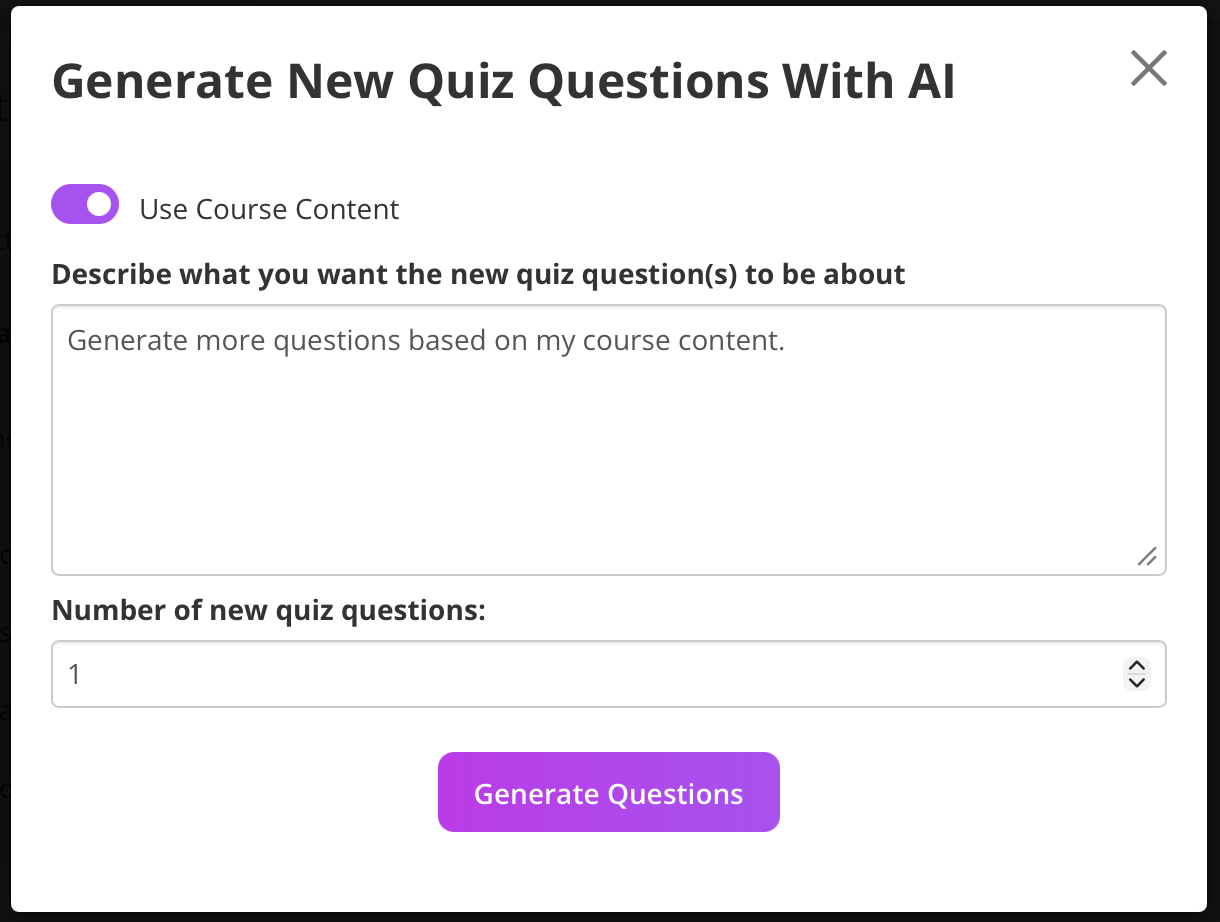
What's new:
- Your AI quizzes and assignments are now built from your own course content, so every question reflects what your learners have studied
- The generator draws on the material on the page and its section when it writes questions
- Works for both quizzes and written assignments
How it works:
Open a course in the editor and navigate to the page or section where you want to add a quiz or assignment
Use the AI quiz or assignment generator as usual
The AI reads the content on that page (and surrounding pages in the section) before writing questions
Review the generated questions, which now reflect the specific material covered in your course
What you can do:
- Generate quiz questions that test what was taught, not just the topic in general
- Reduce the time spent rewriting AI-generated questions that missed the mark
Please note: Coursebox is currently migrating all accounts to a faster, upgraded platform. This feature is already available on newer accounts and will roll out to all remaining accounts by early August 2026.
Banner: Now With Custom Colours (July 16, 2026)
Every course page comes with a banner, and you can now set its colour to match your brand or upload your own background image.
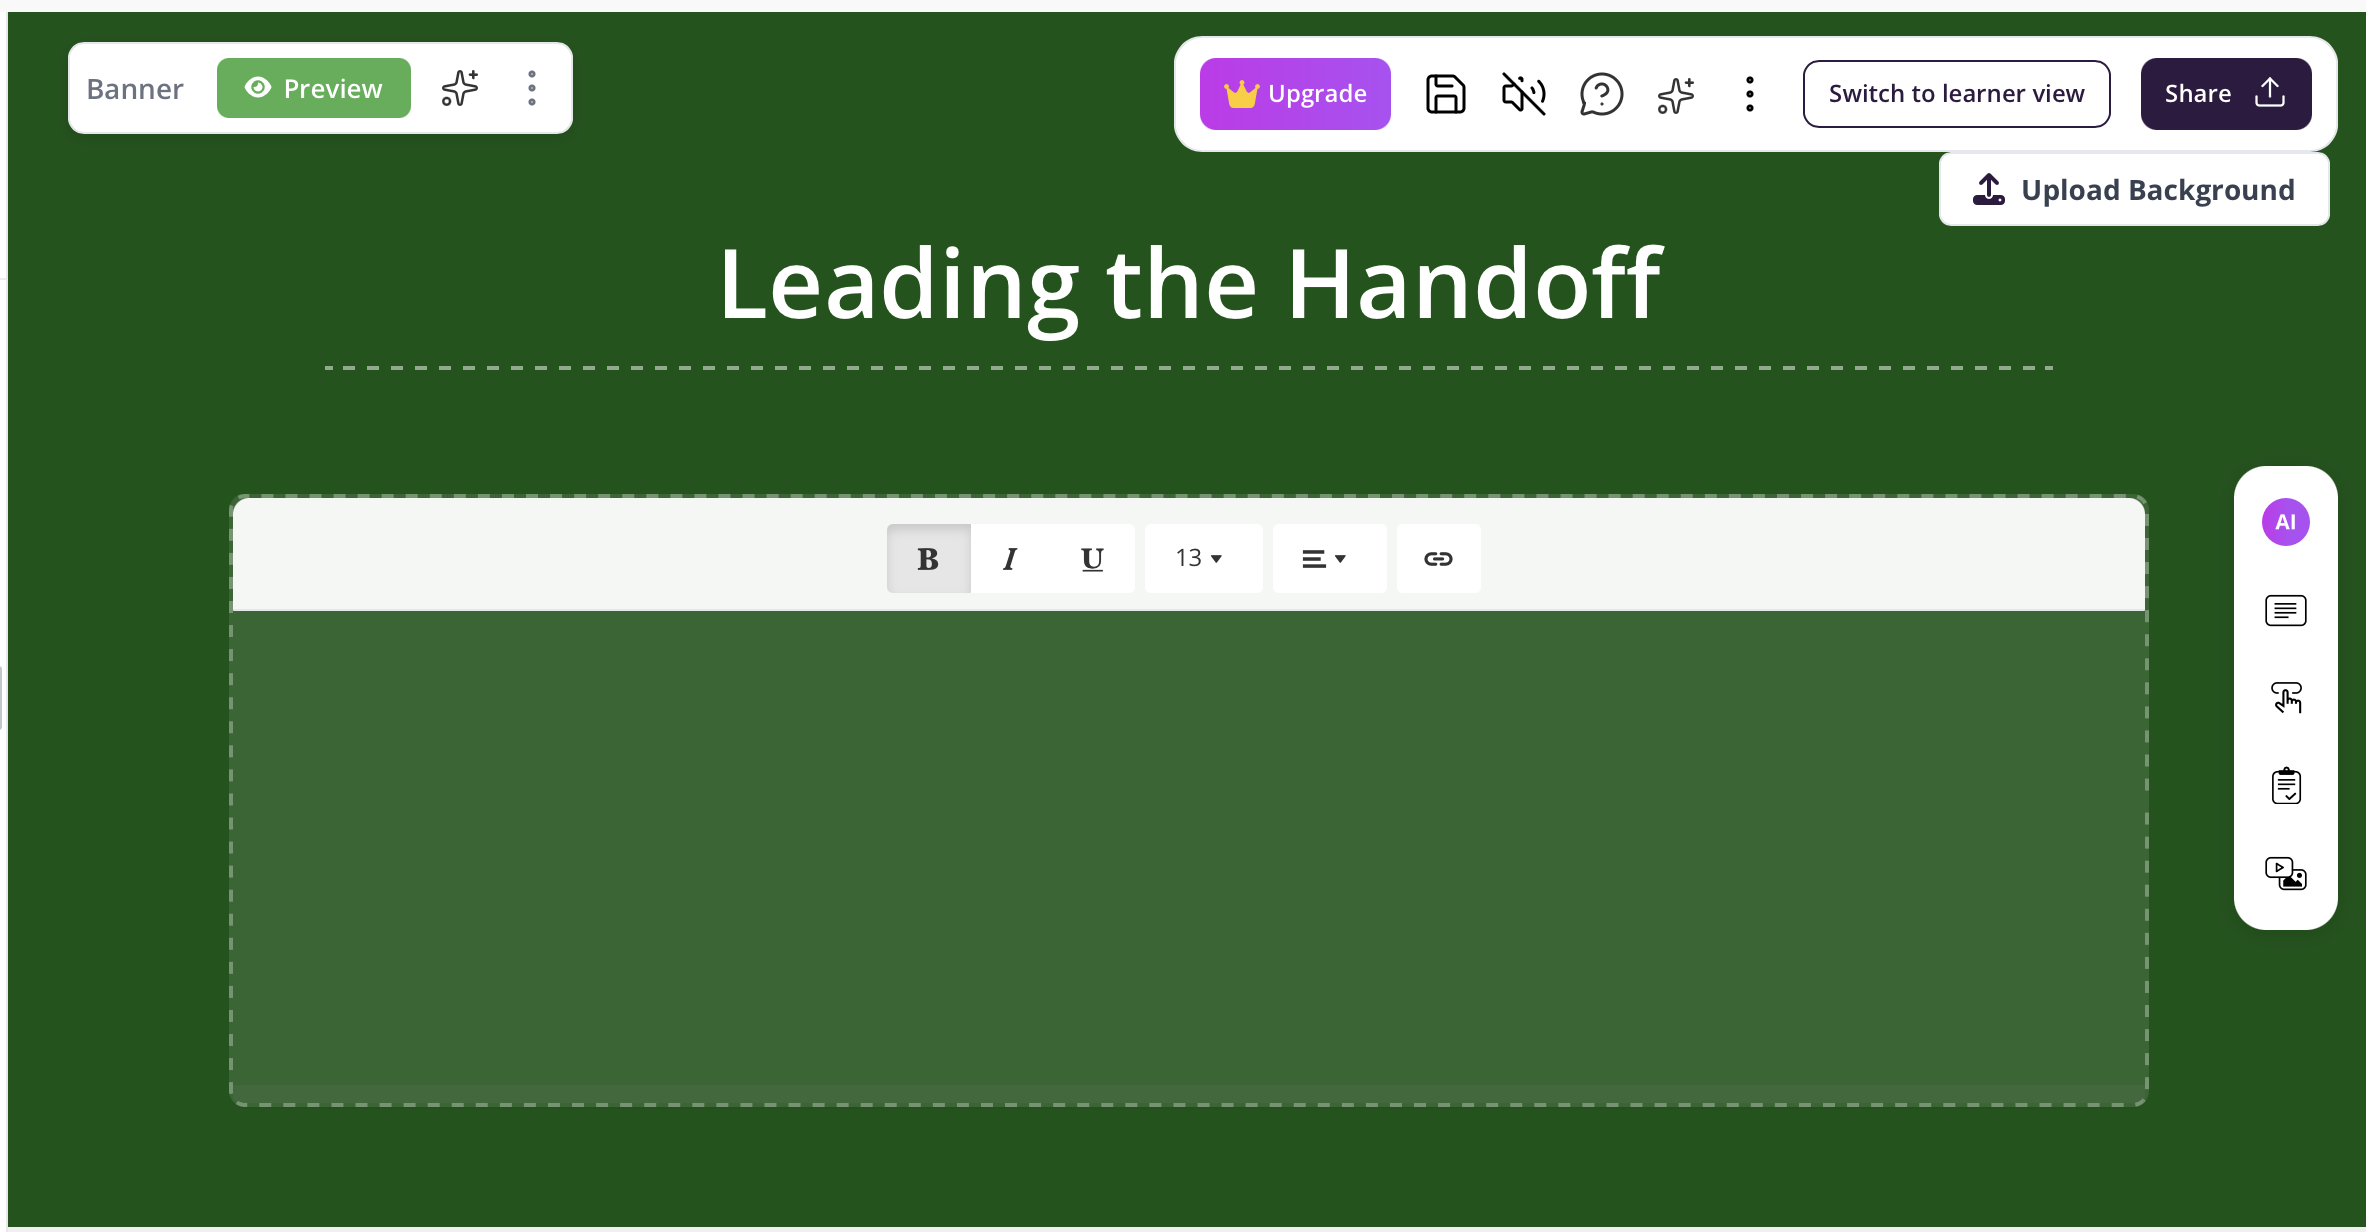
What's new:
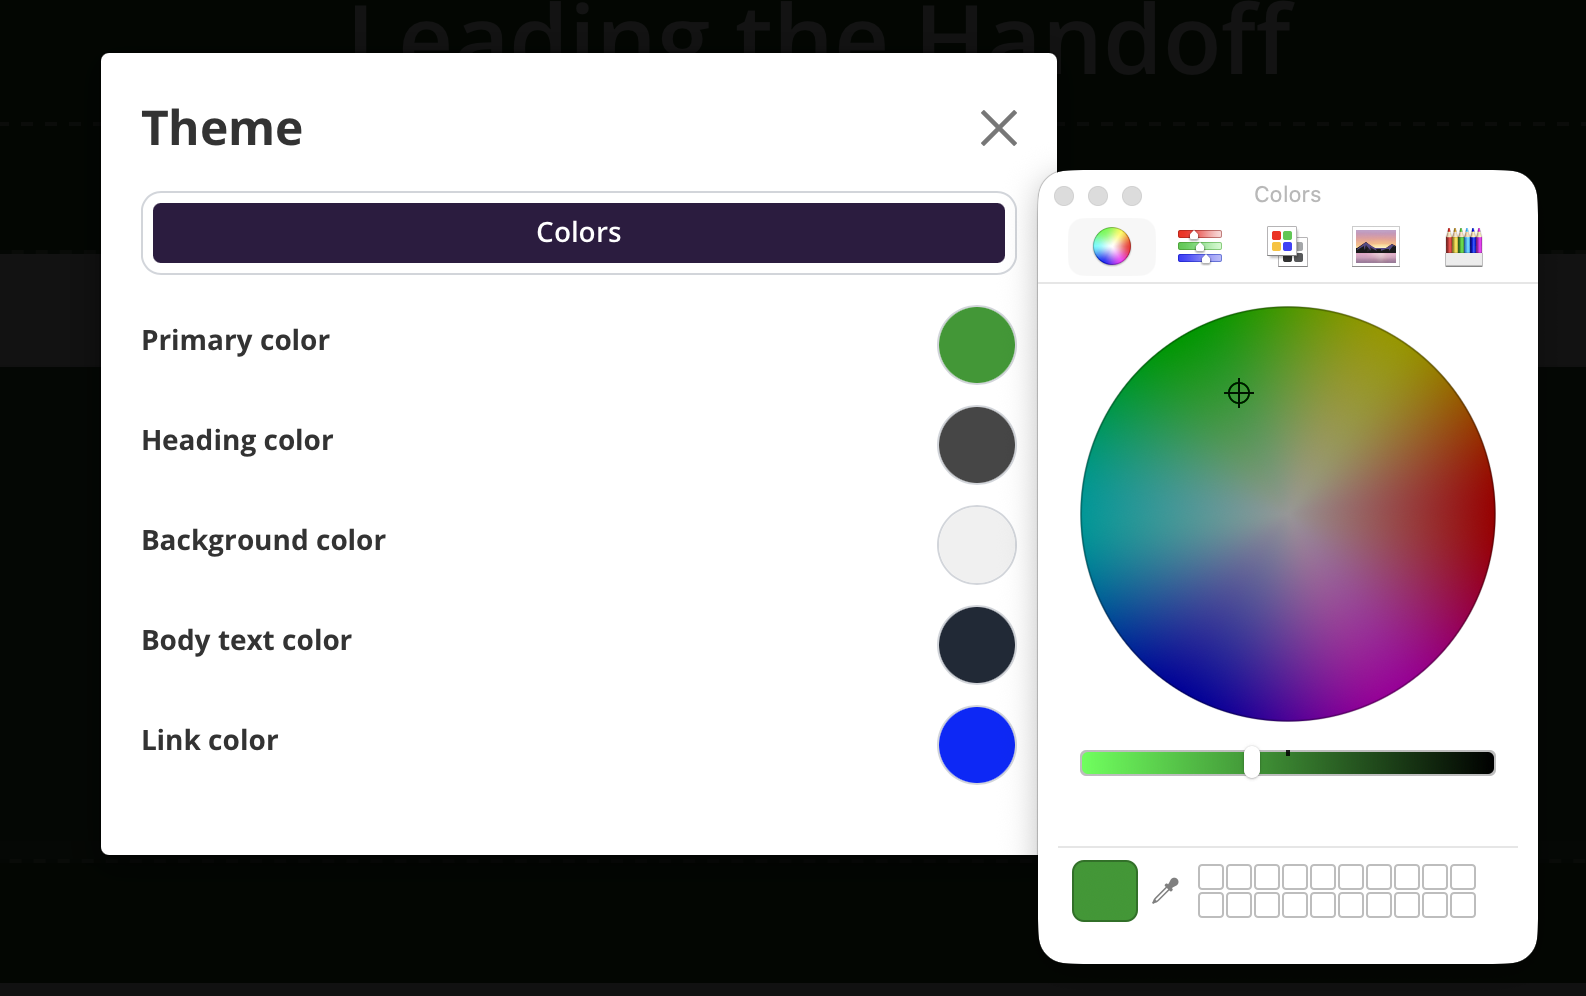
- Change your banner's colour from the course Theme
- Upload your own background image for the banner
How it works:
Open your course in the editor
To change the color, click Theme and adjust the colors; the top one, Primary color, sets the banner
To use an image instead, click Upload Background on the banner
What you can do:
- Match your banner to your brand colors
- Give a page a custom look with your own background image
- Keep every page on-brand
Please note: Coursebox is currently migrating all accounts to a faster, upgraded platform. This feature is already available on newer accounts and will roll out to all remaining accounts by early August 2026.
Additional Admin Seat (July 02, 2026)
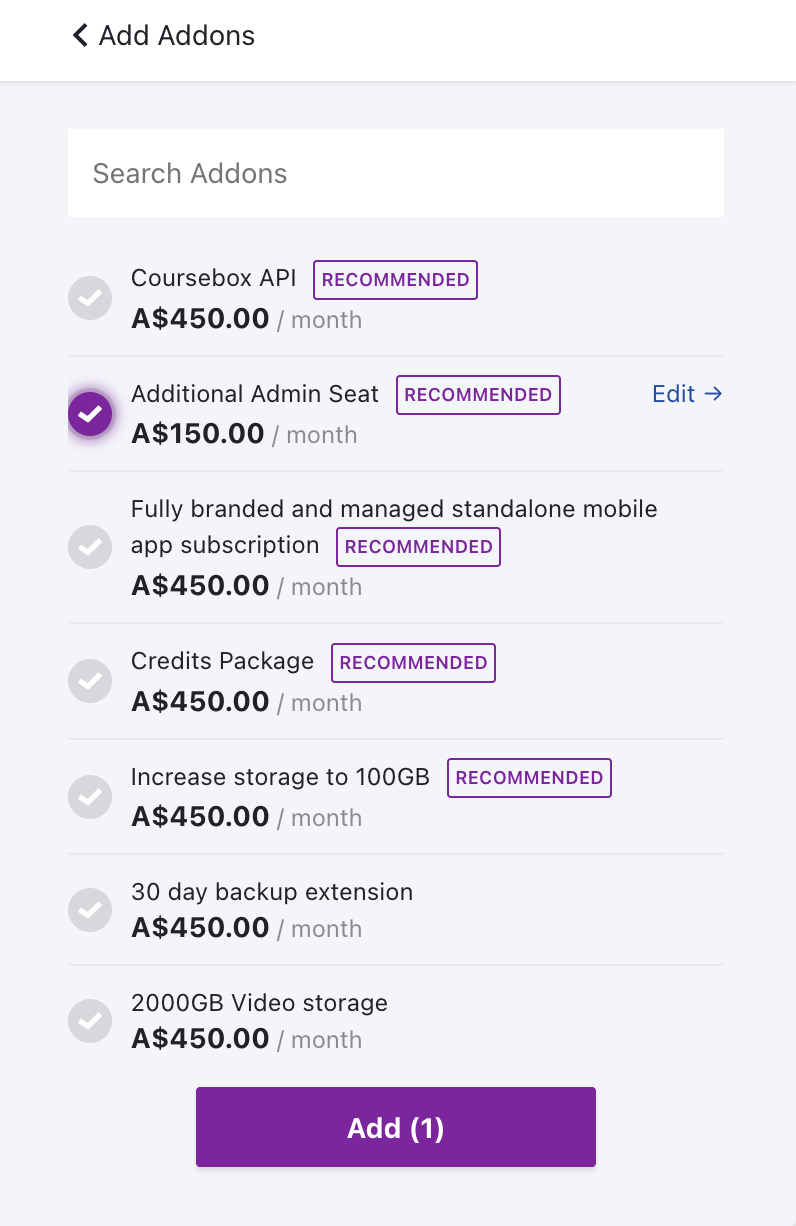
Pro and Business plan users can now purchase additional admin seats directly from the subscription portal, without upgrading to a higher plan.
What's new:
- Additional admin seats are available as a paid add-on for Pro and Business plans
- Add-ons can be purchased directly from the Coursebox subscription portal
How it works:
1. Go to the Coursebox subscription portal at courseboxai.chargebeeportal.com
2. Enter the email address linked to your account and request a one-time password
3. Check your inbox, copy the OTP, paste it into the login screen, and click Login
4. On the Manage Subscriptions page, click your active plan
5. Click Add Addons on the Subscription Details screen
6. Select the add-on you want — such as Additional Admin Seat — and click Add
7. Review the updated price and click Update Subscription to confirm
What you can do:
- Add admin seats to a Pro plan without upgrading to Business
- Scale admin access incrementally as your team grows
- Manage seat and credit top-ups from the subscription portal without contacting support
AI Promo + Content Block Images: Now Auto-Generated (June 29, 2026)
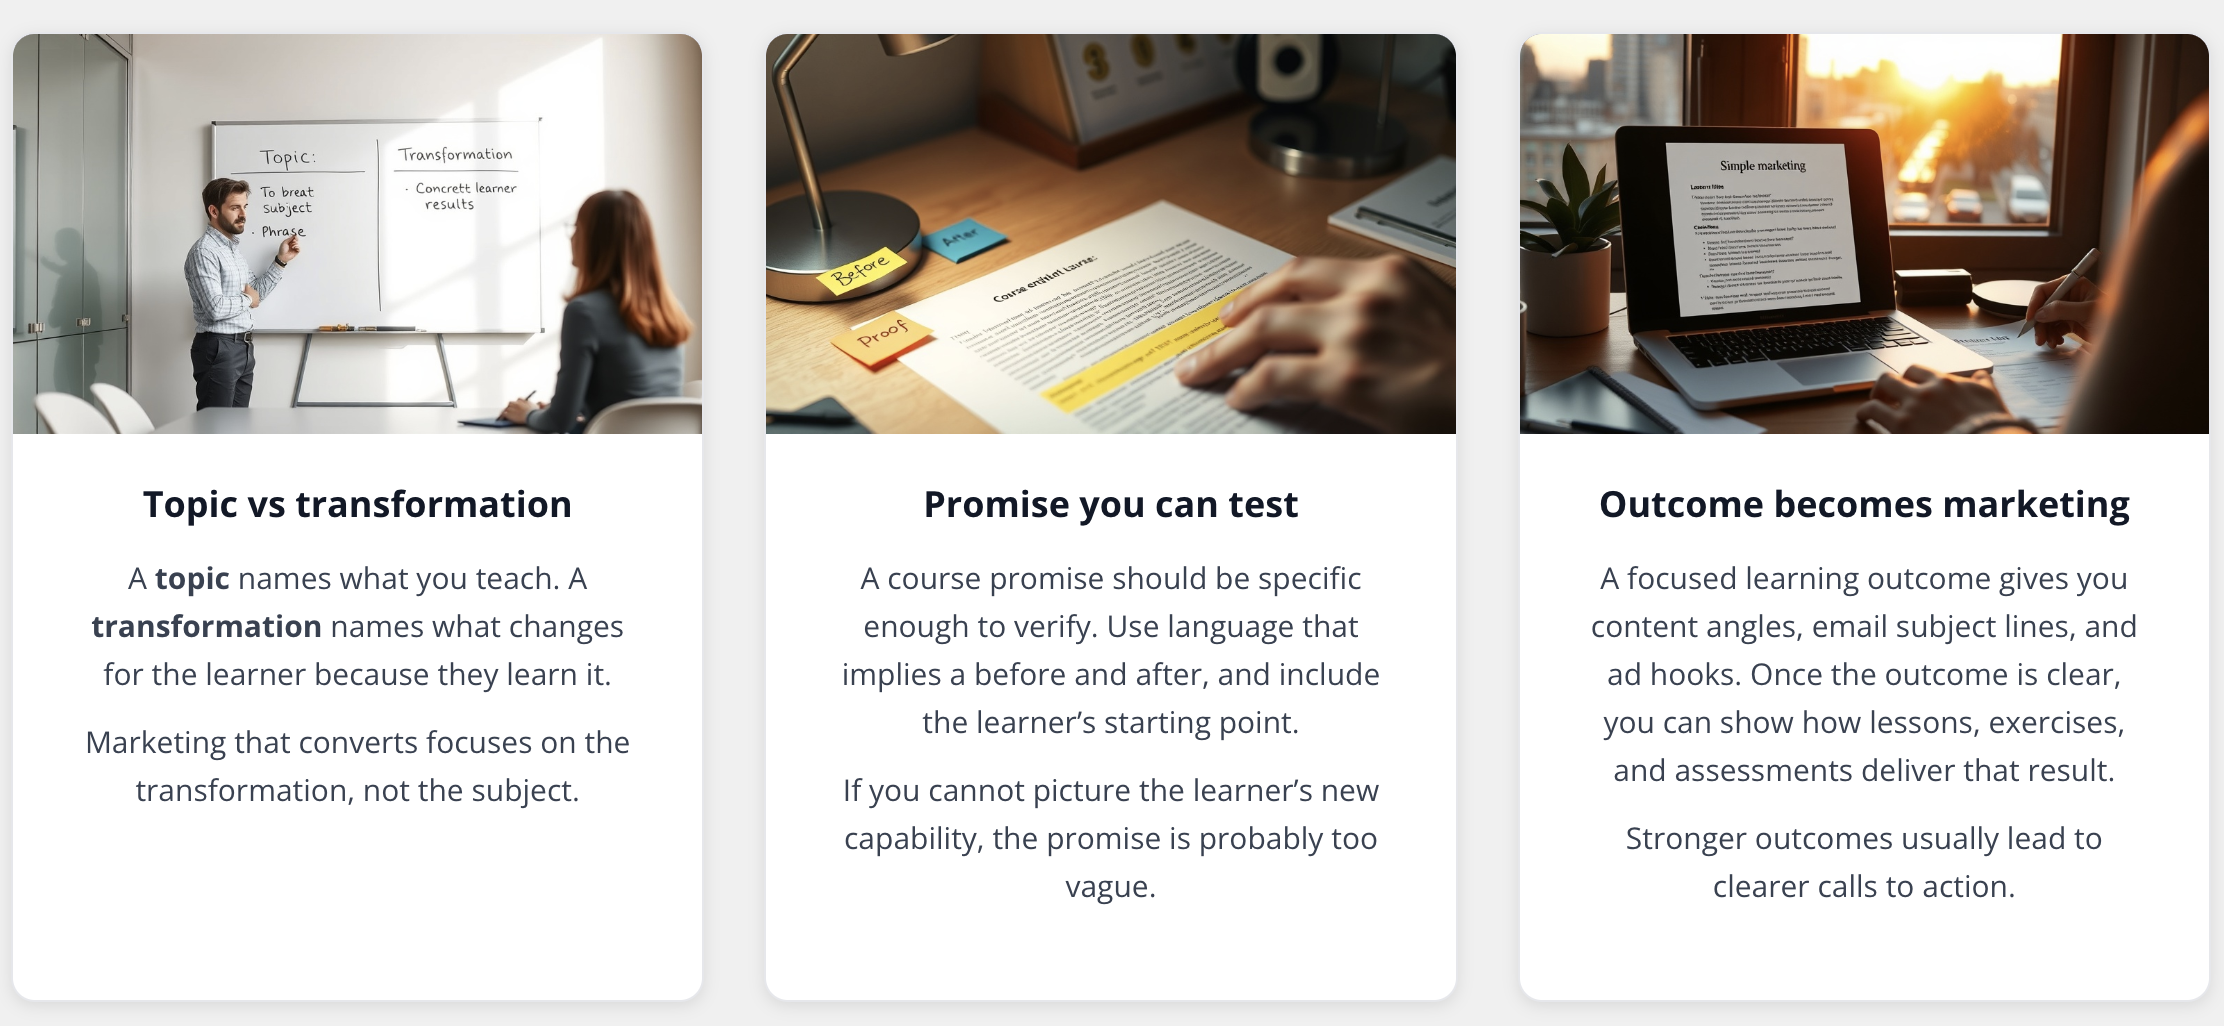
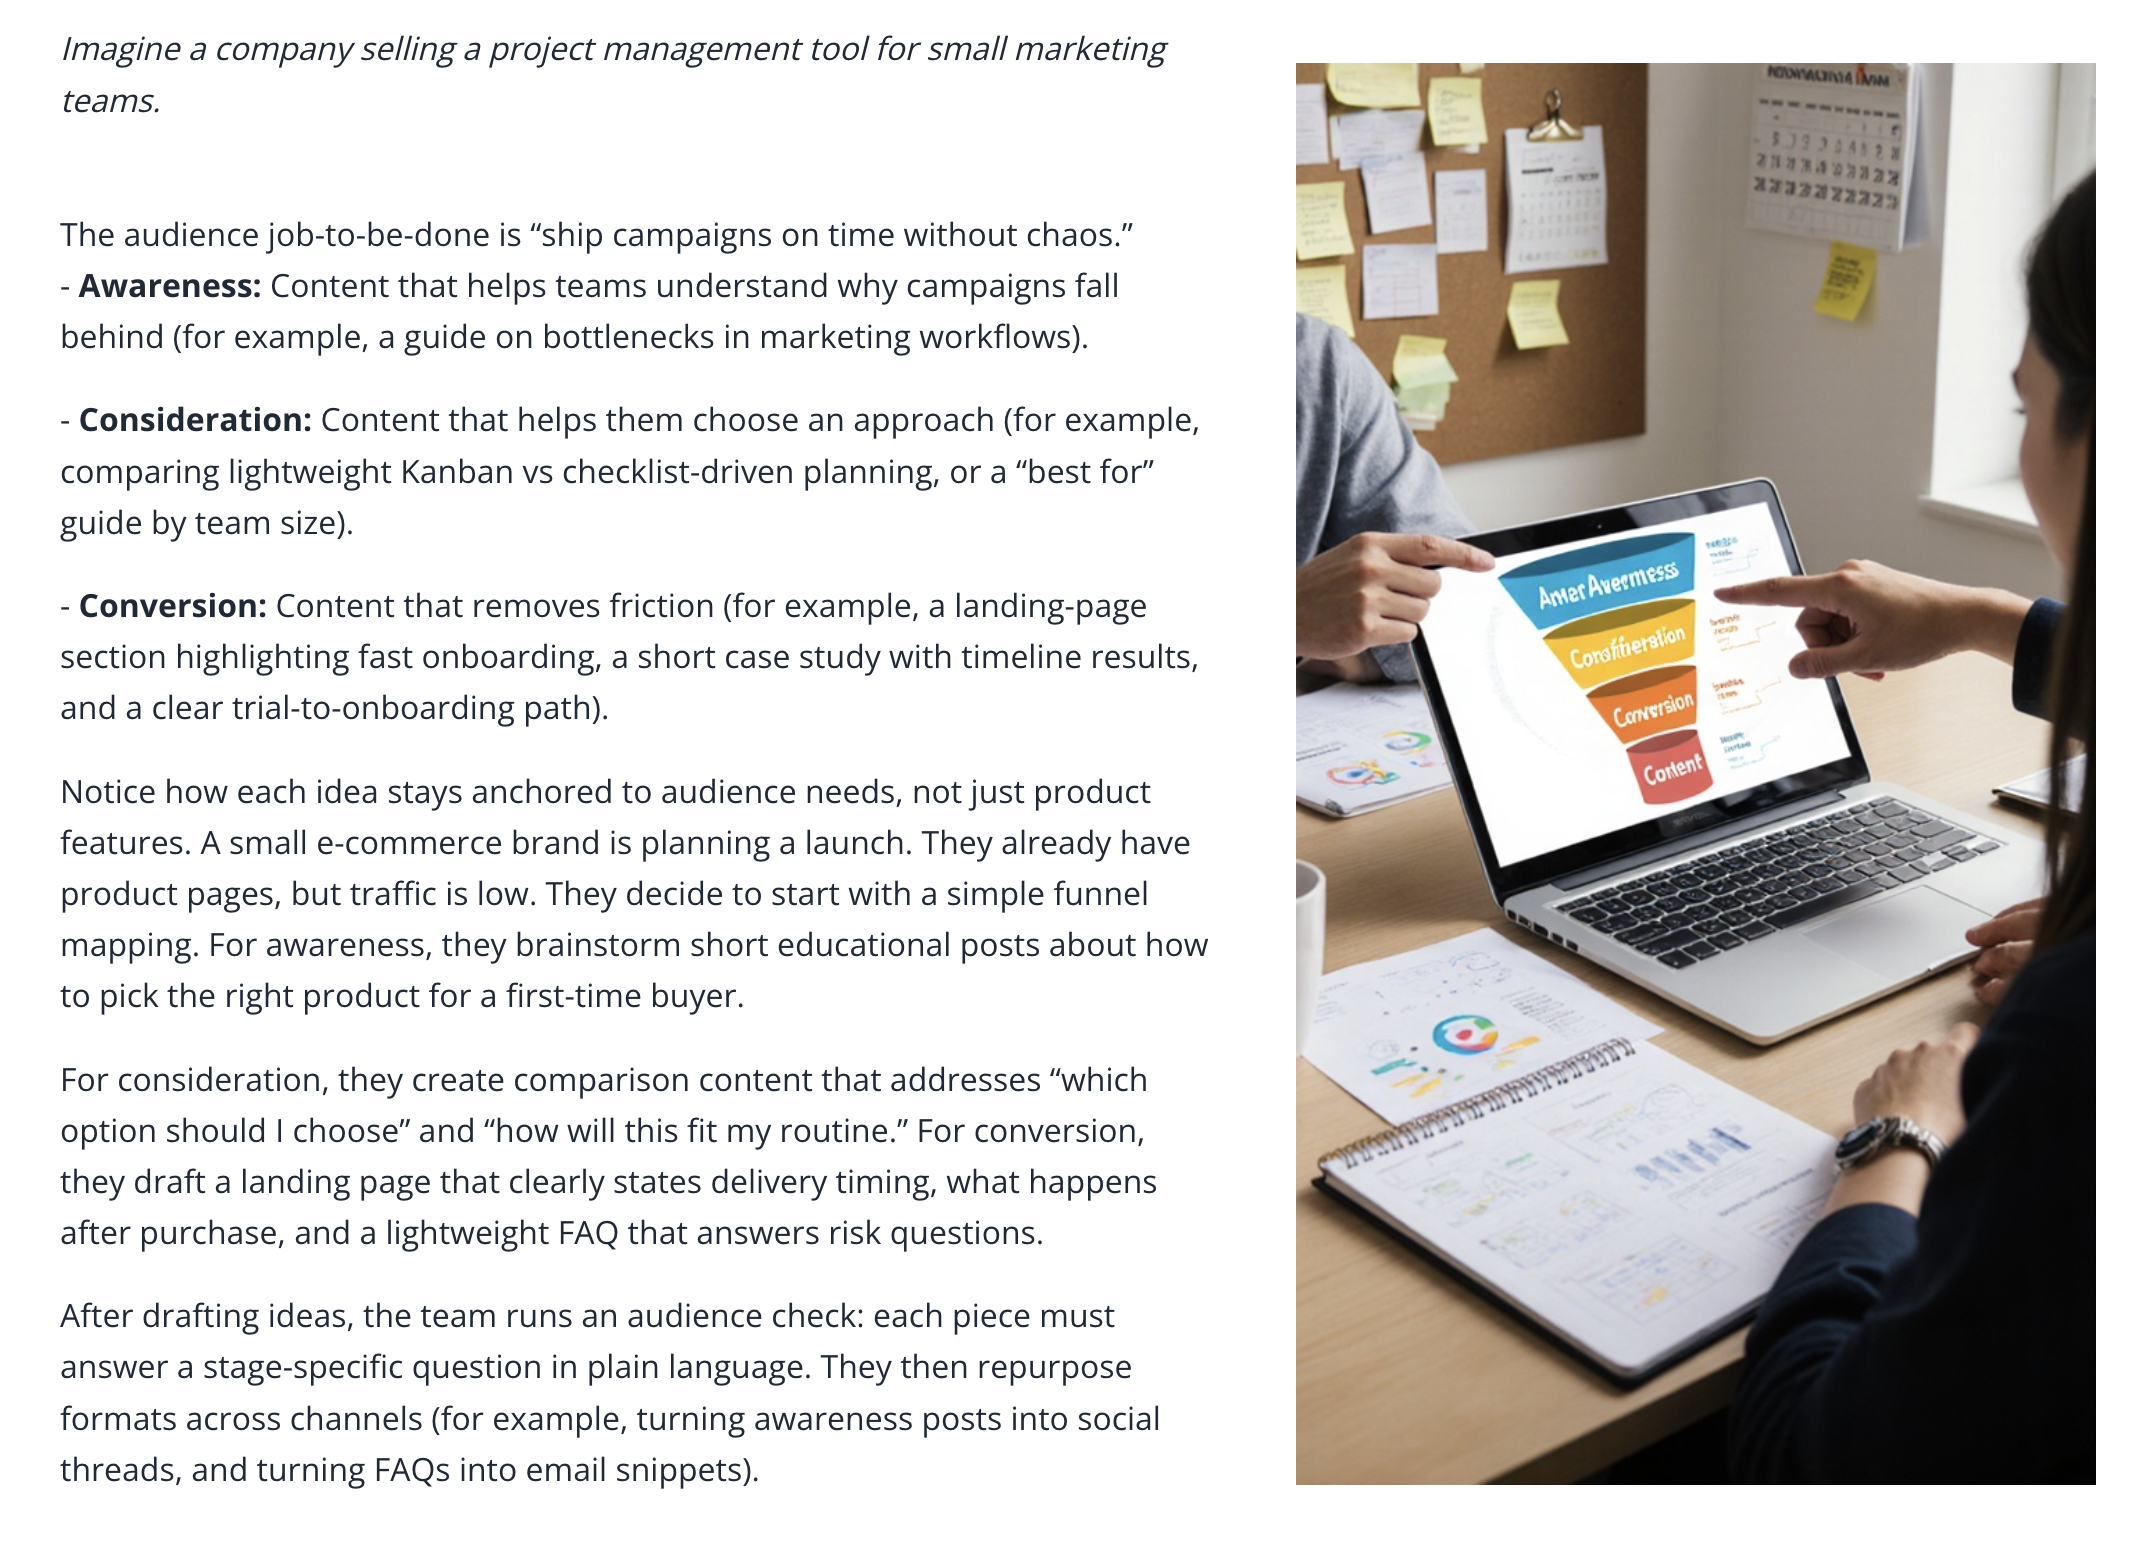
Courses created with the AI now include an auto-generated image in the Promo block and the Content block, so your course looks polished from the moment it is built.
What's new
- AI-generated courses now automatically include images in the Promo block and the Content block
How it works
Write a prompt or upload a document to create your course with AI
When the course is generated, images are automatically created in the Promo block and the Content block based on the course topic
You can replace the image at any time if you prefer a different visual
HTML Block (June 29, 2026)
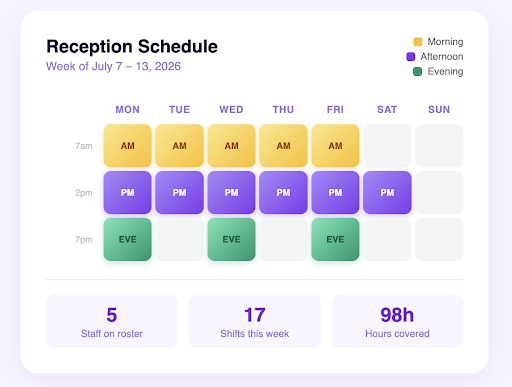
Add custom HTML and JavaScript directly to a course page to embed interactive widgets, tools, or experiences you've built or generated elsewhere.
What's new
- A new HTML Block content type is available in the course editor
- Supports custom HTML with embedded JavaScript for fully interactive elements
- Preview and edit your HTML inline without leaving the course editor
How it works
1. Open your course in the Course Editor
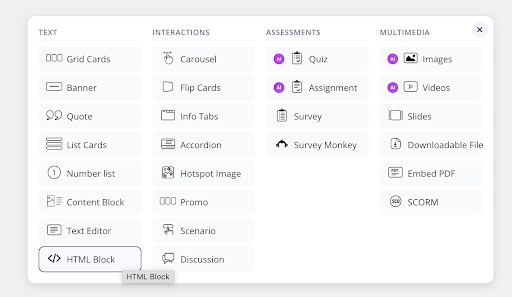
2. Click to add a new content block and select HTML Block from the Text section
3. Paste your custom HTML (including any JavaScript) into the code editor
4. Click Preview to see how it renders on the page
5. Click Save to publish the block as part of your course
What you can do
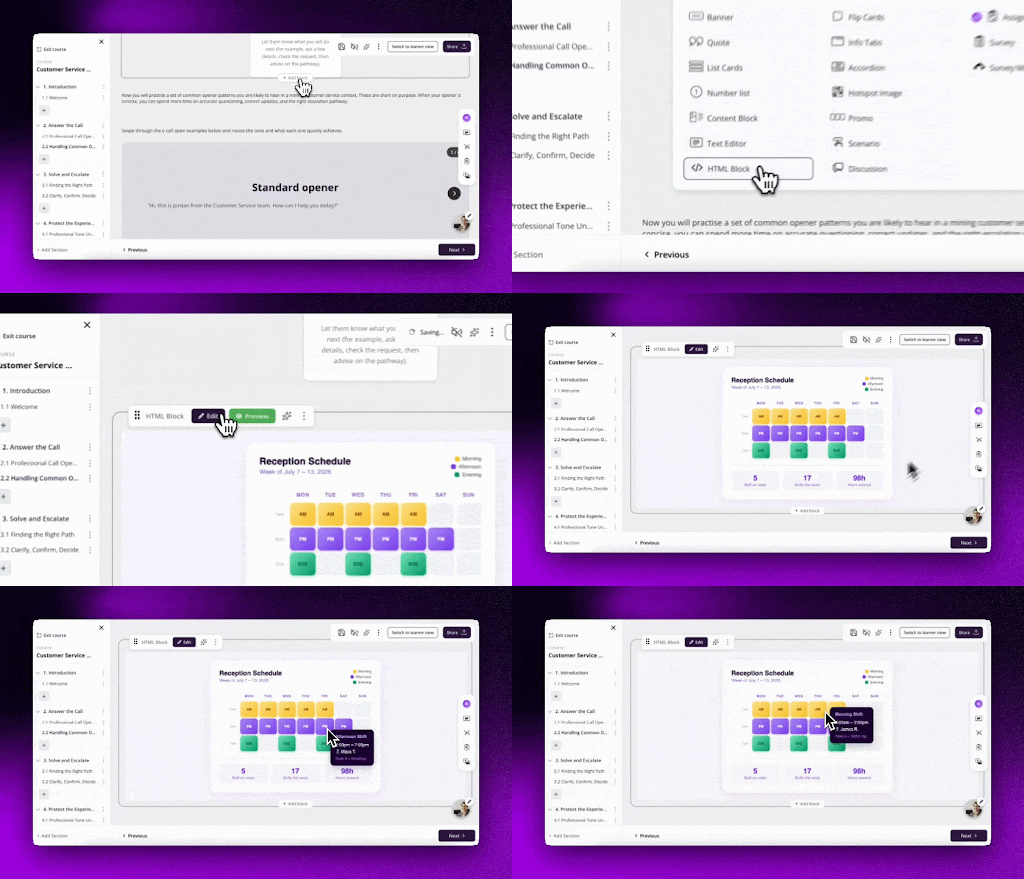
- Embed interactive widgets — such as drag-and-drop activities, calculators, or custom tools — directly inside a course page
- Drop in AI-generated HTML artifacts or dashboards without any conversion or reformatting
- Build experiences tailored to your course content that go beyond standard content block types
Please note: Coursebox is currently migrating all accounts to a faster, upgraded platform. This feature is already available on newer accounts and will roll out to all remaining accounts by early August 2026.
Platform Languages: Now 17 More (June 25, 2026)
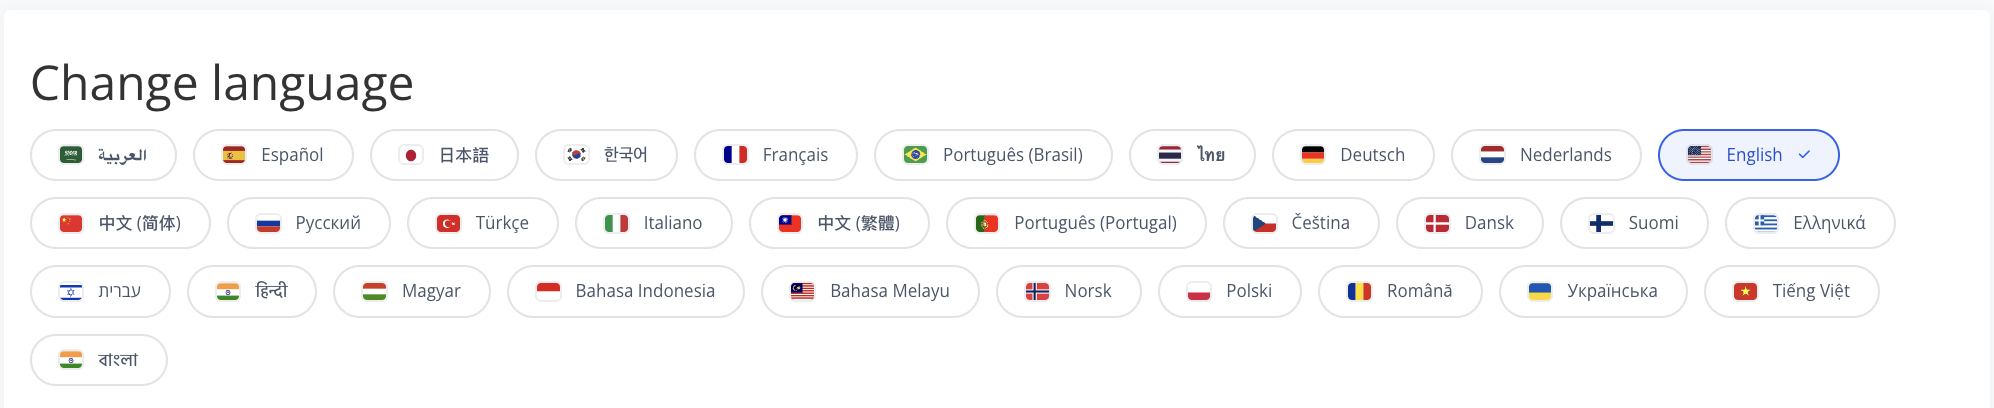
The Coursebox platform interface is now available in 17 additional languages, bringing the total to well over 30 supported locales. In-app notifications are also translated across 31 languages.
What's new:
- 17 new languages added to the platform UI (menus, buttons, labels, and system text)
- In-app notification translations expanded to cover 31 languages
- Learners and admins see the interface in their selected language without any setup by the course creator
How it works:
Log in to your Coursebox portal
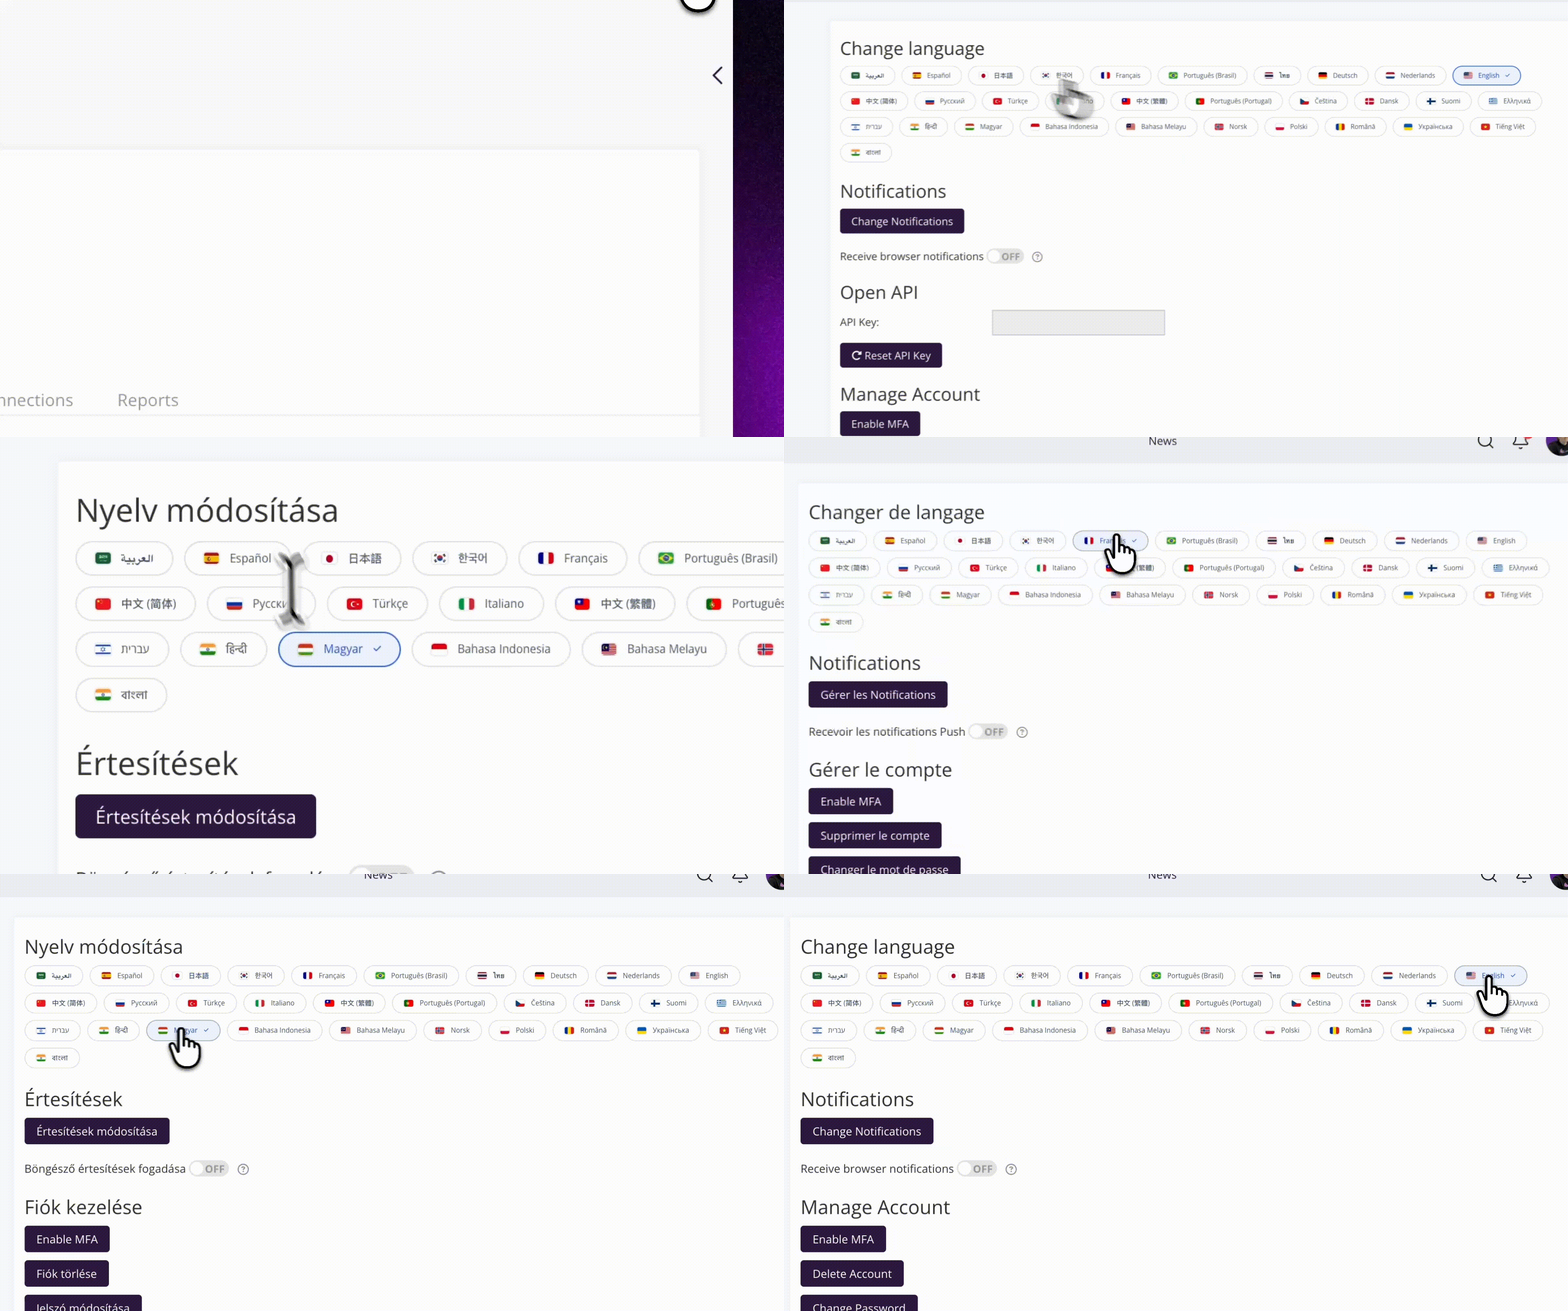
Click Srofile Settings
Change the platform language to any of the supported languages
Admins can set a default language for their portal in the platform settings
What you can do:
- Serve learners in more regions without needing to translate the platform yourself
- Combine with Google Translate (launched May 2026) for course content translation alongside the now-localised interface
- Run a single portal for multilingual teams and have each user see the UI in their own language
Document to Course Creation - Improved (June 21, 2026)
The AI now generates course content that more closely follows your source document, including its structure, text, and images.
What's new:
- Course text can now replicate your document content more precisely
- Course outline is generated based more strongly on the document structure
- Image extraction from uploaded documents is more reliable
How it works:
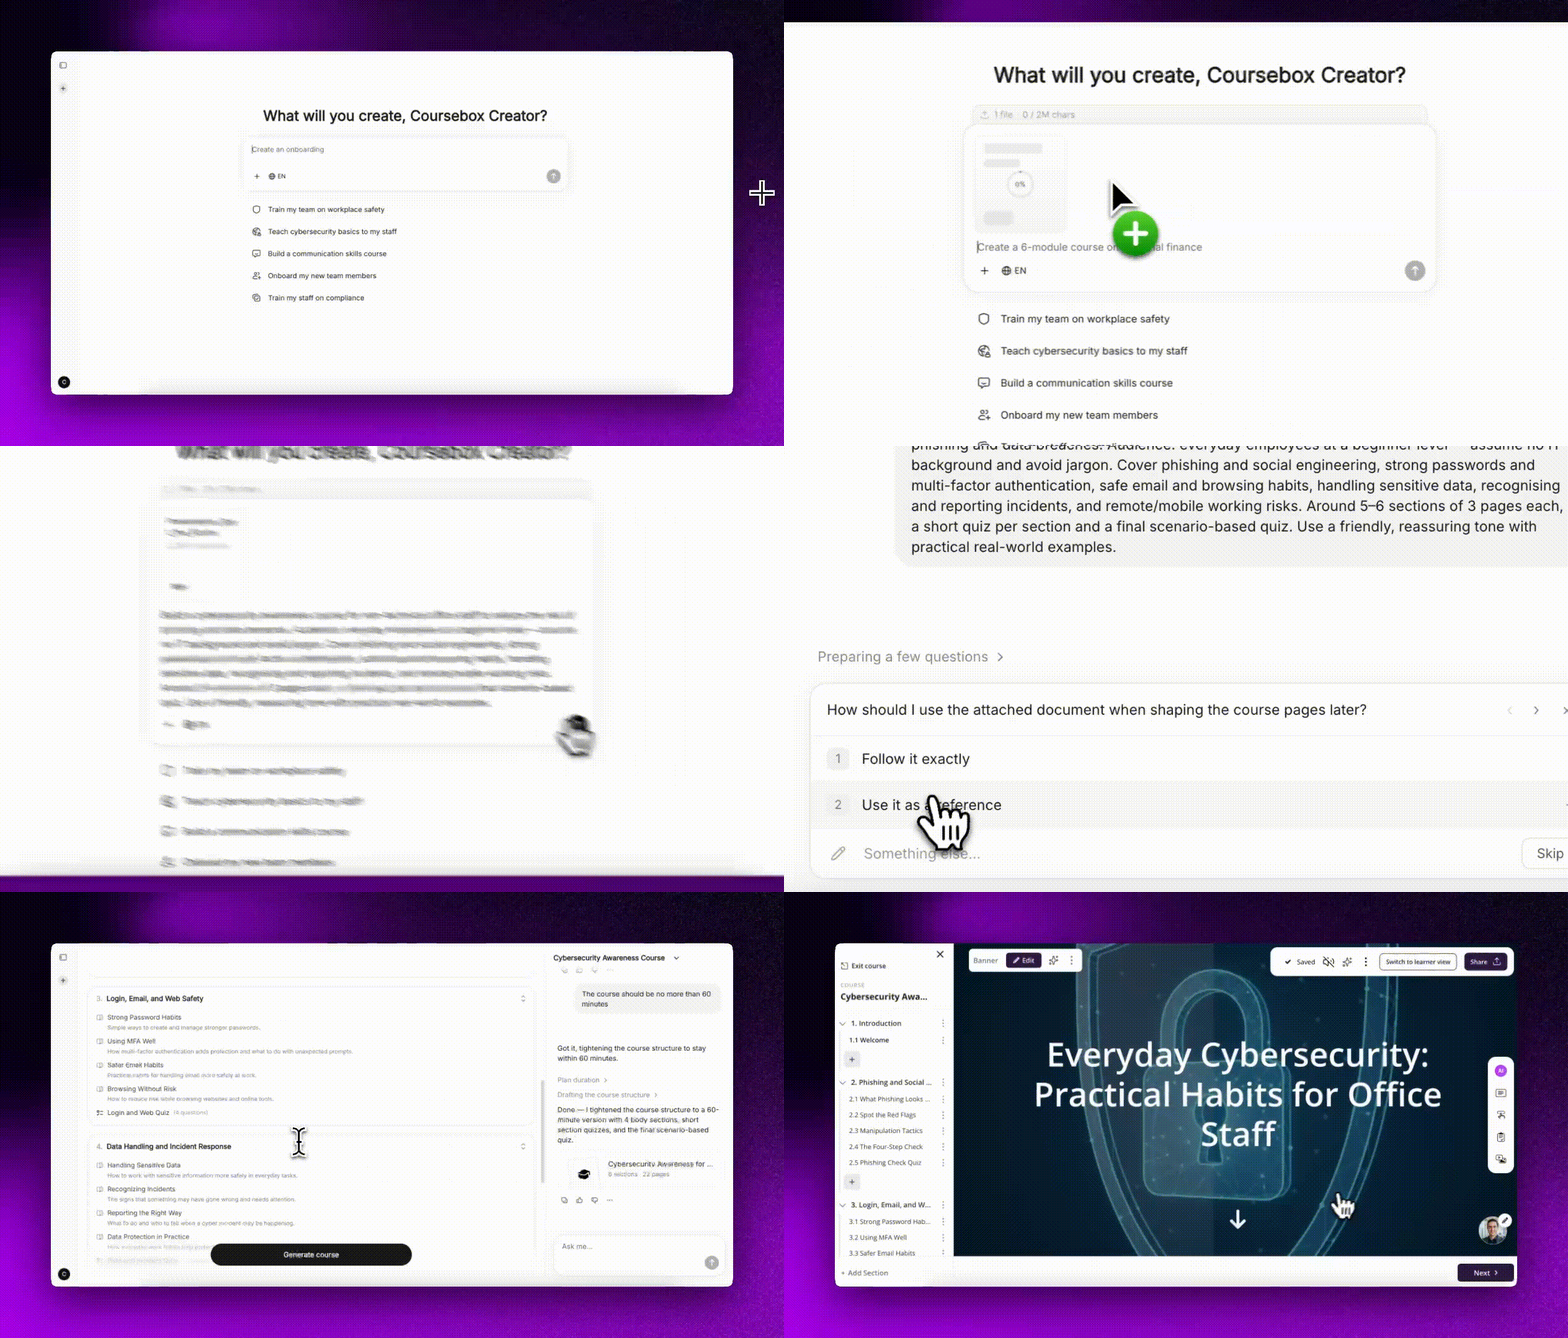
1. Open Coursebox and start a new course
2. Upload your source document (PDF, Word, PowerPoint, or plain text — up to 50MB) or add a YouTube link or web URL
3. Enter your prompt, specifying your audience and key topics for best results
4. The AI generates a course outline and content based closely on your document
5. Review the generated course and use the editor to refine any content
What you can do:
- Turn an existing document into a structured course without manually recreating its content
- Preserve source material text and images in the generated course with less cleanup
- Use your document's structure as the foundation for the course outline
Self-Hosted SCORM (June 19, 2026)
Export your course as a standalone SCORM package that runs on your own server or LMS without needing an active connection back to Coursebox.
What's new
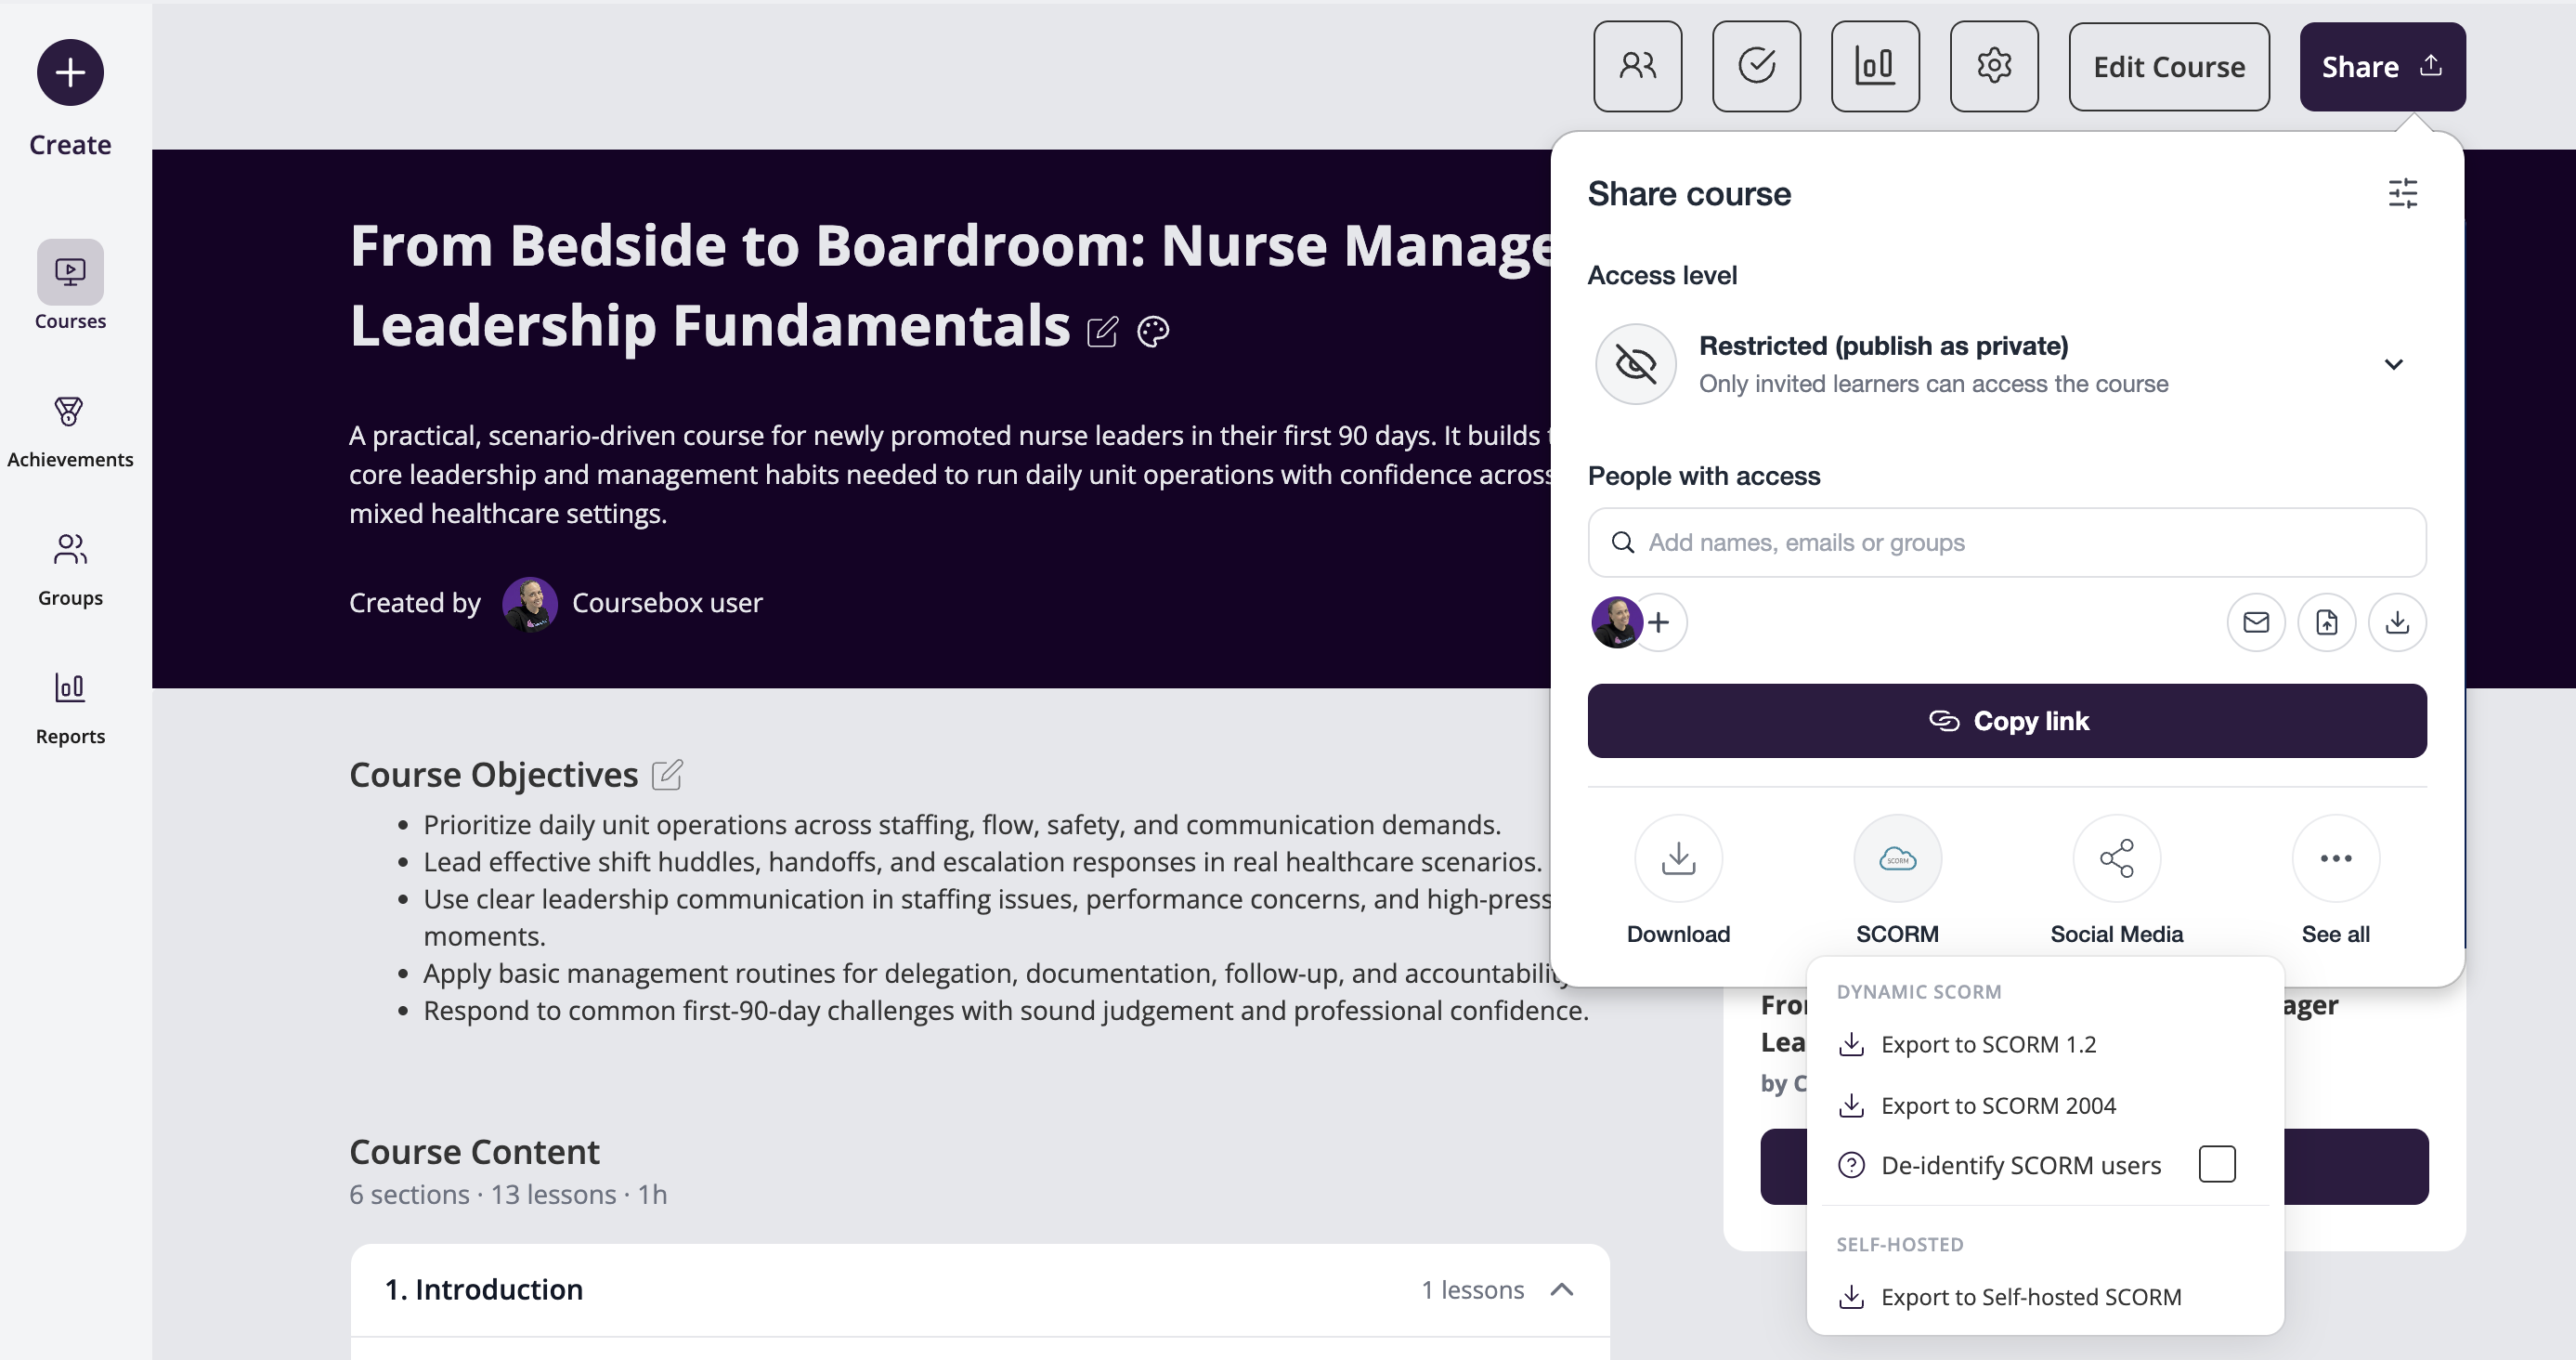
- Export courses as a fully self-contained SCORM package
- Host your course on any server or LMS without a Coursebox dependency
- Built-in limitations dialog surfaces unsupported features before you download
How it works
1. Open your course in the Course Editor
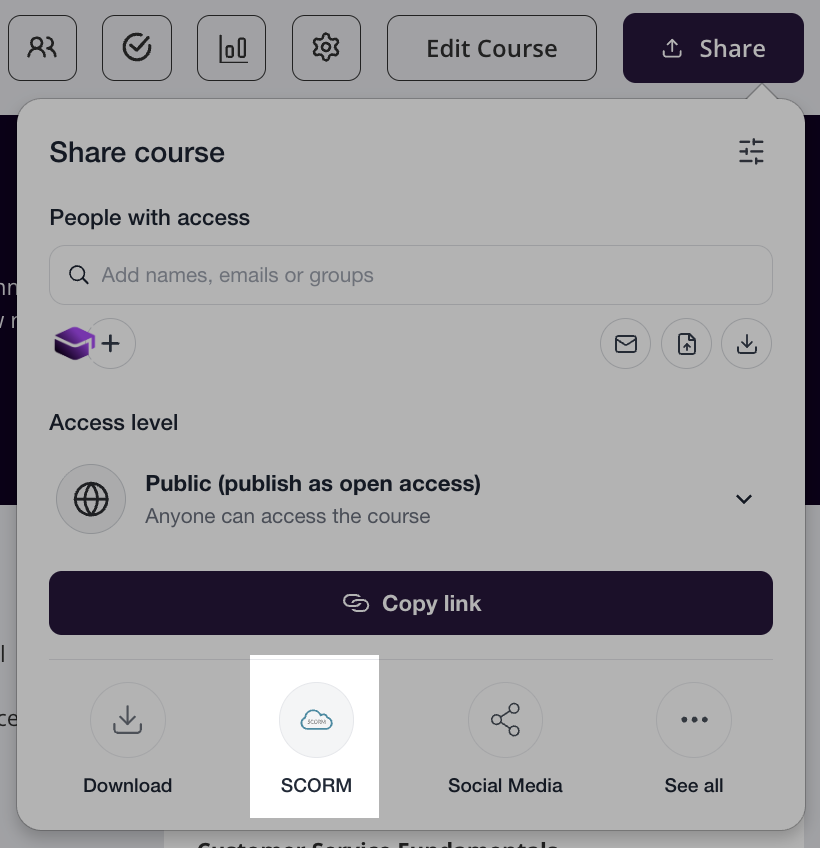
2. Click the Share button in the top right to open the Share panel
3. Click the SCORM option to expand the SCORM export menu
4. Select Export to Self-hosted SCORM
5. Review the limitations listed in the Self-Hosted SCORM Limitations dialog
6. Click Continue to proceed and download the package
What you can do
- Host your course on any SCORM-compatible LMS without relying on Coursebox infrastructure
- Share courses with organisations that require self-hosted delivery
- Distribute fully portable course packages that work offline or in closed networks
Dynamic vs Self-hosted SCORM
Dynamic SCORM (Export to SCORM 1.2 or 2004) stays connected to Coursebox, so every feature keeps working. Choose it if you want the full experience.
Self-hosted SCORM runs completely on its own, with no Coursebox connection, which makes it ideal for offline use or closed networks. The following features rely on a live connection, so they work with Dynamic SCORM rather than in a self-hosted package:
- Listen mode (text-to-speech)
- Short answer questions in quizzes
- Assignments submissions
- Discussions
- AI tutor
- Uploaded SCORM content
Admin User Management (June 19, 2026)
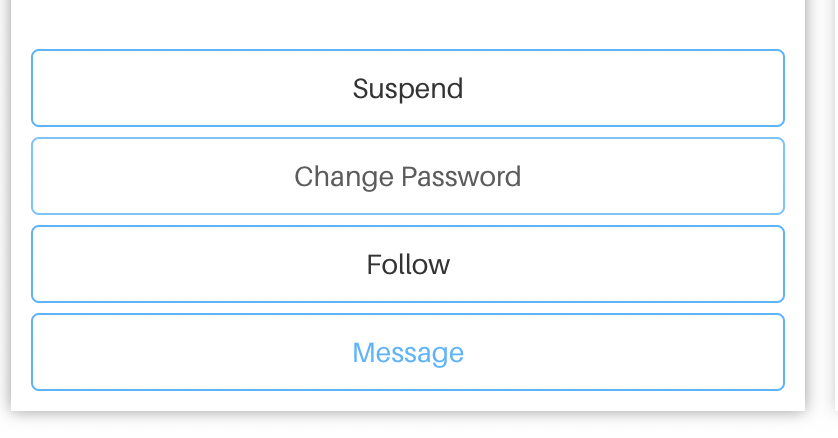
Super Admins can now fix a user's email and suspend accounts straight from the Users section, with no need to contact support.
What's new:
- Edit a user's email address in the Users section
- Suspend a user to restrict their access, without deleting the account
- Both sit with the Super Admin
How it works:
As a Super Admin, open the Users section from the left-hand menu
Find the user you want to manage in the All tab
To restrict access, click Suspend (restrict access) on their user card
To fix an email, open the user, update the email, and save
Suspended users can be reactivated later, without losing their course progress or data
What you can do:
- Correct a wrong email yourself, so learners keep their progress and access
- Restrict access for leavers or expired contracts, without deleting their records
- Handle everyday user changes from the Users section, instead of raising a support ticket
Prompt Memory (June 16, 2026)
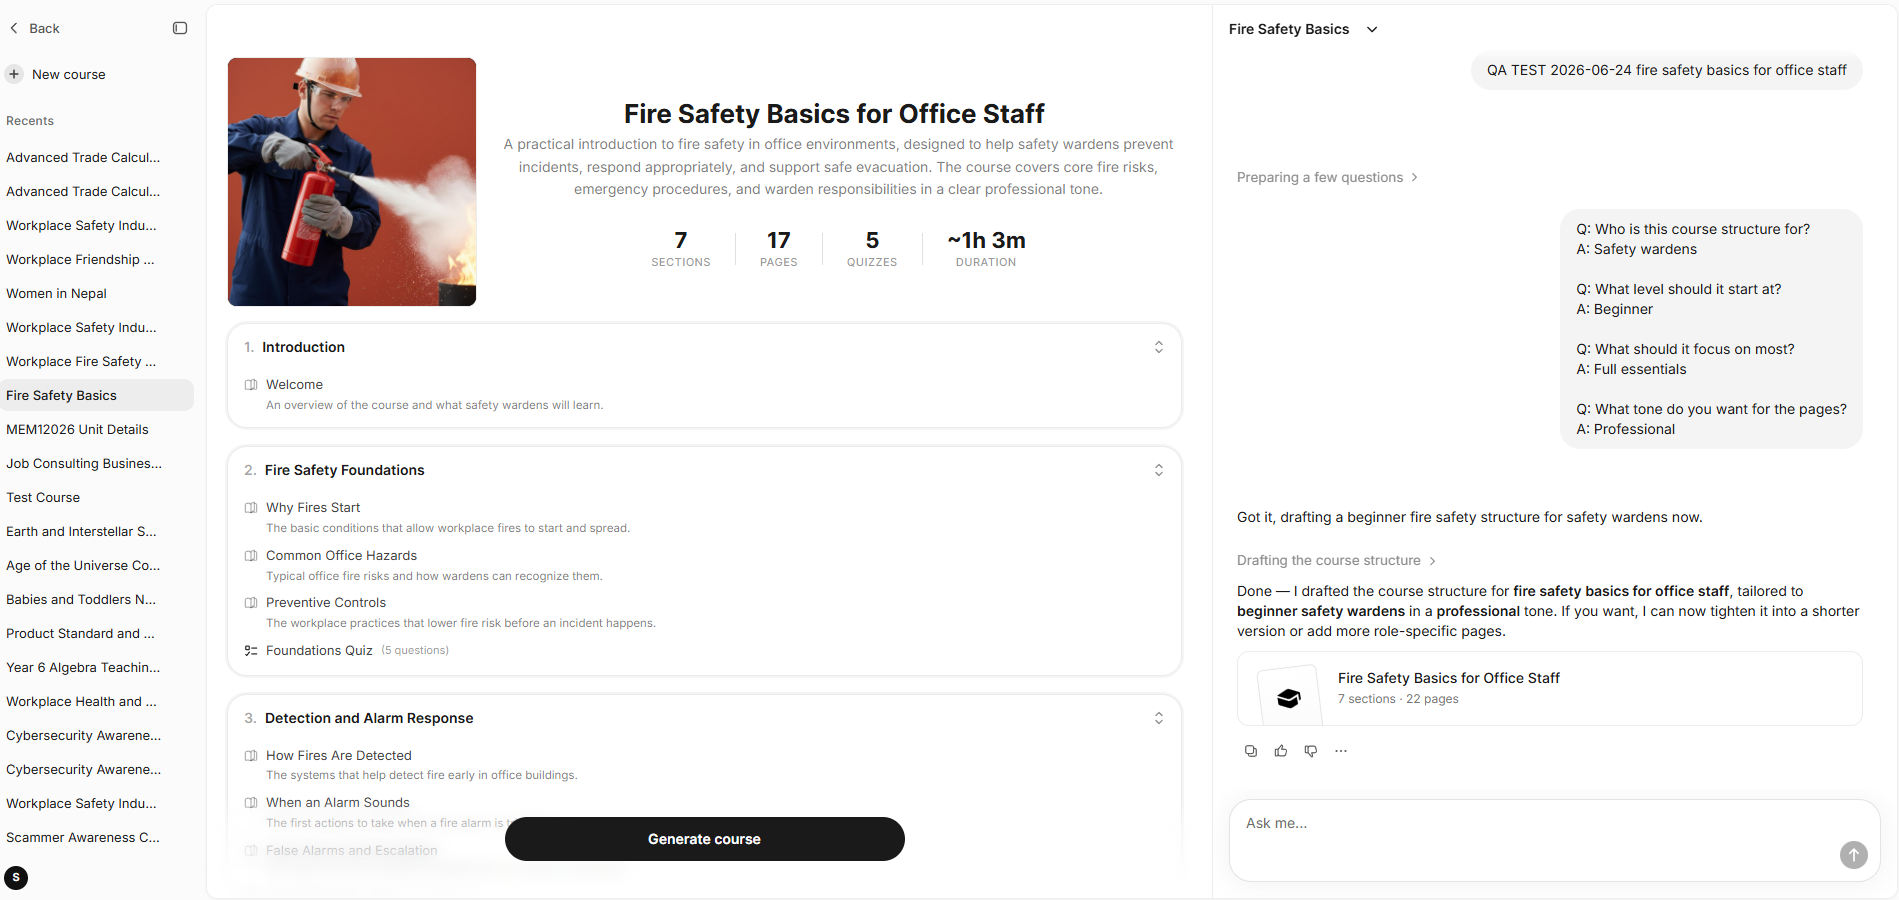
Coursebox AI retains your instructions and preferences throughout a session so you don't need to repeat yourself as you build and refine your course.
What's new:
- The AI remembers context from earlier in your session, including tone, audience, and course details
- Instructions carry forward automatically to all content generated after they're given
- You can update or override remembered settings at any point by providing a new instruction
How it works:
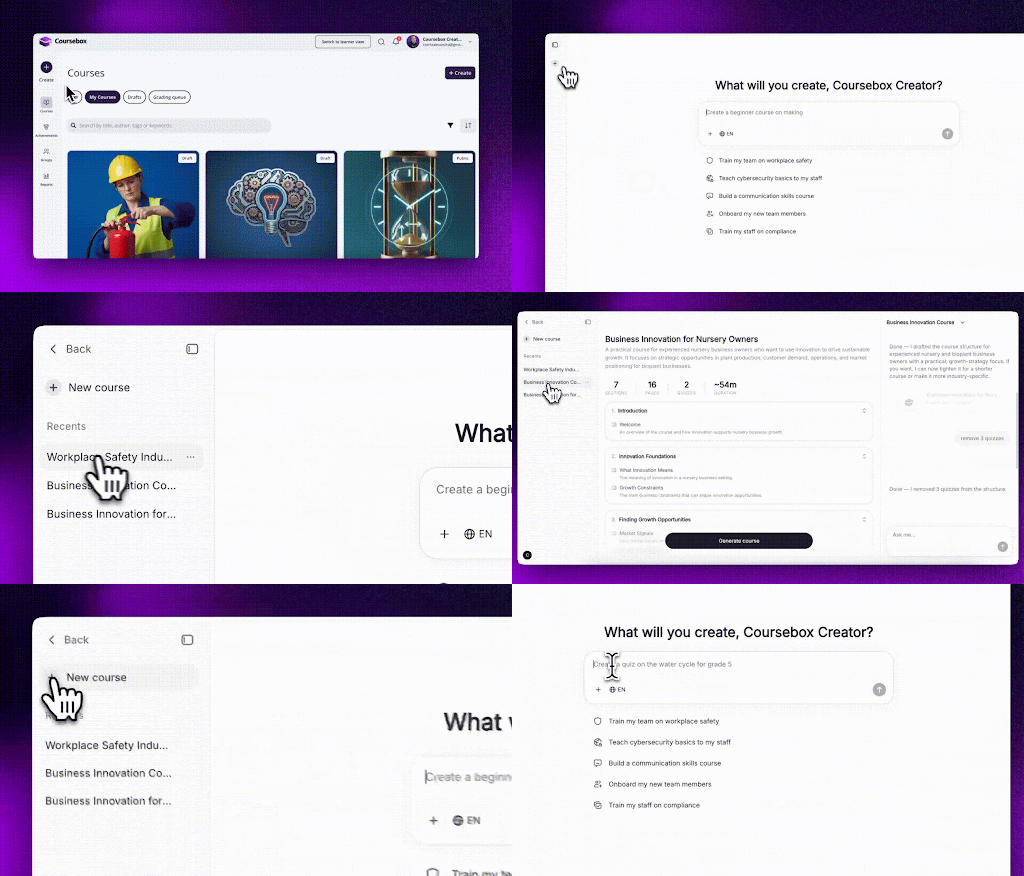
1. Start a course creation session in Coursebox AI
2. Provide any preferences or instructions early on — such as audience level, tone, or course topic
3. Continue building your course as normal; the AI applies your earlier instructions to new content automatically
4. To change a setting, simply type a new instruction in your prompt — the AI will use the updated context going forward
What you can do:
- Set your course tone or audience once and have it applied throughout the entire session
- Refine content without re-explaining your course context each time
- Override any previous instruction mid-session by providing an updated prompt
- Build longer, more consistent courses without losing context between requests
Learner Mode (May 24, 2026)
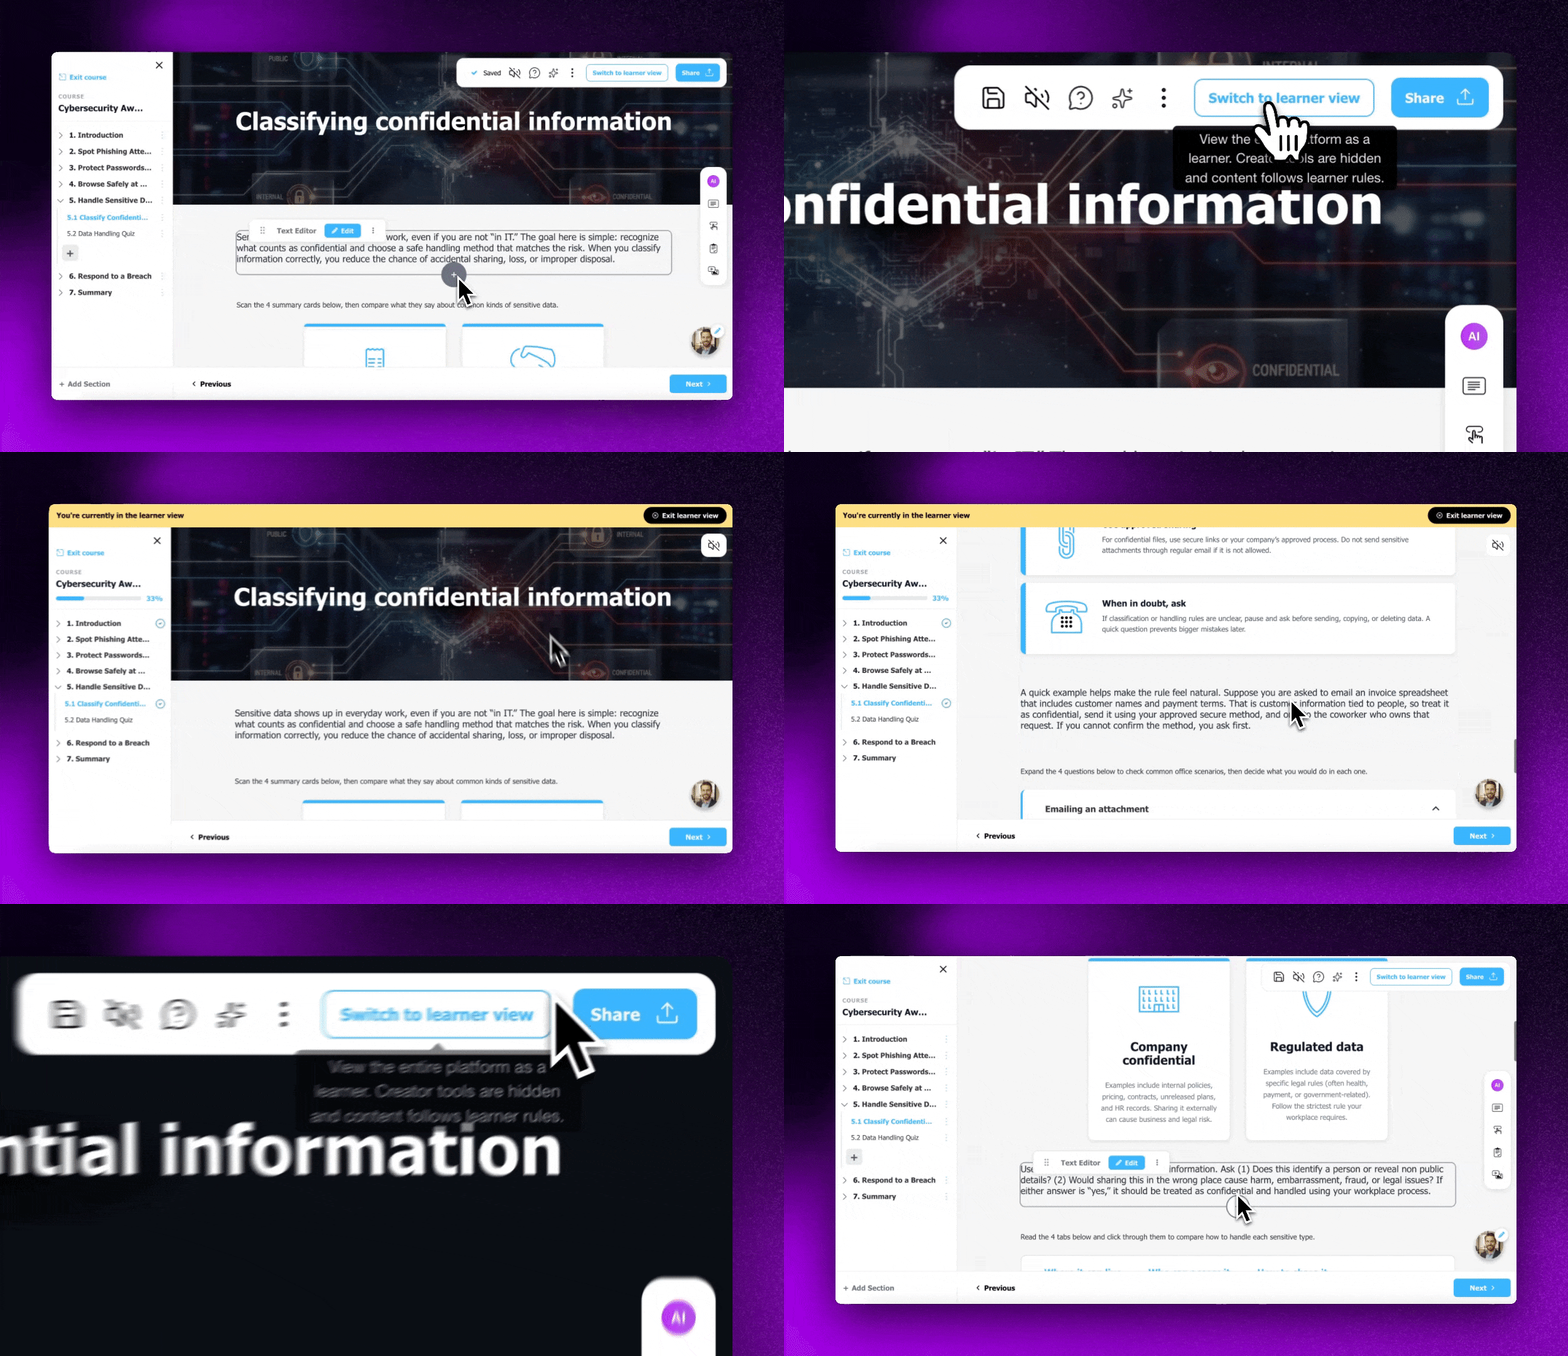
Creators can now switch into a learner view directly while editing a course to see and test the course exactly as learners experience it.
What's new
- New Learner Mode toggle lets creators preview their course from the learner's perspective without leaving the editor
- Hands Free Mode is accessible from within Learner Mode via the toggle next to the speaker icon in the top right
How it works
1. Open a course in the Coursebox editor.
2. Click the Learner Mode toggle to switch into the learner view.
3. Review your course as a learner would see it.
4. Optionally, click the toggle next to the speaker icon in the top right to enable Hands Free Mode and hear the on-screen text read aloud.
5. Toggle back to exit the learner view and continue editing.
What you can do
- Test your course from a learner's point of view without publishing or switching accounts
- Catch layout, content, or flow issues before learners see them
- Use Hands Free Mode to check how your course sounds when read aloud
Google Translate for Learners (May 19, 2026)
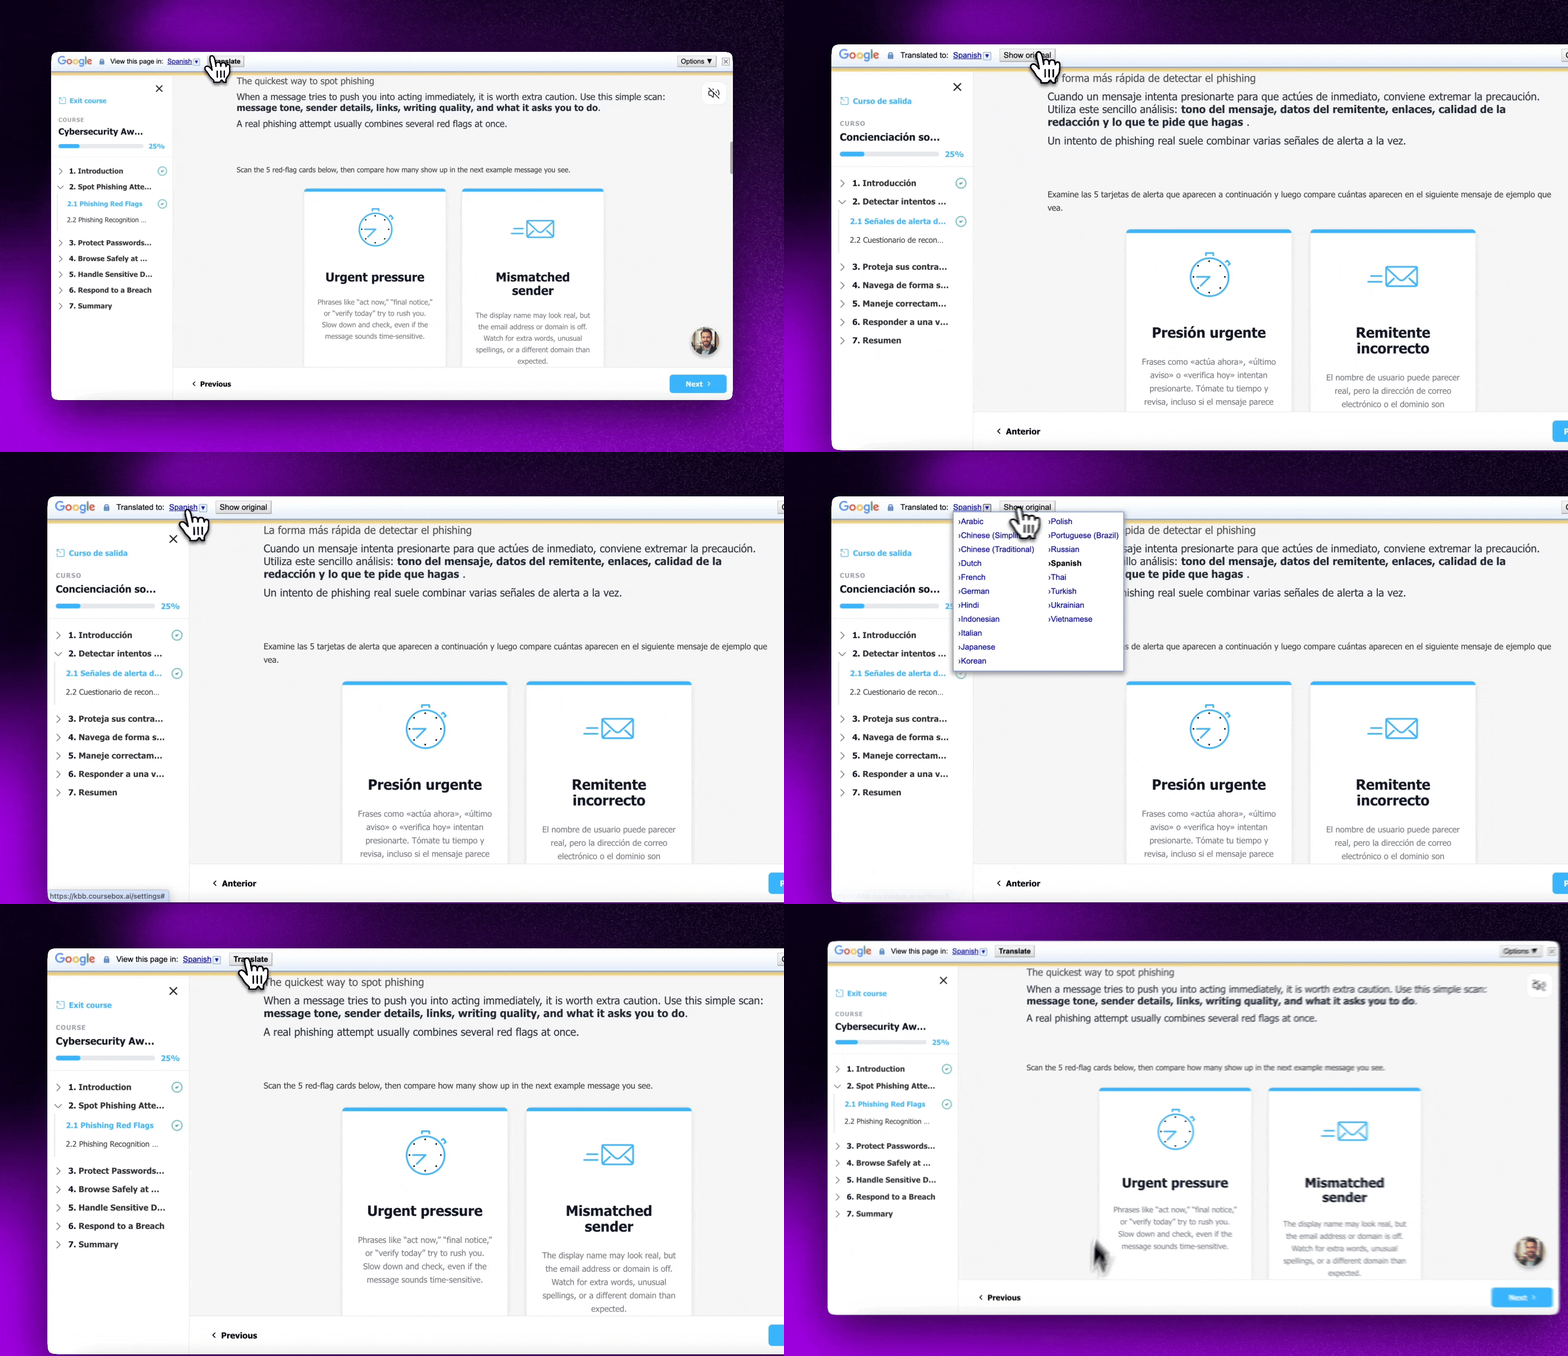
Super Admins can enable Google Translate on their platform so learners can read content in their preferred language.
What's new
- Enable Google Translate across your entire Coursebox platform from a single setting
- Option to hide the floating translate widget while keeping translation functionality active
- Restrict available languages by entering specific language codes, or leave open to Google's full default language list
How it works
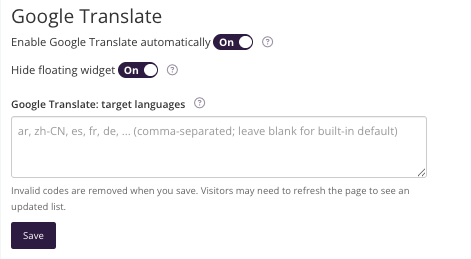
1. Log in to your Coursebox portal as a Super Admin.
2. Click your profile icon in the top right and go to Settings.
3. Scroll down to the Google Translate section.
4. Toggle Enable Google Translate to On.
5. Optionally, toggle Hide floating widget to On to remove the floating button from your portal pages.
6. Optionally, enter target language codes in the Google Translate: target languages field (comma-separated, e.g. ar, zh-CN, es, fr, de).
7. Click Save.
What you can do
- Support learners who speak different languages without modifying your course content
- Control which languages are available to learners on your platform
- Keep your portal interface clean by hiding the floating translate button if preferred
Zapier Improvements (May 16, 2026)
The Coursebox Zapier integration has been updated with new triggers and reliability improvements.
What's new
- New User Course Completed trigger — fires when a specific user finishes a course
- New Course Completed trigger — fires when any user completes a course
- ID fields now accept both numeric and UUID user IDs
- Improved performance through paginated user lookups
How it works
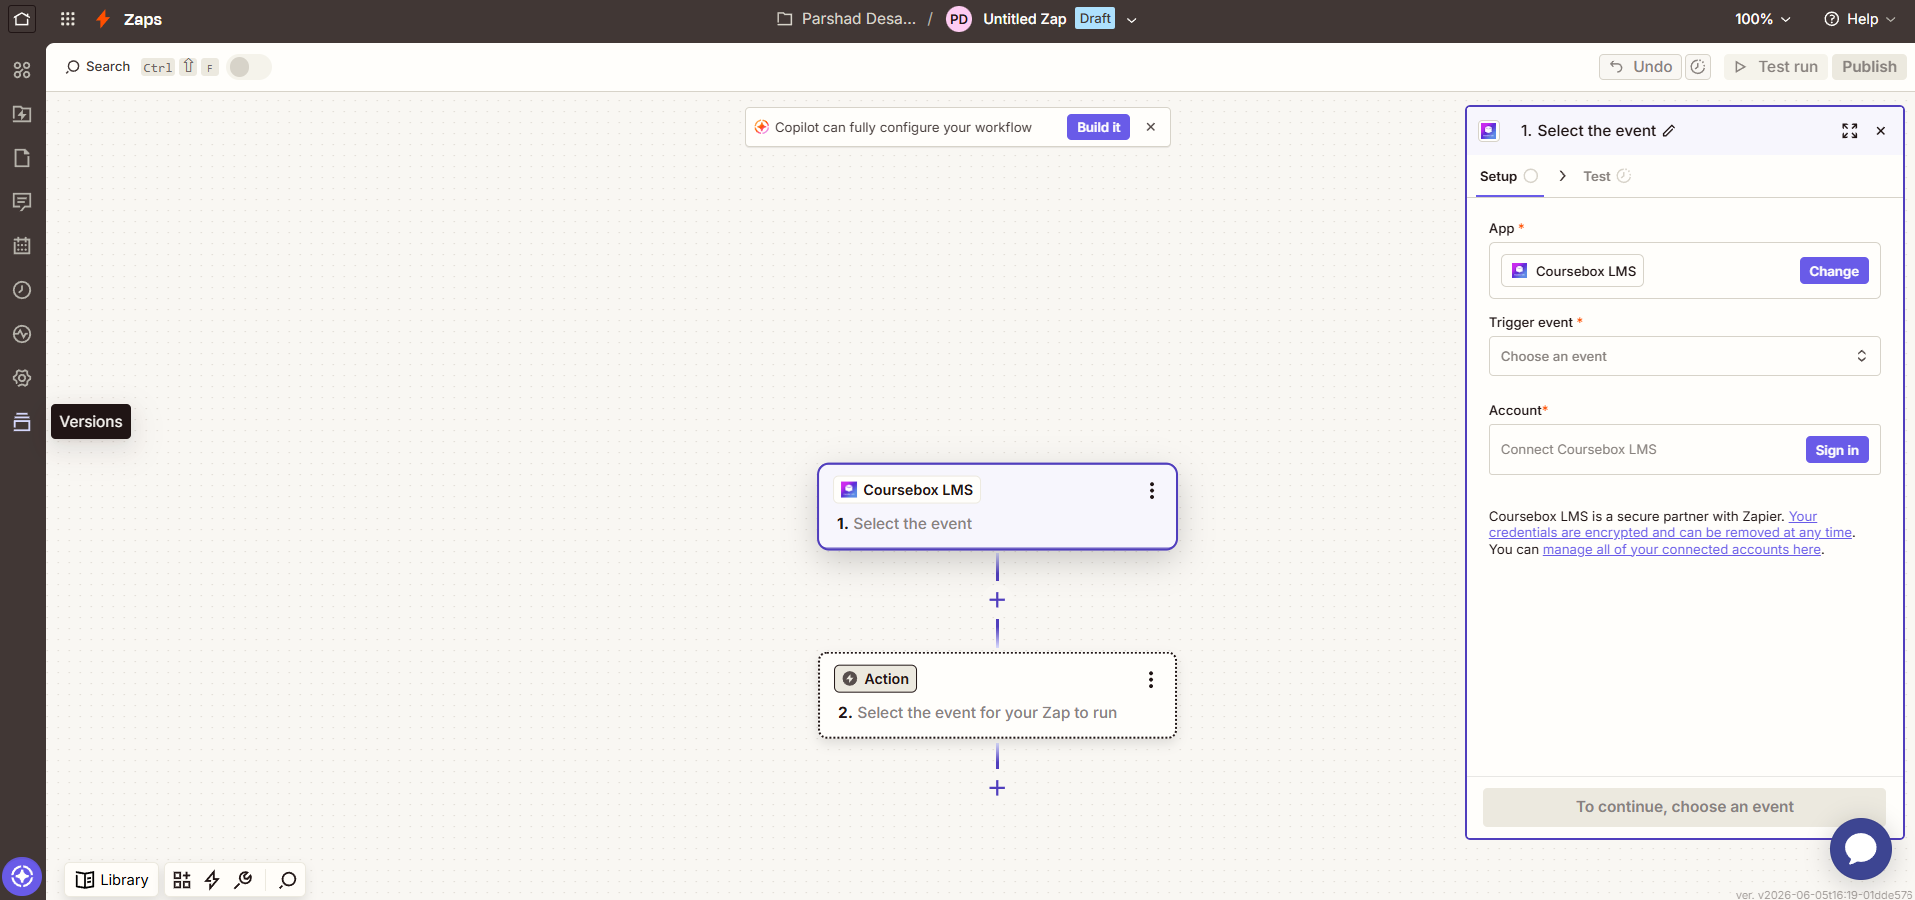
1. Open your Zap in Zapier and select Coursebox as the trigger app.
2. Choose User Course Completed or Course Completed as your trigger event.
3. Connect your Coursebox account and configure the trigger settings.
4. Use either a numeric or UUID user ID in any ID field — both formats are supported.
5. Save and turn on your Zap.
What you can do
- Trigger downstream Zapier actions the moment a learner completes a course
- Build automations that work with user IDs in either numeric or UUID format
- Rely on faster, more stable Zap performance for platforms with large user bases
Improved Course Landing Page (May 15, 2026)
Learners can now see more information about a course before they start.
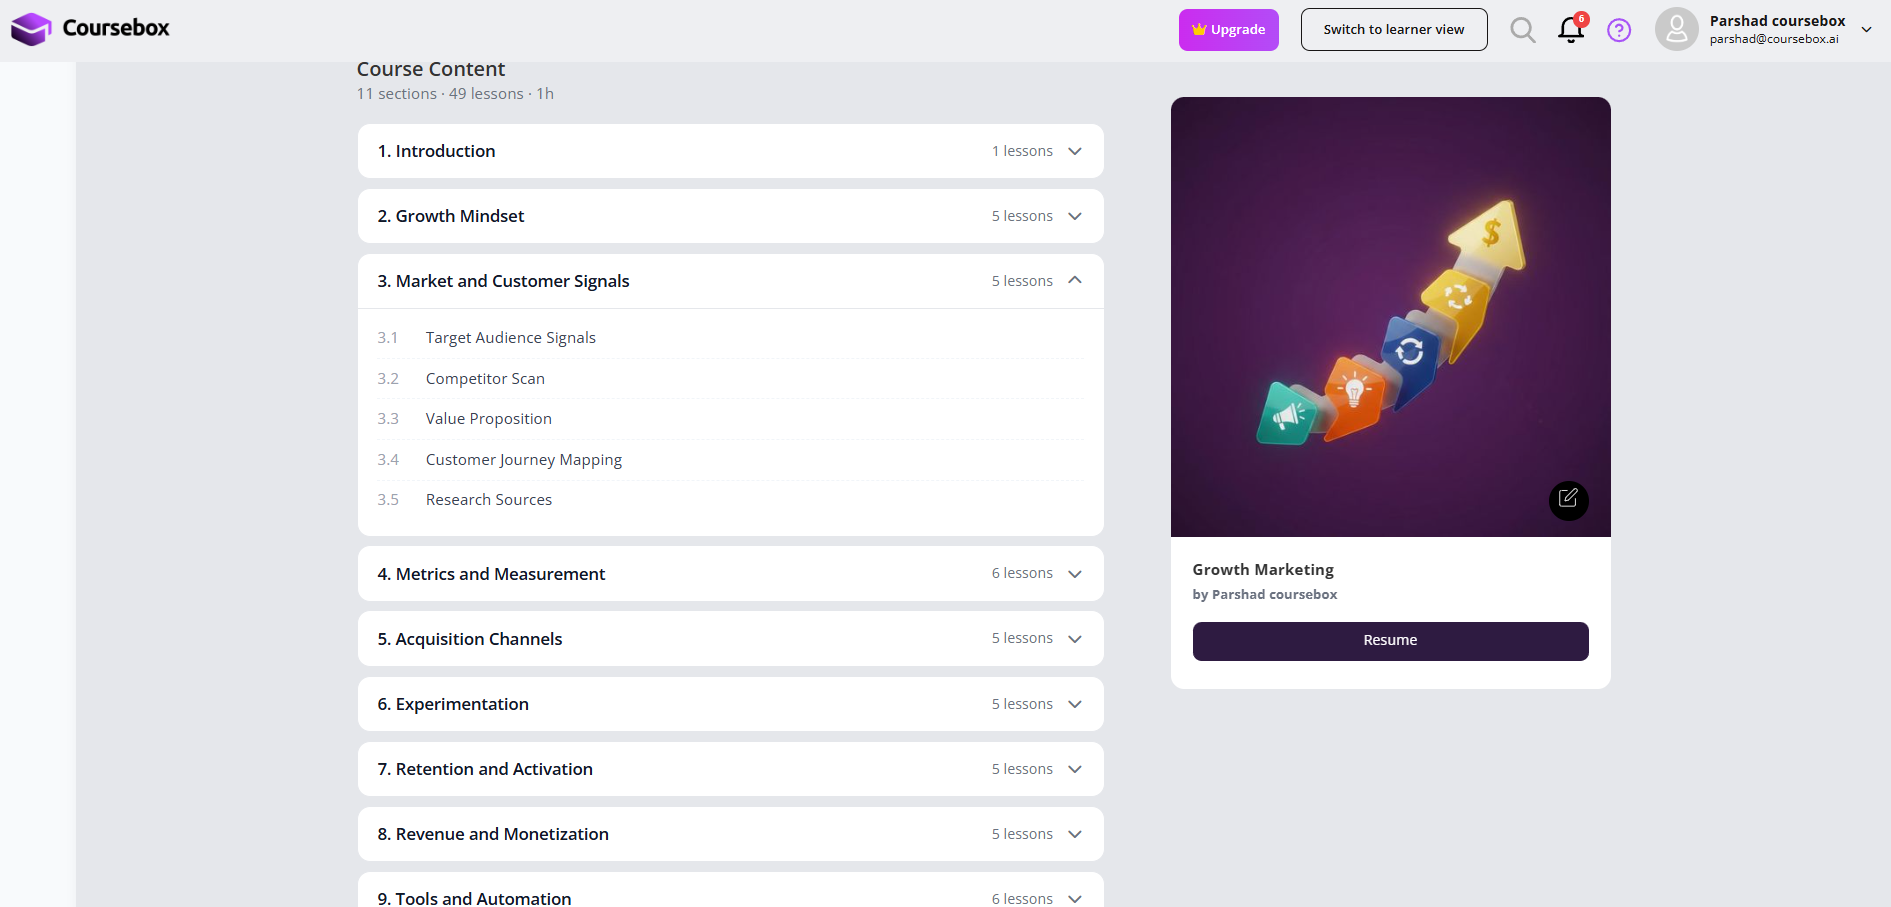
What's new
Course landing page now displays the full course structure and content outline
Course Objectives, summary, and skills are visible before enrolling or starting
Learners get a clearer picture of what a course covers upfront
How it works
Open a course as a learner
View the landing page before starting
Browse the course structure and content outline
Read the Course Objectives, summary, and skills covered
Start the course when ready
How this helps
Give learners confidence in what they are signing up for
Reduce drop-off by setting clear expectations before a course begins
Showcase course value through objectives and skills on the landing page
Help learners decide if a course is relevant to their needs
New Editing Flow (May 09, 2026)
A faster, cleaner way to edit courses with AI assistance built in.
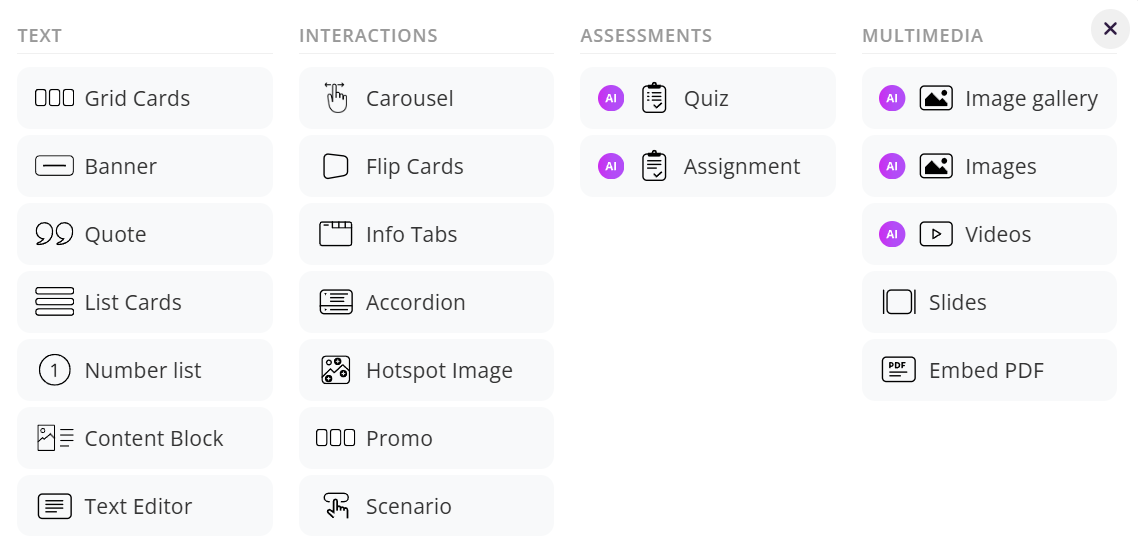
What's new
Ask Coursebox directly how to edit your course and it directly make the changes for you
Course editor has a refreshed visual design with fewer clicks to make changes
Learner View introduced so you can see your course exactly as a learner would
Courses now open in edit mode by default with a simpler, less cluttered layout
How it works
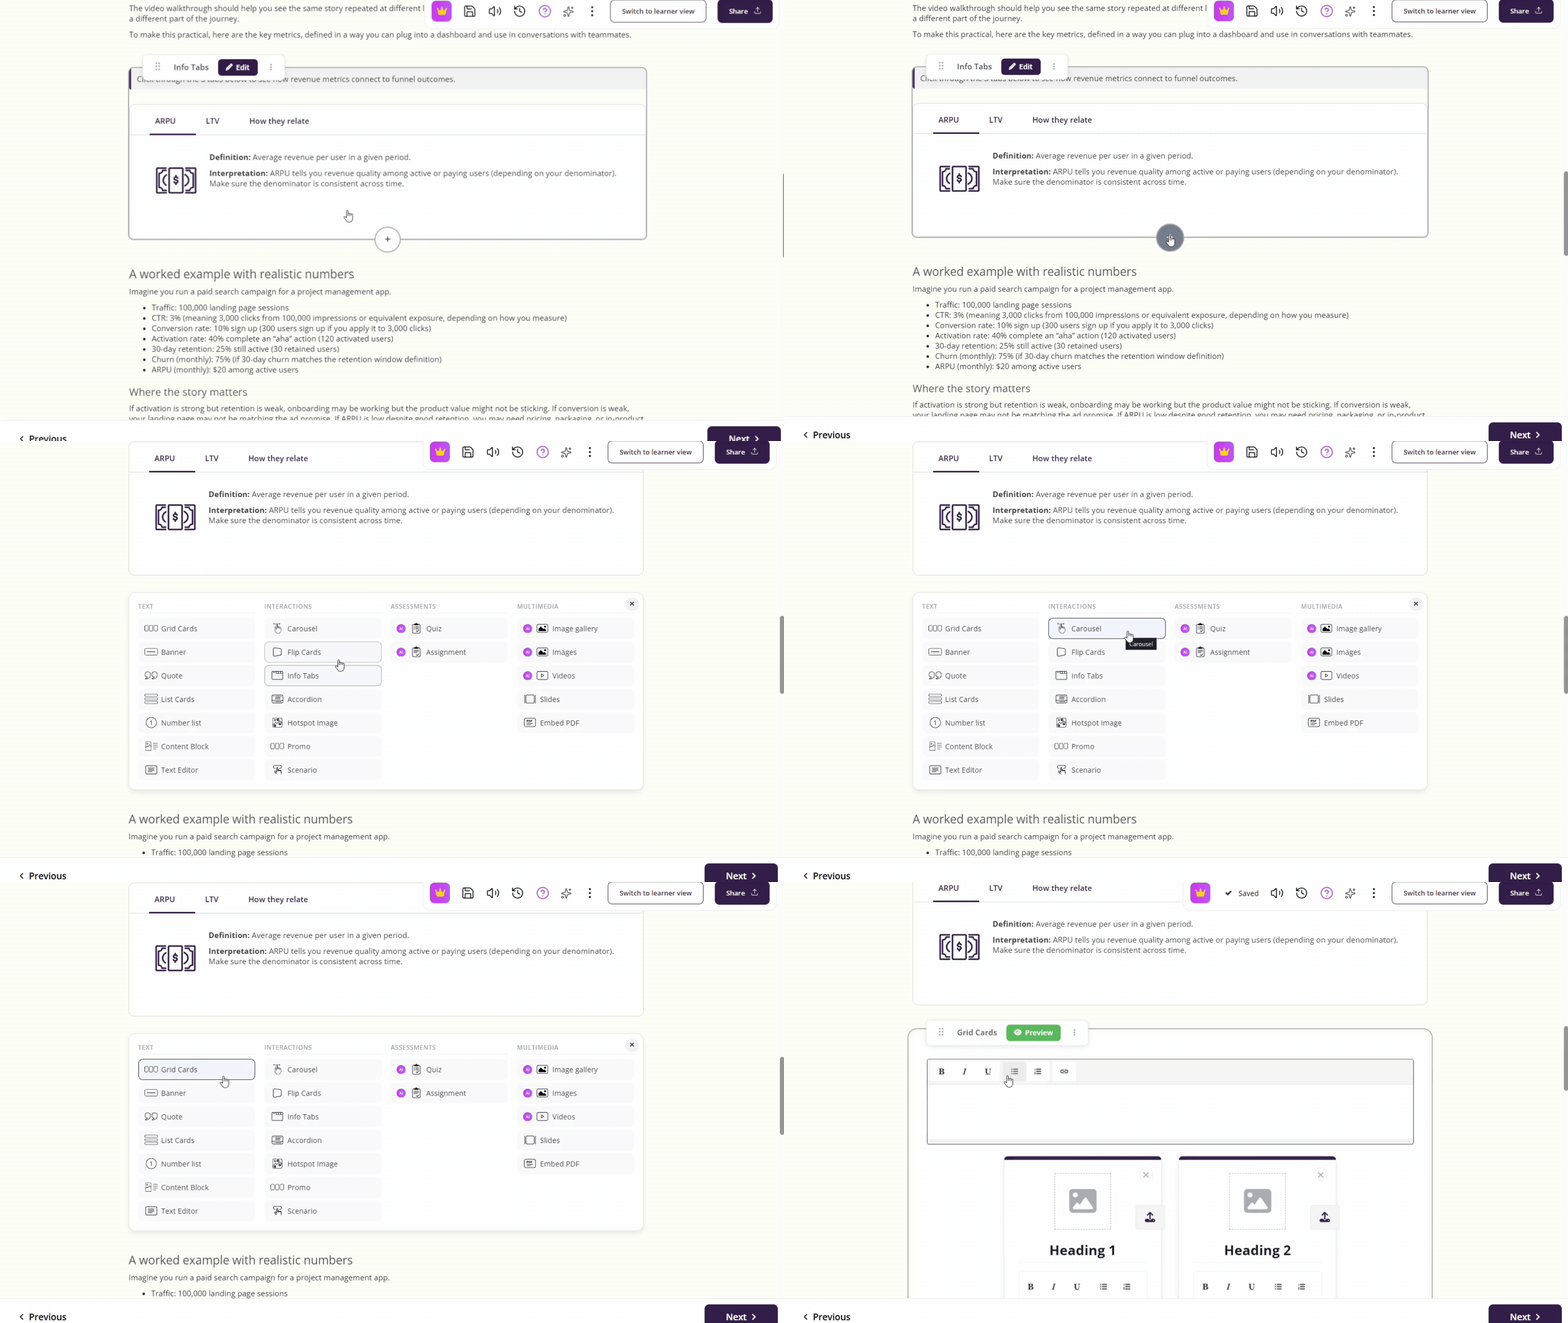
Open any course in the editor
Use the Ask Coursebox prompt to type what you want to edit or change
Follow the AI guidance to make your edits
Switch to Learner View to preview how your course appears to learners
Return to edit mode to continue making changes
What you can do
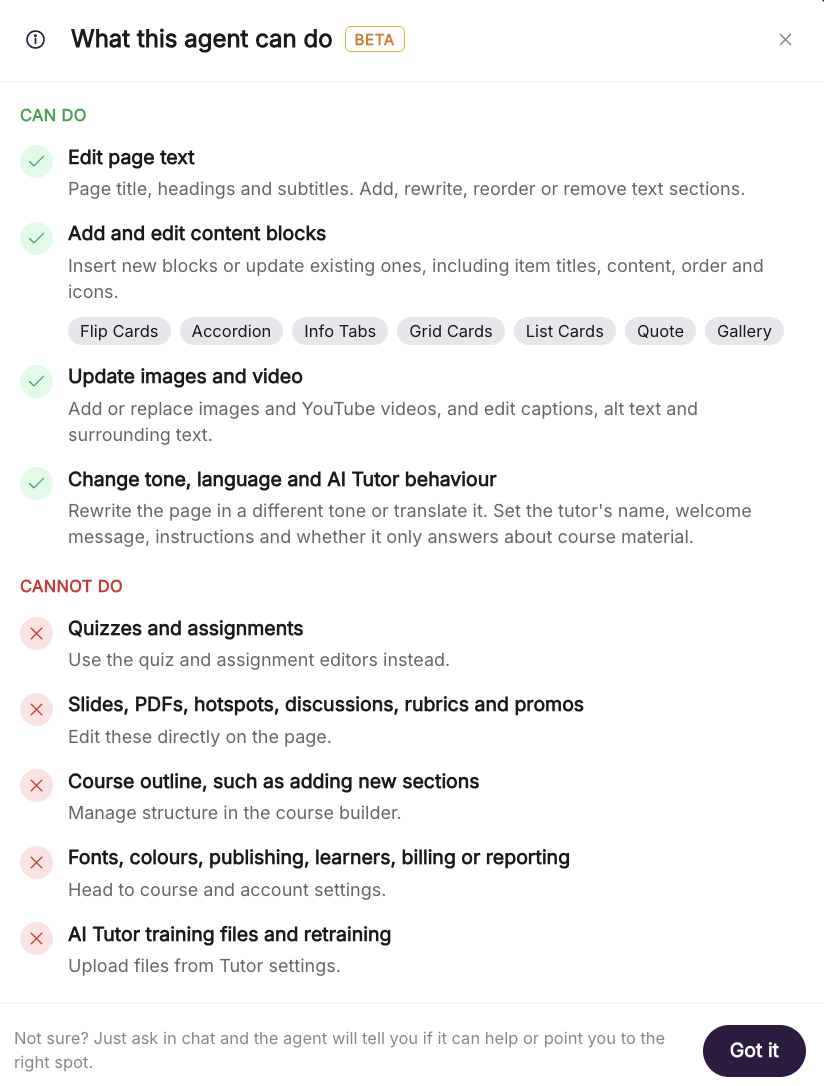
Edit courses by describing what you want instead of hunting through menus
Preview your course from a learner's perspective without leaving the editor
Make changes faster with a cleaner interface and fewer steps
Navigate the editor more intuitively with the updated layout
Ask Coursebox (April 04, 2026)
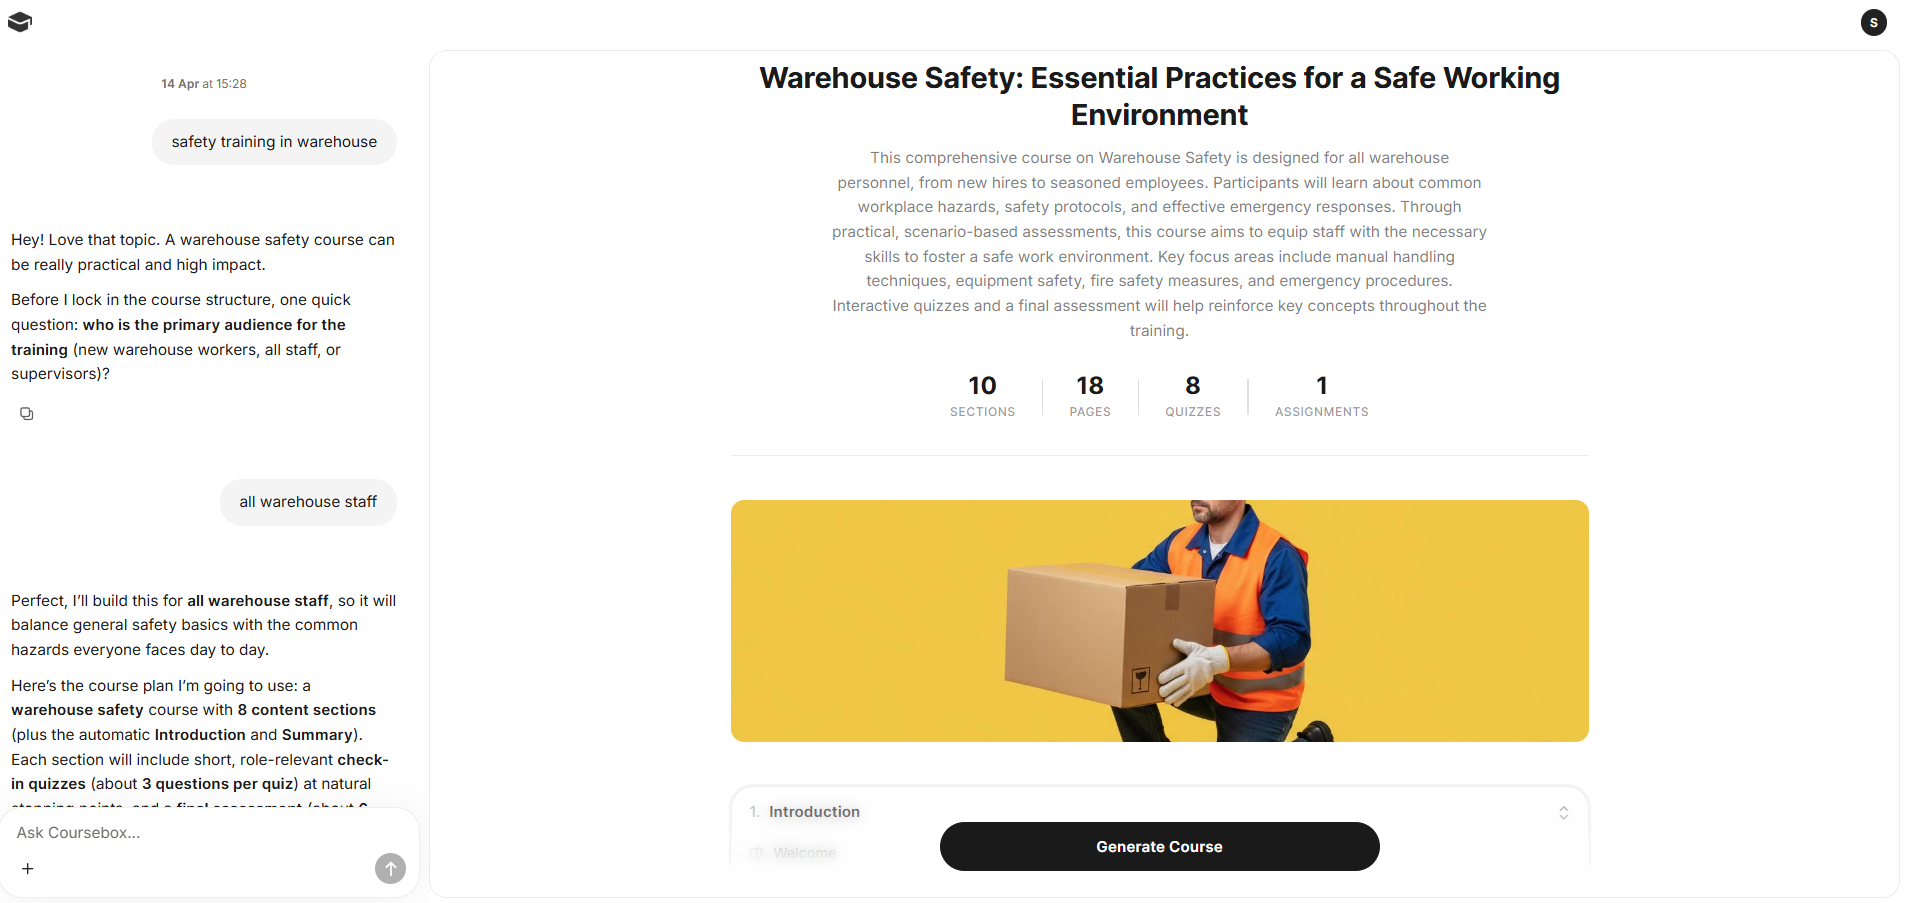
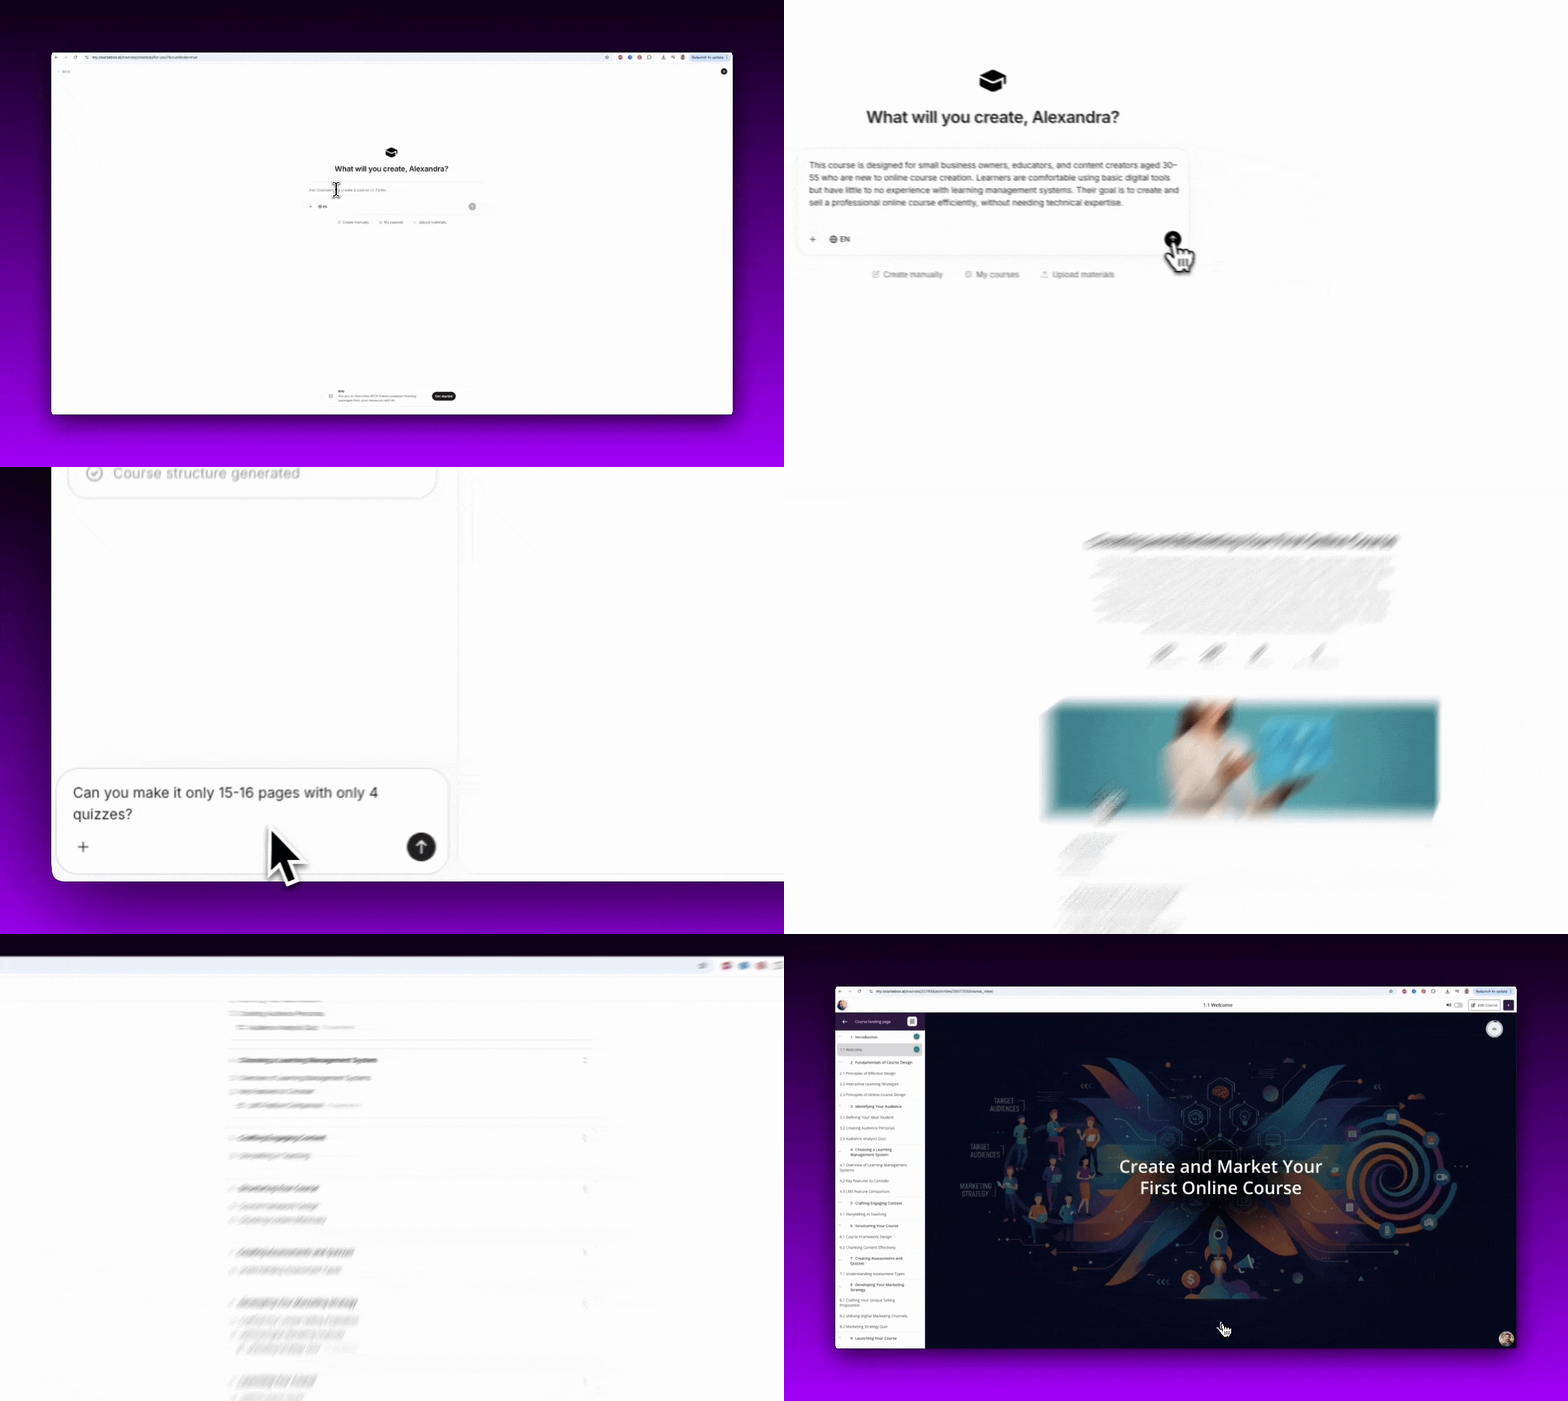
Create and refine course structures by chatting directly with Coursebox AI.
What's new
A more conversational way to create courses using AI
Improved course structure UX with better organisation
Easier editing and refinement of course structure through chat
How it works
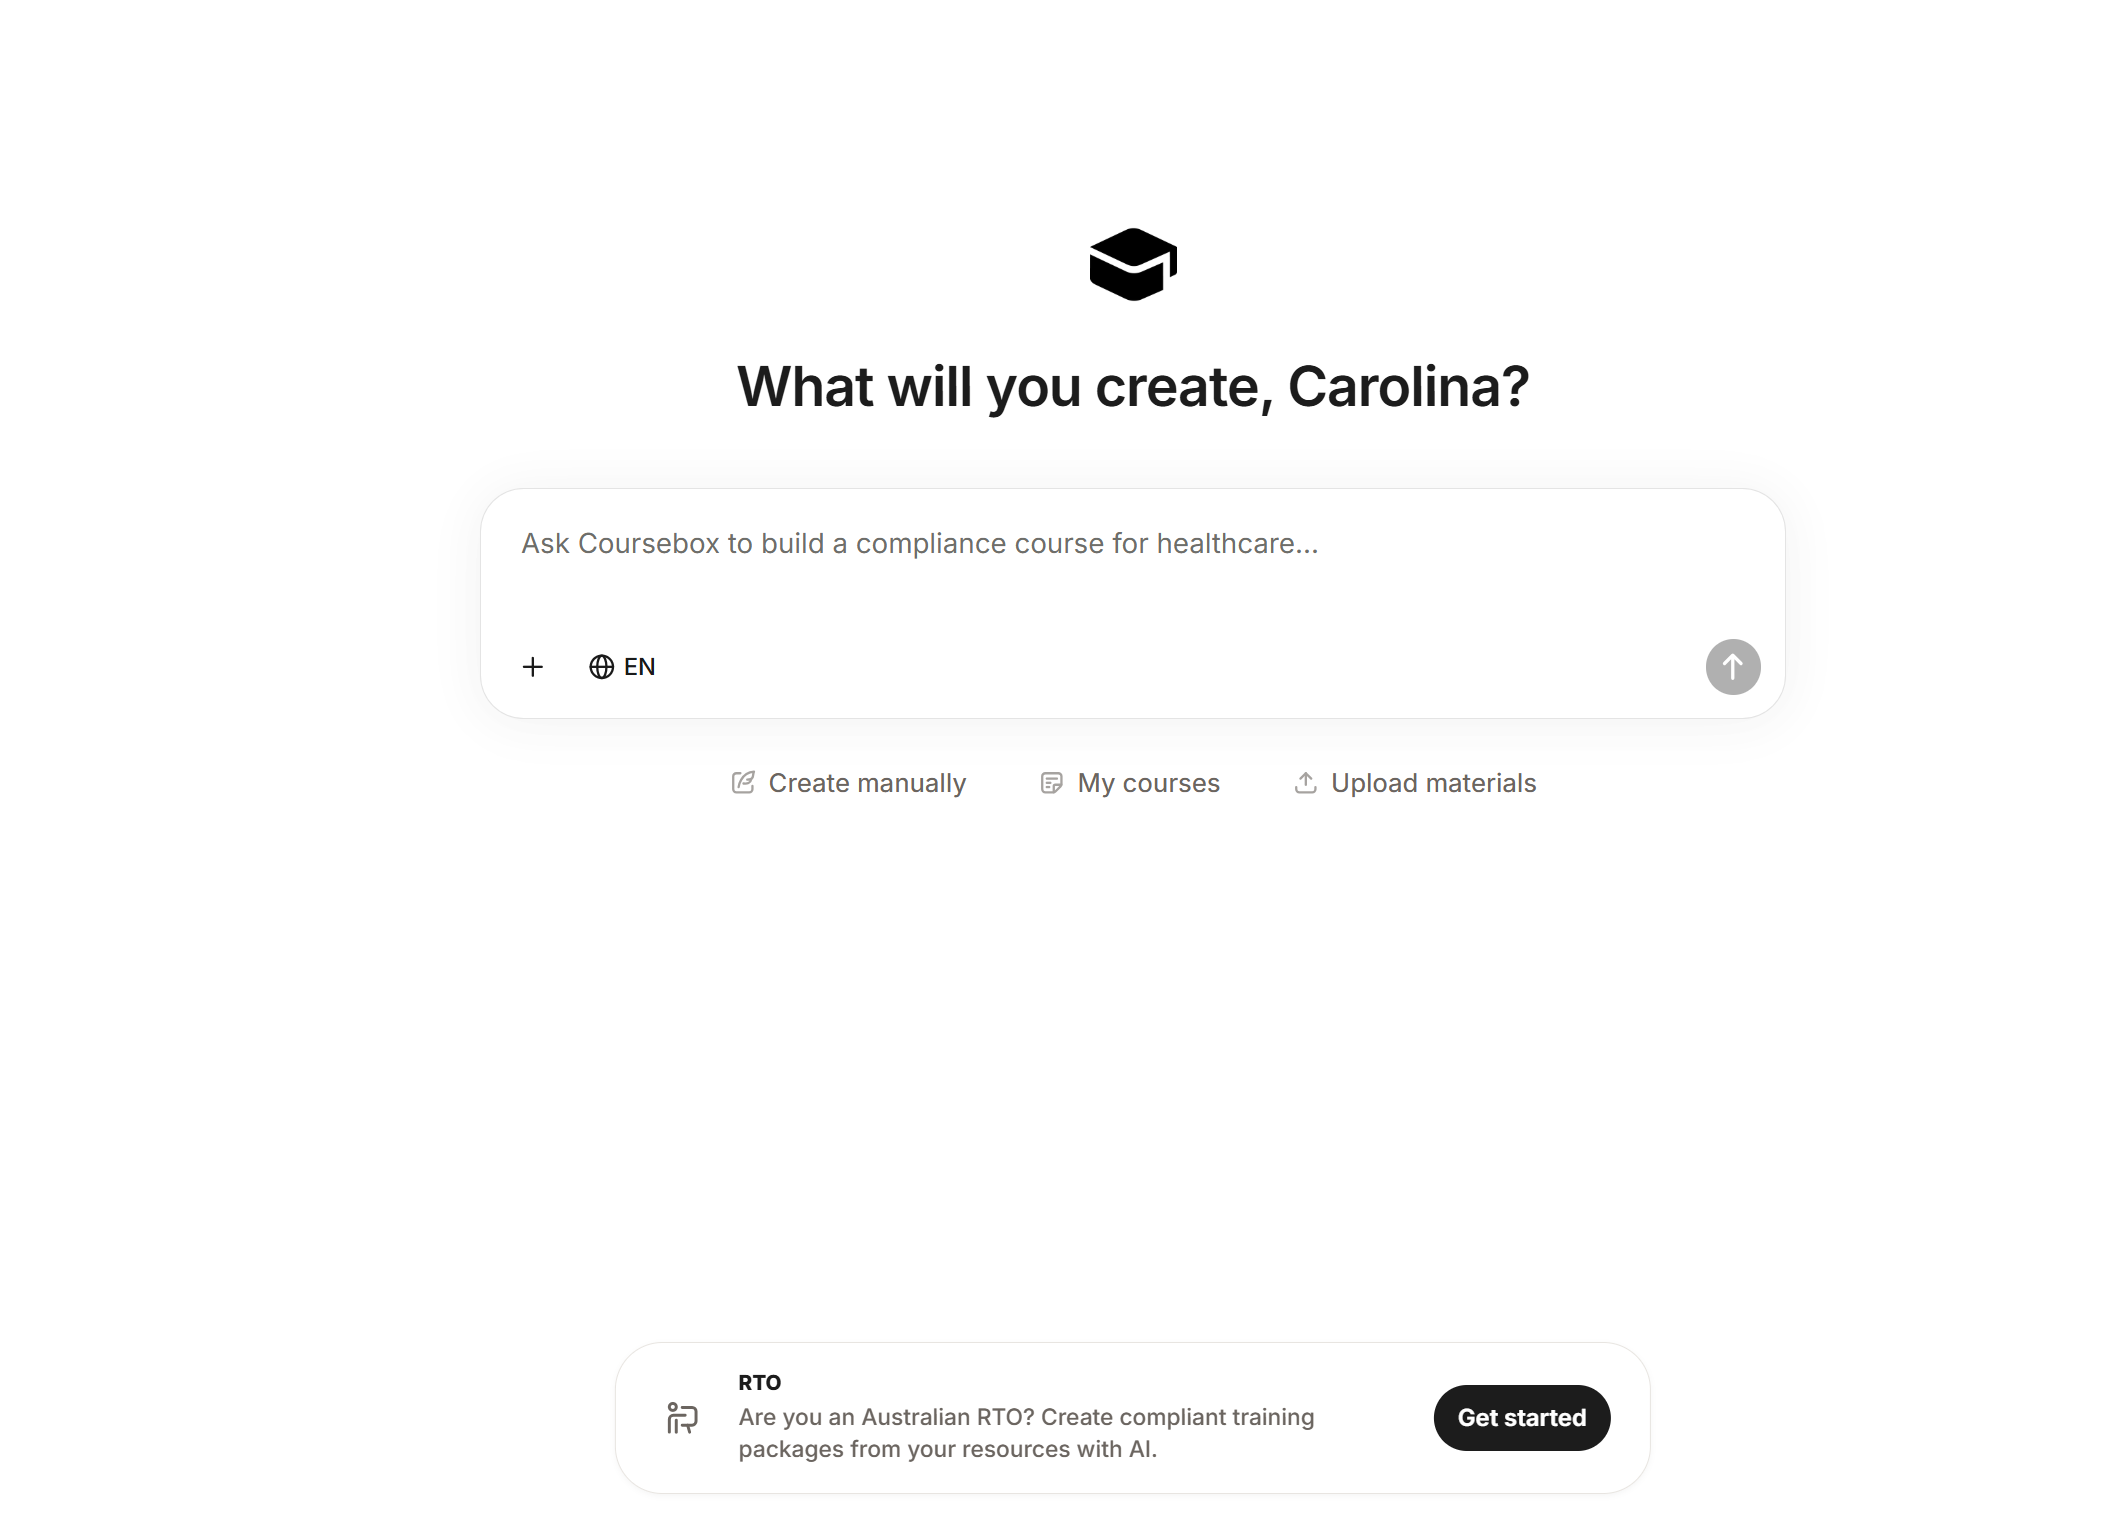
Start from the dashboard
Enter a course description in the prompt box
Select your preferred language
(Optional) Upload files or add links
Continue the conversation to refine your course
Review the generated structure
Click Generate Course to finalise
What you can do
Create complete courses without manual setup
Adjust structure, content, and flow through chat
Guide the AI with feedback and follow-up prompts
Generate more accurate content using source materials
Build courses faster with fewer steps
Preview
Magic Link Login (April 02, 2026)
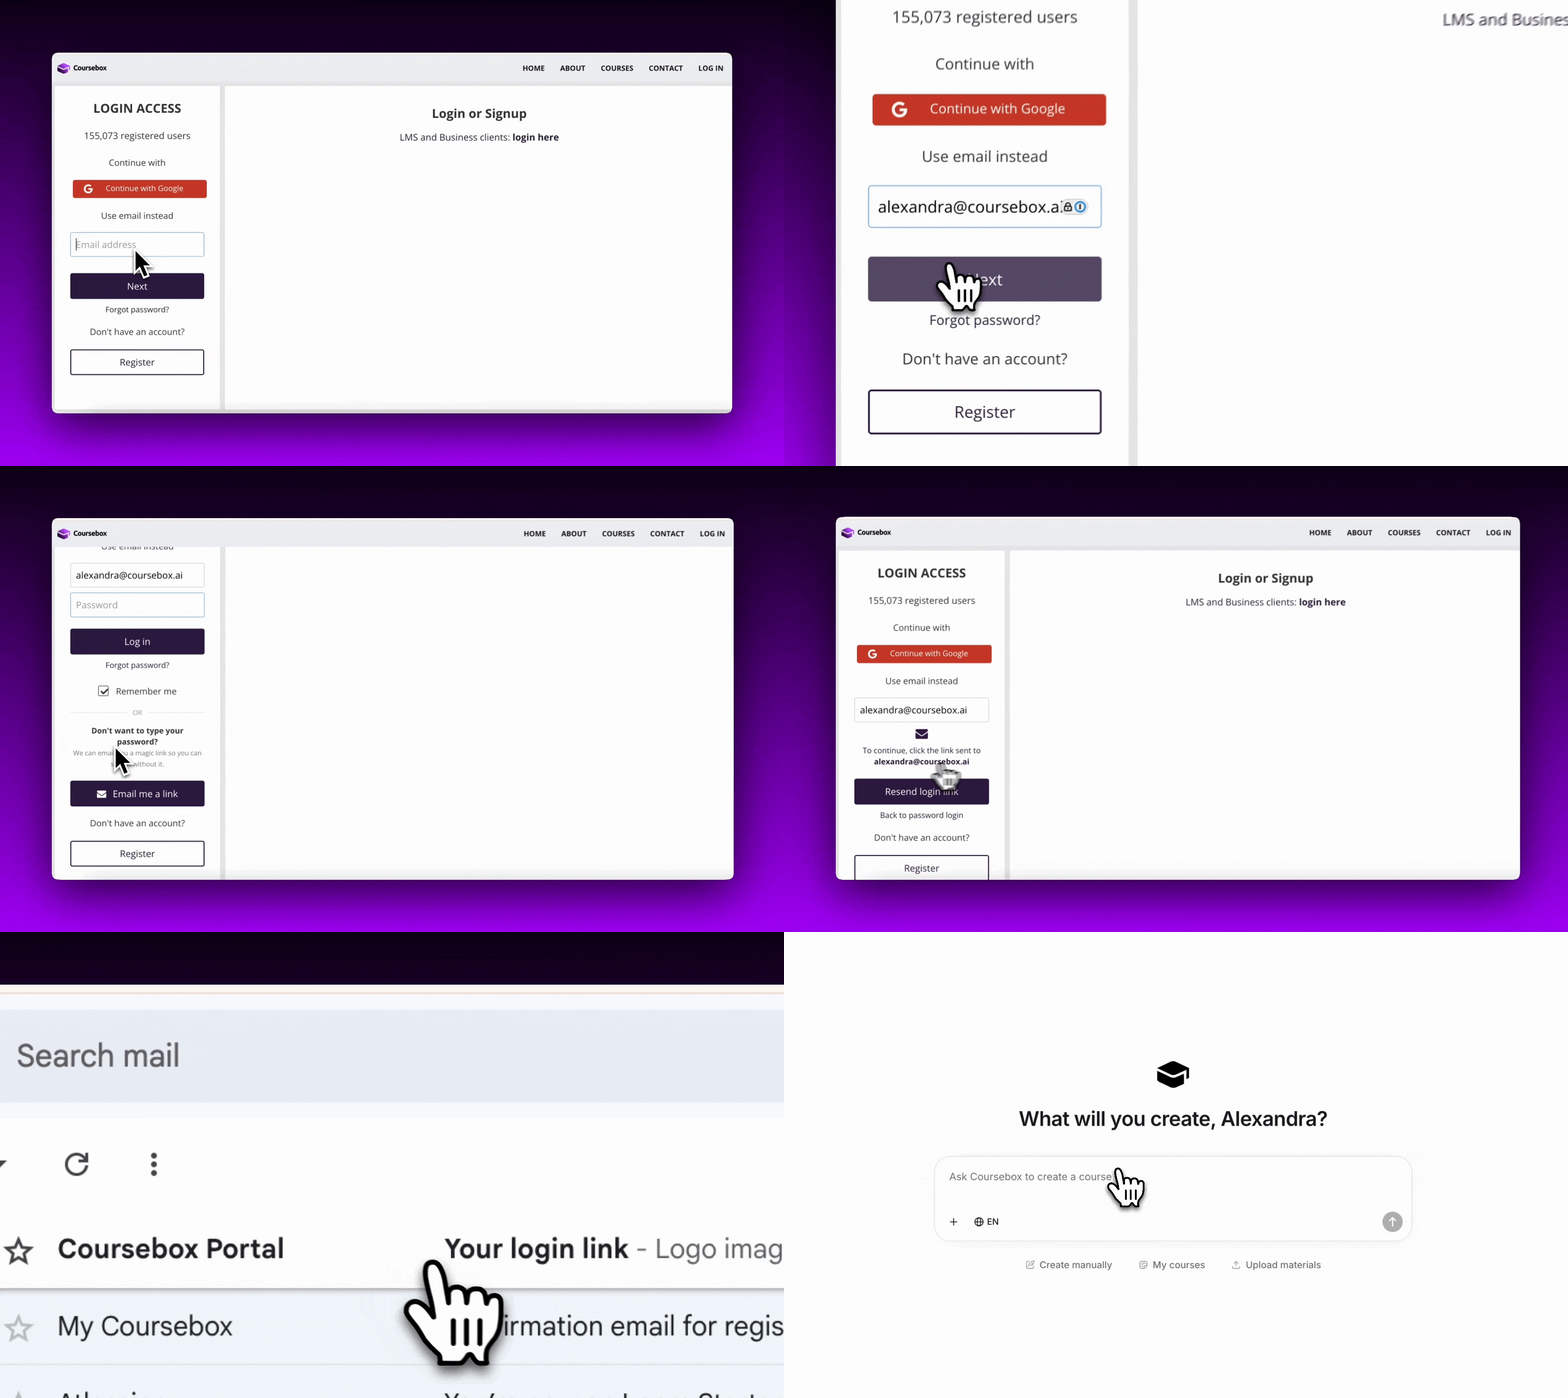
Log in instantly using a secure link sent to your email.
What's new
Password-free login using a secure email link
Faster and simpler access for all users
Works for learners, creators, and collaborators
Reduces friction during sign-in
How it works
Enter your email on the login page
A secure login link is sent to your inbox
Click the link to access your account
No password required
Preview
Version History (March 23, 2026)
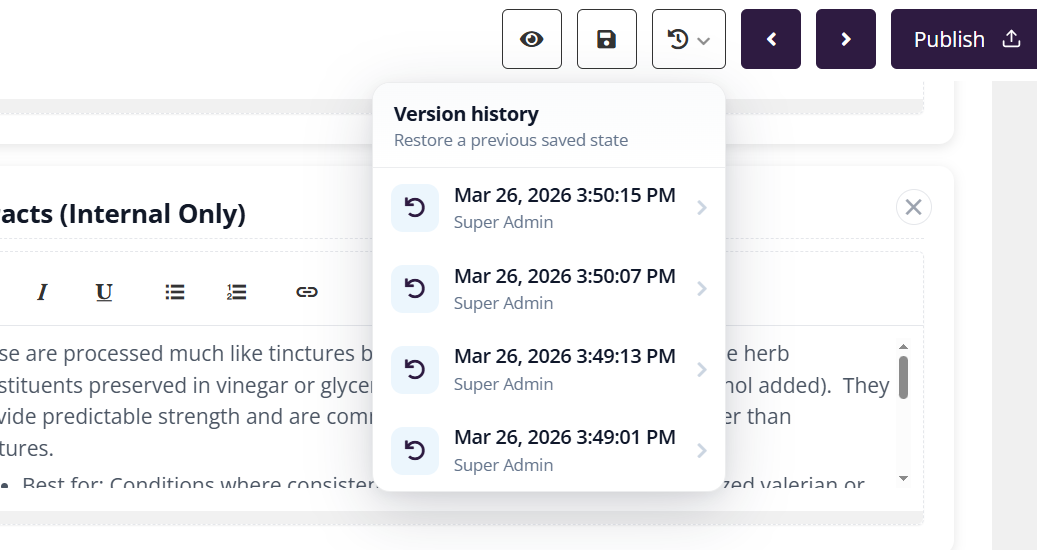
Restore a previously saved version of your course.
What's new
Access up to the last 20 saved versions
Restore any previous version instantly
Track changes made over time
Helps prevent loss of content or edits
How it works
Open your course editor
Click Version History
View up to 20 previous saves
Select a version to preview or restore
Confirm to revert your course
What you can do
Revert to an earlier version if something breaks
Recover deleted or overwritten content
Compare recent changes
Maintain better control over course updates
PDF Export v2 (March 16, 2026)
Turn courses into e-books.
What's new
Export courses as visually structured PDFs
Images and media are included across all sections
Interactive elements like accordions, tabs, and flipcards are rendered visually
Embedded videos appear inside the PDF layout
Improved colours and formatting for a more polished output
How it works
Open your course
Click Publish in the top right in Edit Mode
Select Course PDF
The system generates a formatted version of your course
Download and share your PDF
What you can do
Share courses as professional-looking documents
Convert training content into downloadable resources
Use PDFs for offline learning or distribution
Repurpose courses as guides, handbooks, or ebooks
Presentation To Video (March 03, 2026)
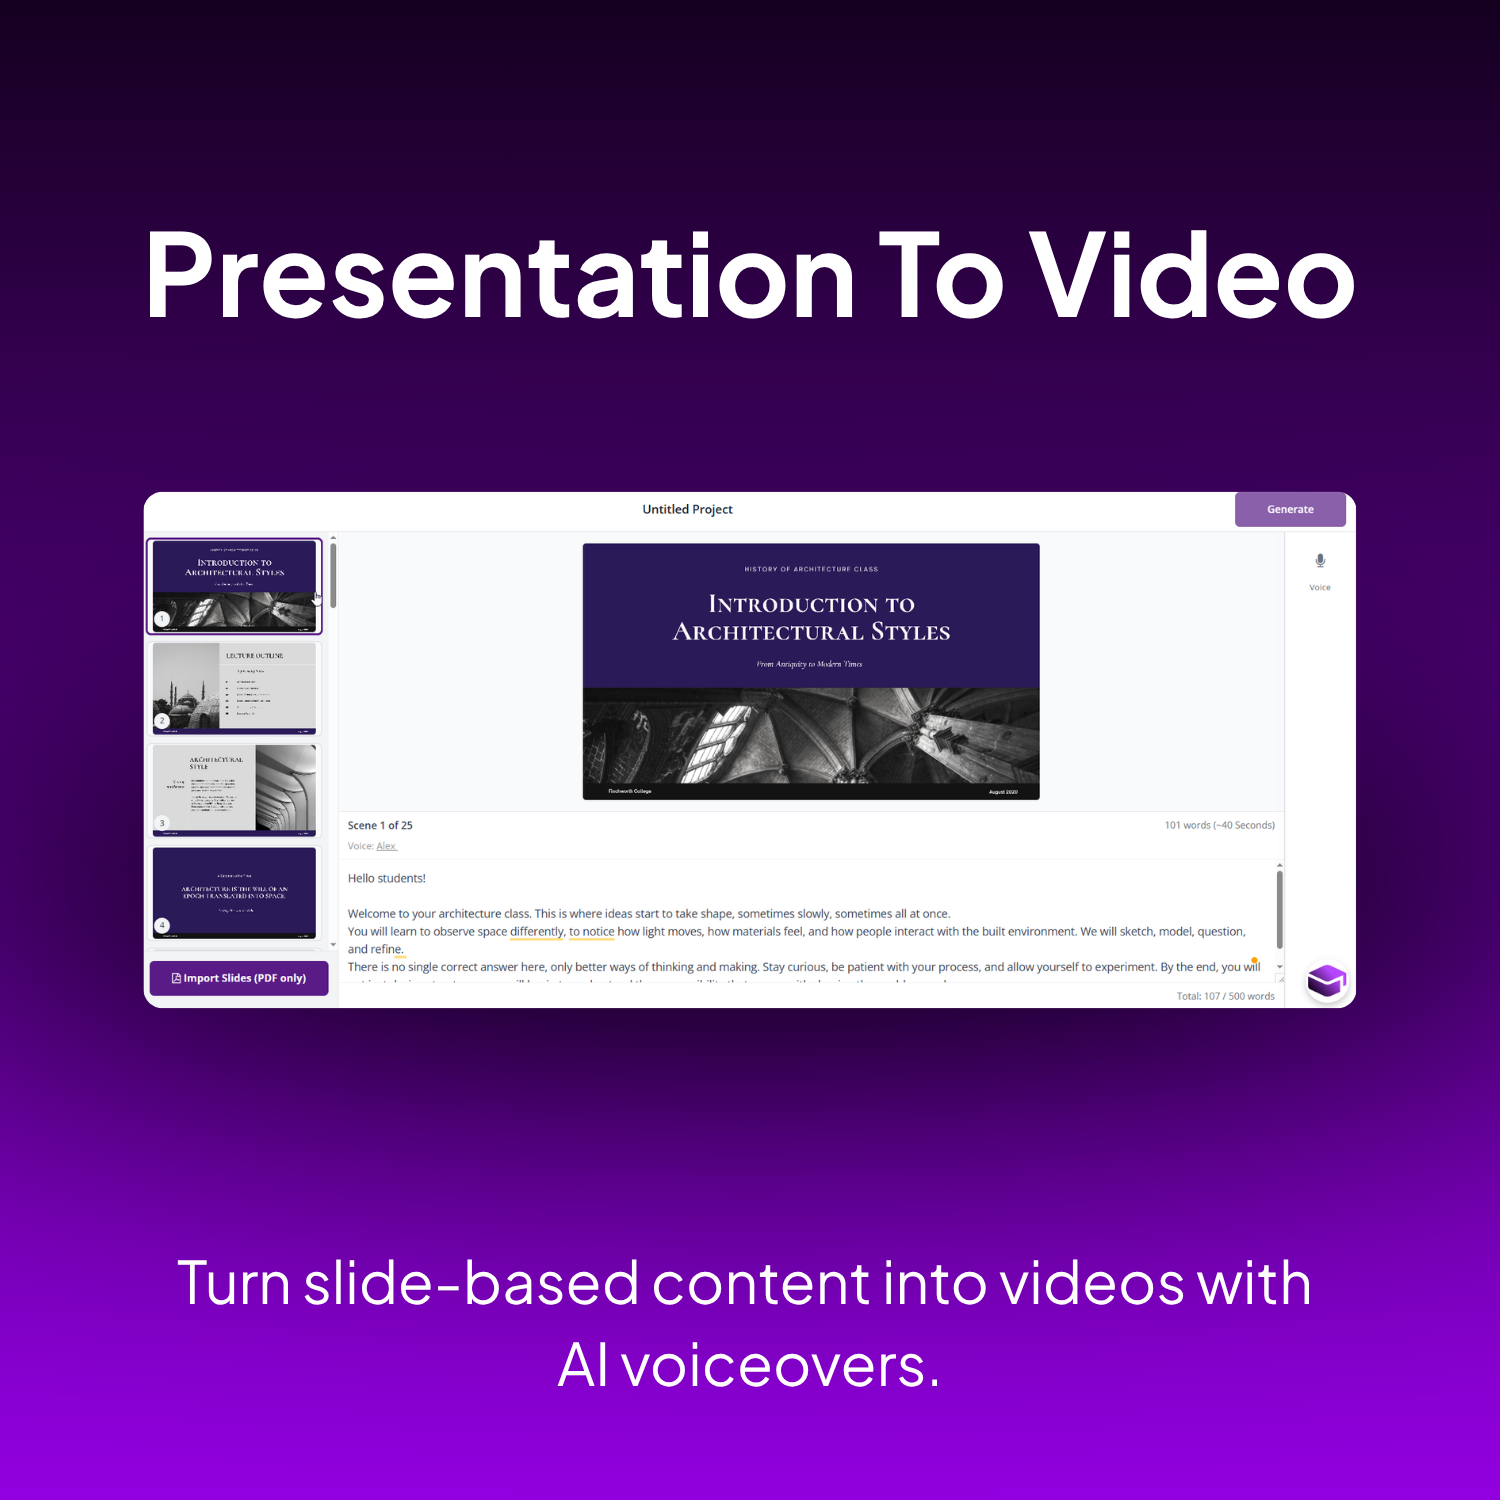
Turn slide-based content into videos with AI voiceovers.
What's new
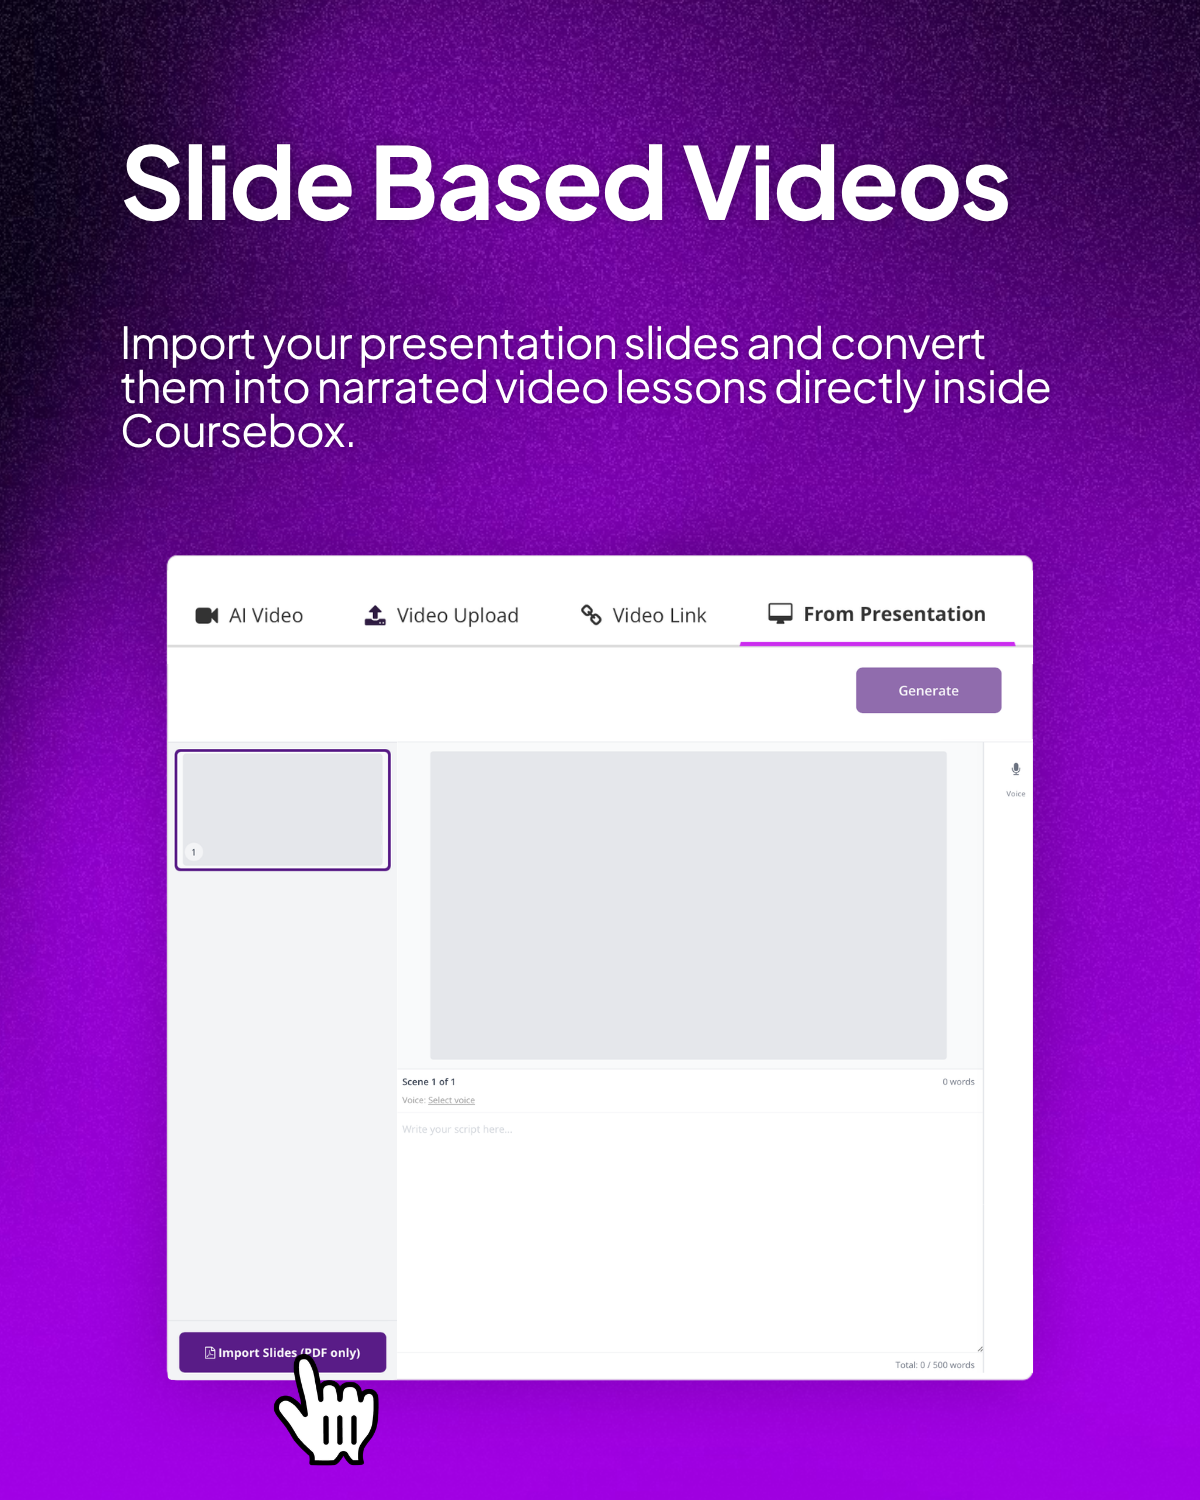
Convert PDF slides into videos automatically
Generate voiceovers based on slide content
Create video lessons without manual recording
Ideal for turning presentations into training content
How it works
Upload a PDF file with your slides
Each slide is processed as a video scene
Add or edit the script for each slide
Select voice and settings
Generate your video
What you can do
Edit the script for each slide before generating
Control how each slide is narrated
Regenerate videos with updated voice or script
Turn existing presentations into full video lessons
Hotspots (February 04, 2026)
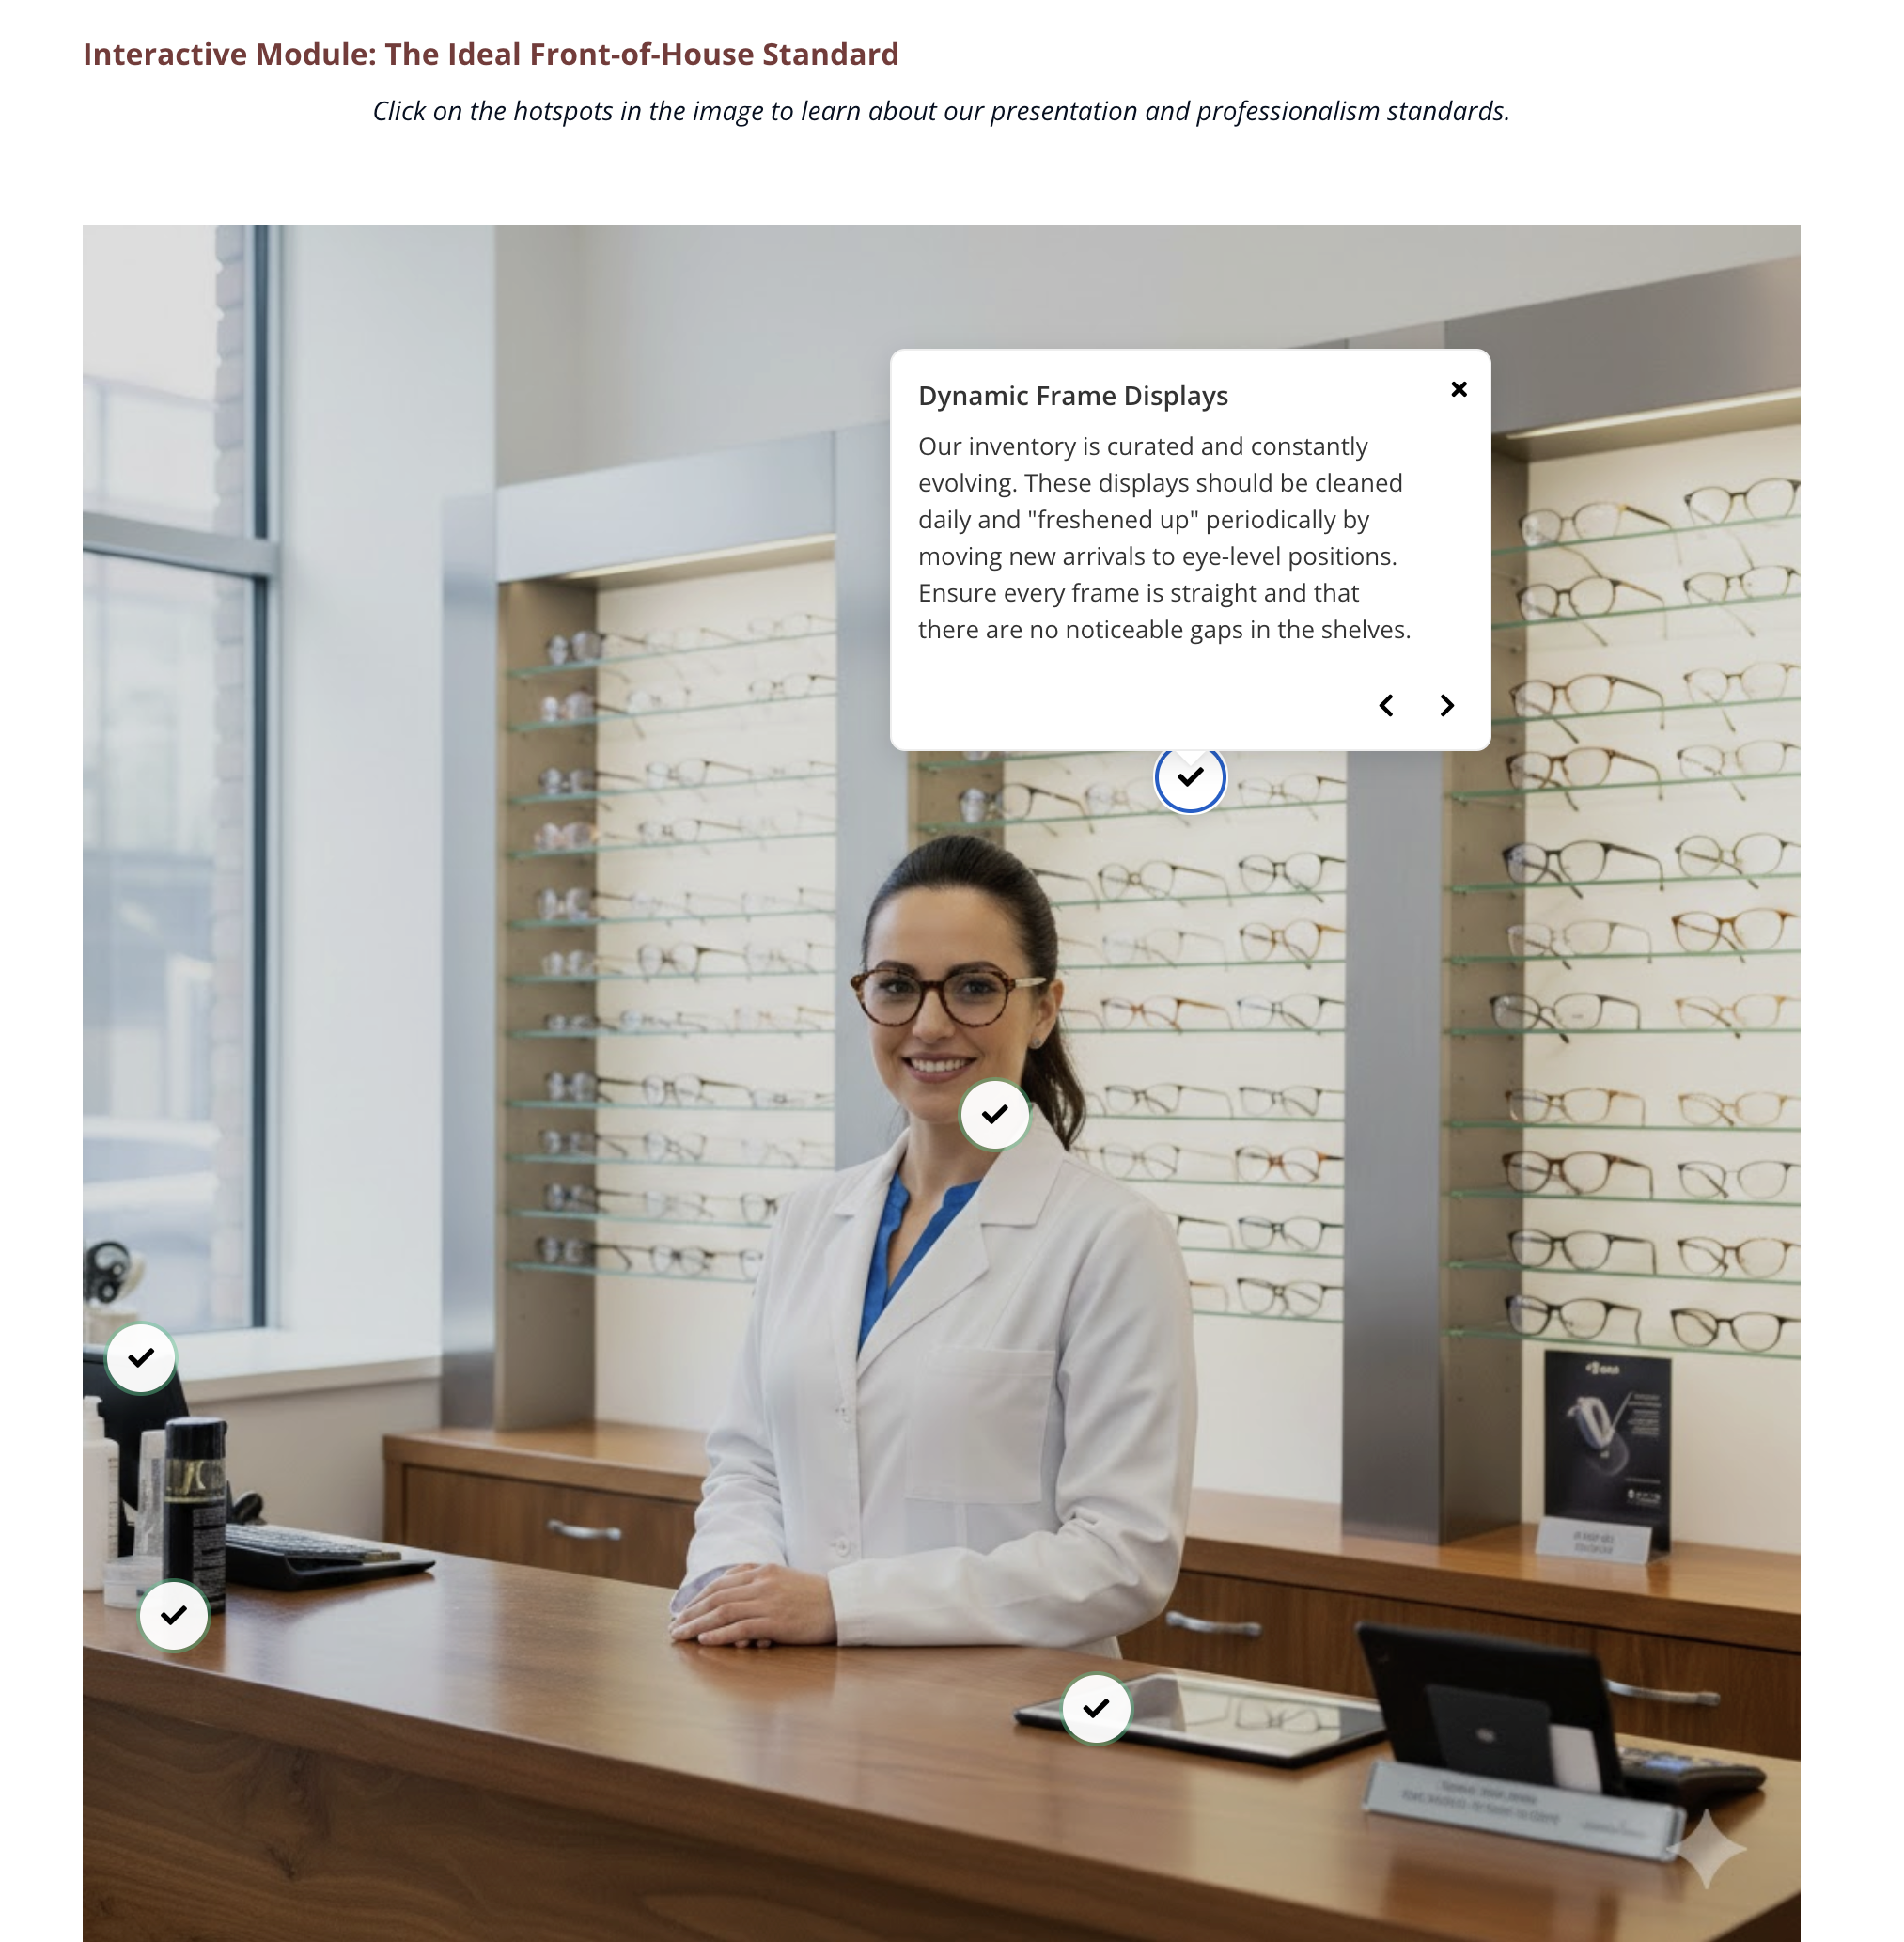
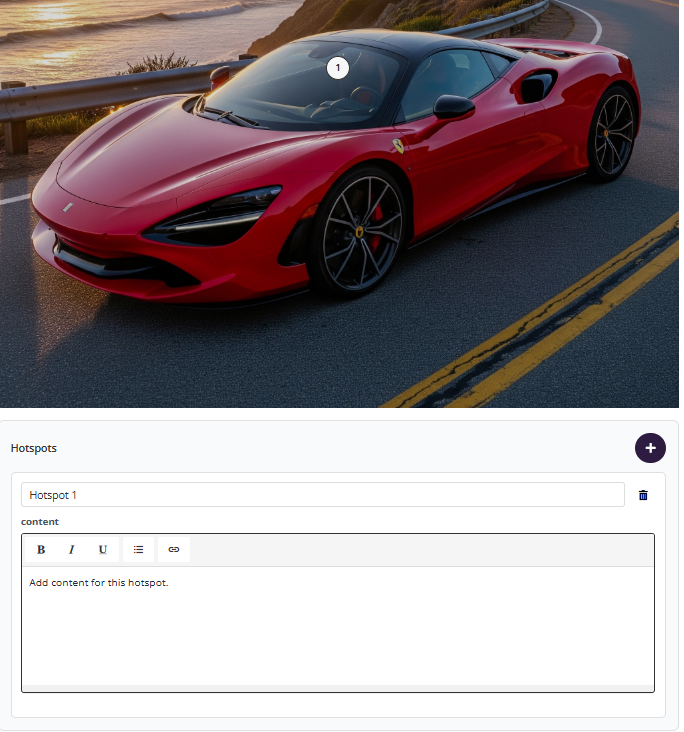
Turn images into interactive learning experiences with clickable hotspots.
What's new
Add clickable points on images to reveal information
Create interactive diagrams and visual learning experiences
Highlight key areas, features, or steps inside an image
Perfect for scenario-based and visual learning
How it works
In the course editor, select Interactions
Choose Hotspot Image
Upload an image
Click Add hotspot and place markers on the image
Add content for each hotspot
Drag, edit, or remove hotspots as needed
What you can do
Add multiple hotspots to one image
Show explanations or guidance on click
Reposition hotspots anywhere on the image
Update or delete hotspots anytime
Custom Video Background (February 03, 2026)
Upload your own image to use as the background for AI videos.
What's new
Replace the default video background with any custom image
Match videos to your course branding
Create a more polished and consistent look
How it works
Open your AI Video
Select Background
Upload an image to use as the background
Preview your voice, script, avatar, and other video elements
Click Generate
Carousel (January 28, 2026)
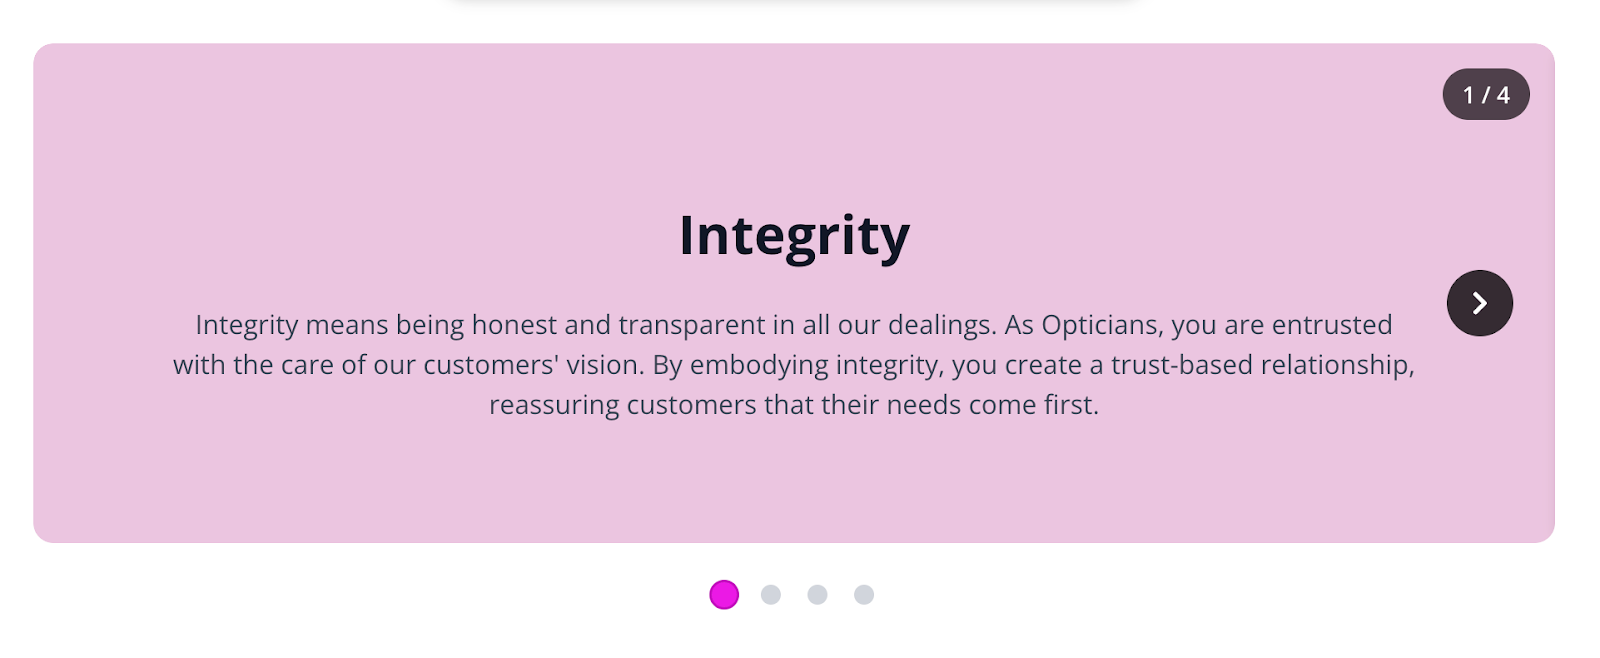
Present content across multiple swipeable or clickable slides.
What's new
Create interactive slide-based content inside courses
Break information into smaller, digestible sections
Highlight key points or create visual storytelling experiences
Optional auto-play for automatic slide rotation
How it works
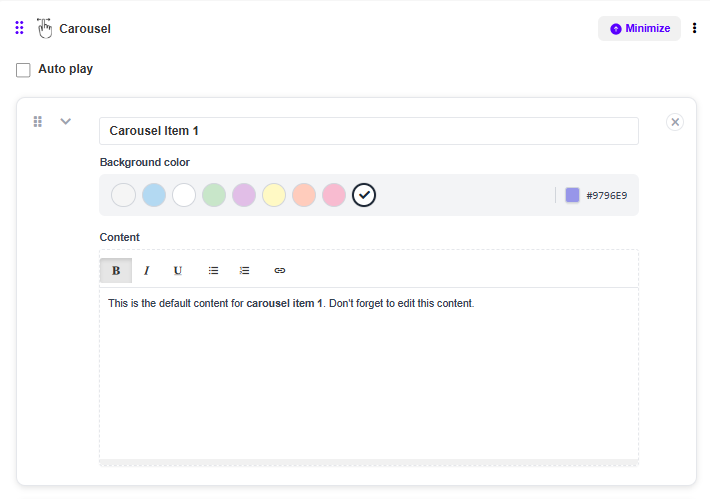
Click Carousel from the interaction menu
A carousel block is added to your page
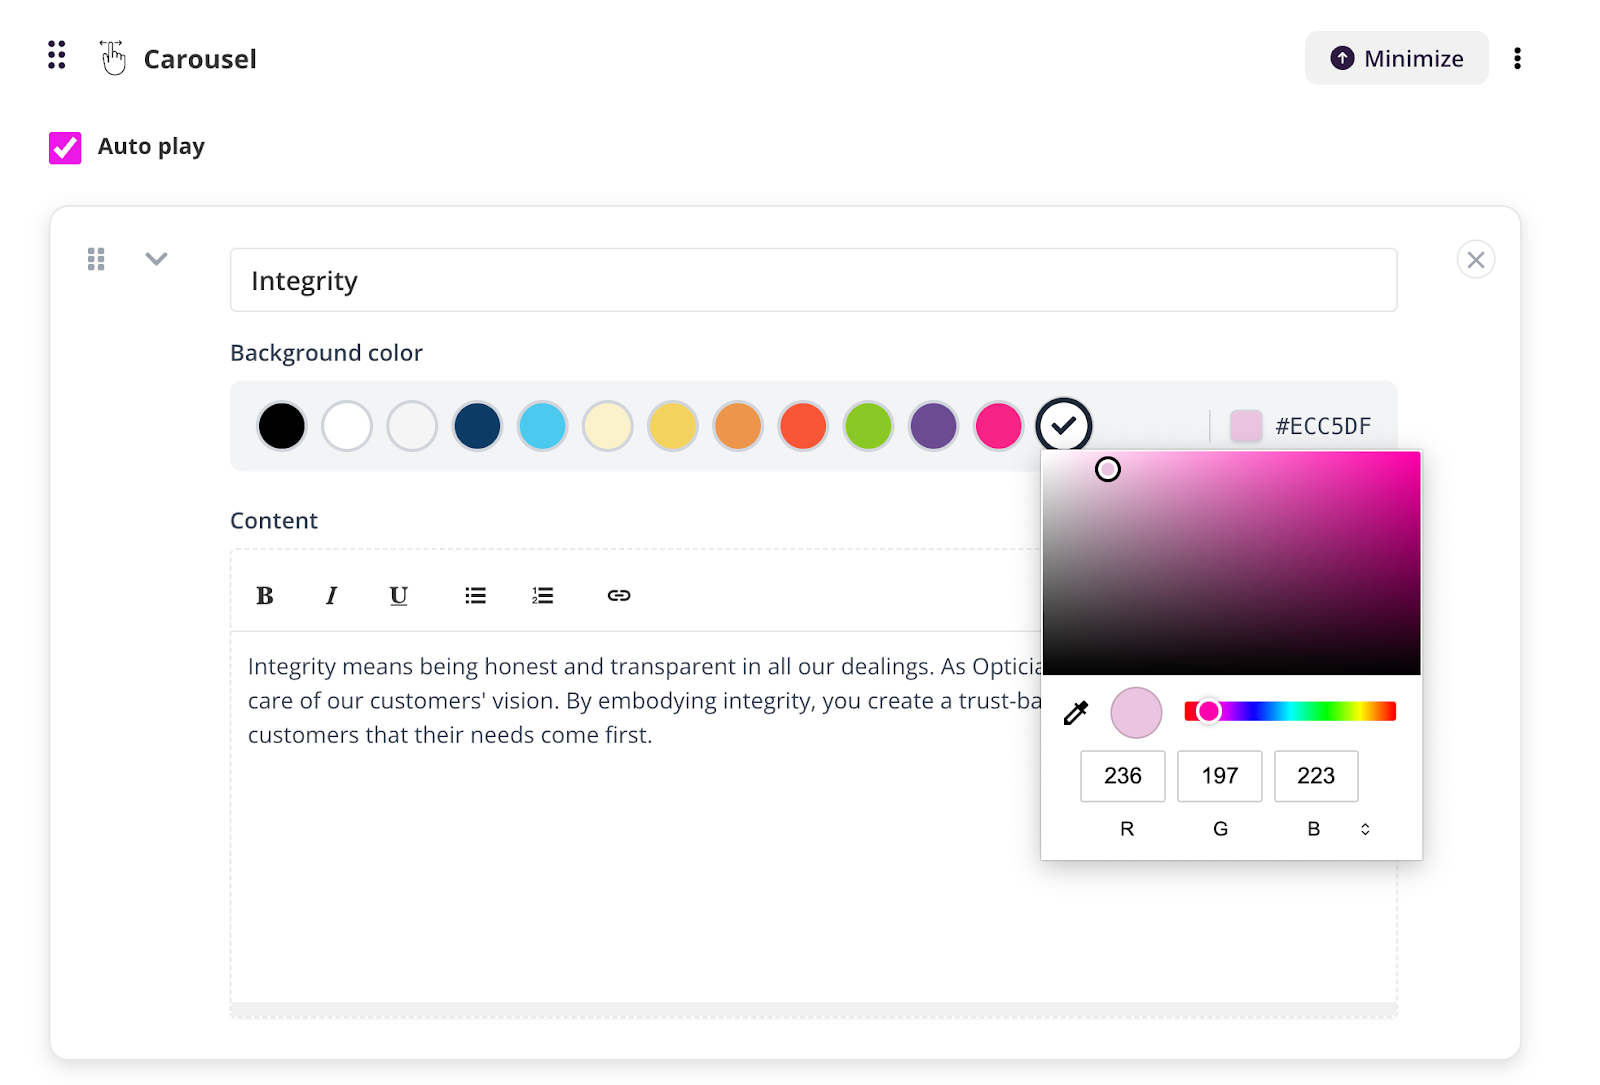
Enable Auto play to rotate slides automatically (optional)
Click any carousel item to edit
Update the title and background colour (or enter a HEX code)
Add or edit content inside the content editor
More Text Elements (January 27, 2026)
Create richer and more engaging course content with new text and layout options.
What's new
More content elements available when editing text
New layout and formatting options for better structure
More visually engaging learning content
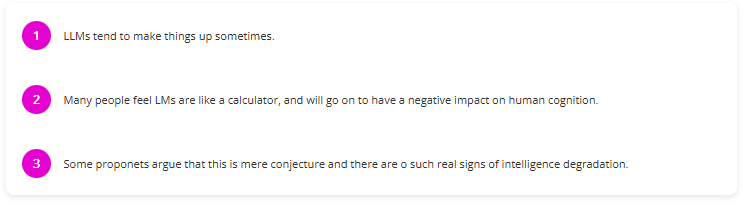
New elements include:
Grid cards
Table
List cards
Quote
Numbered list
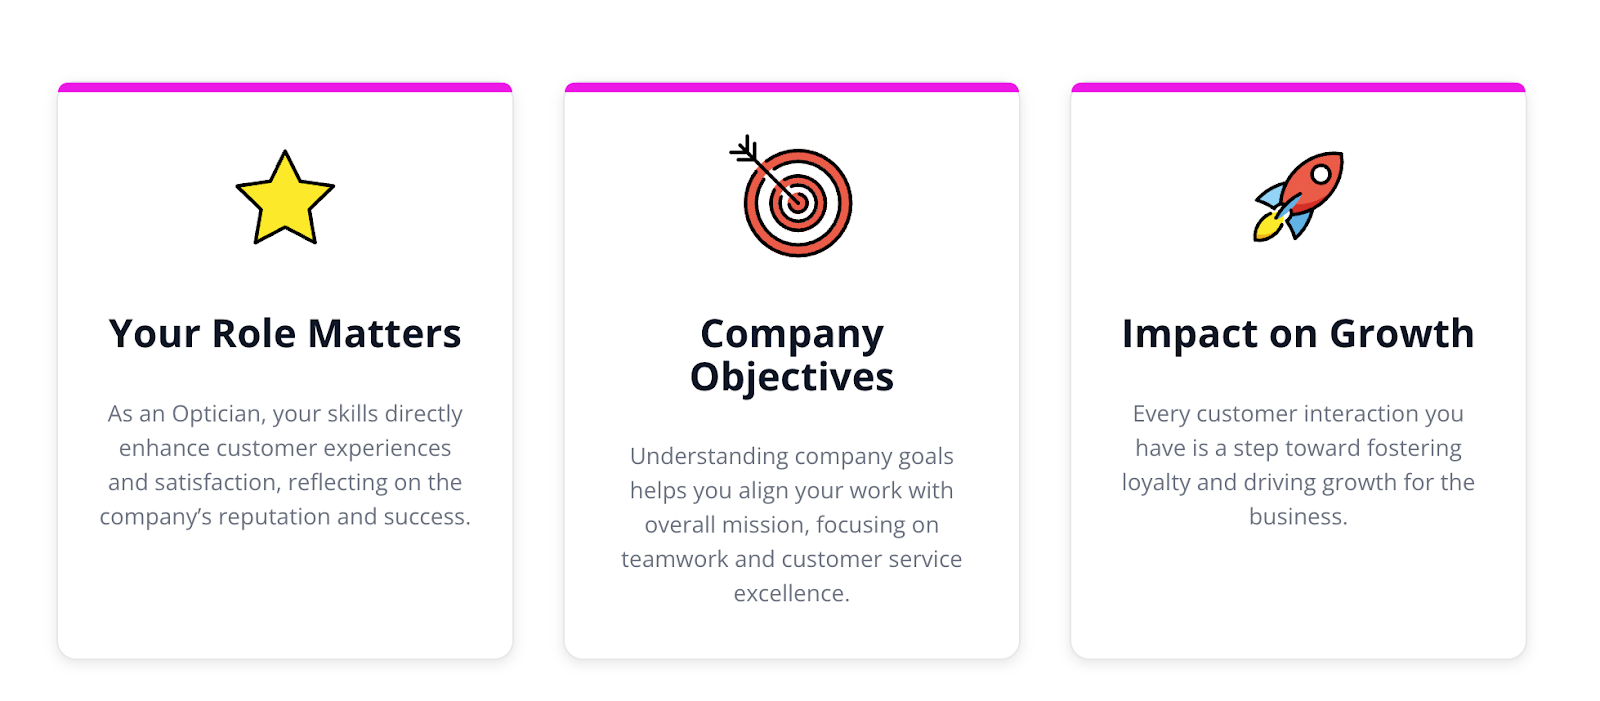
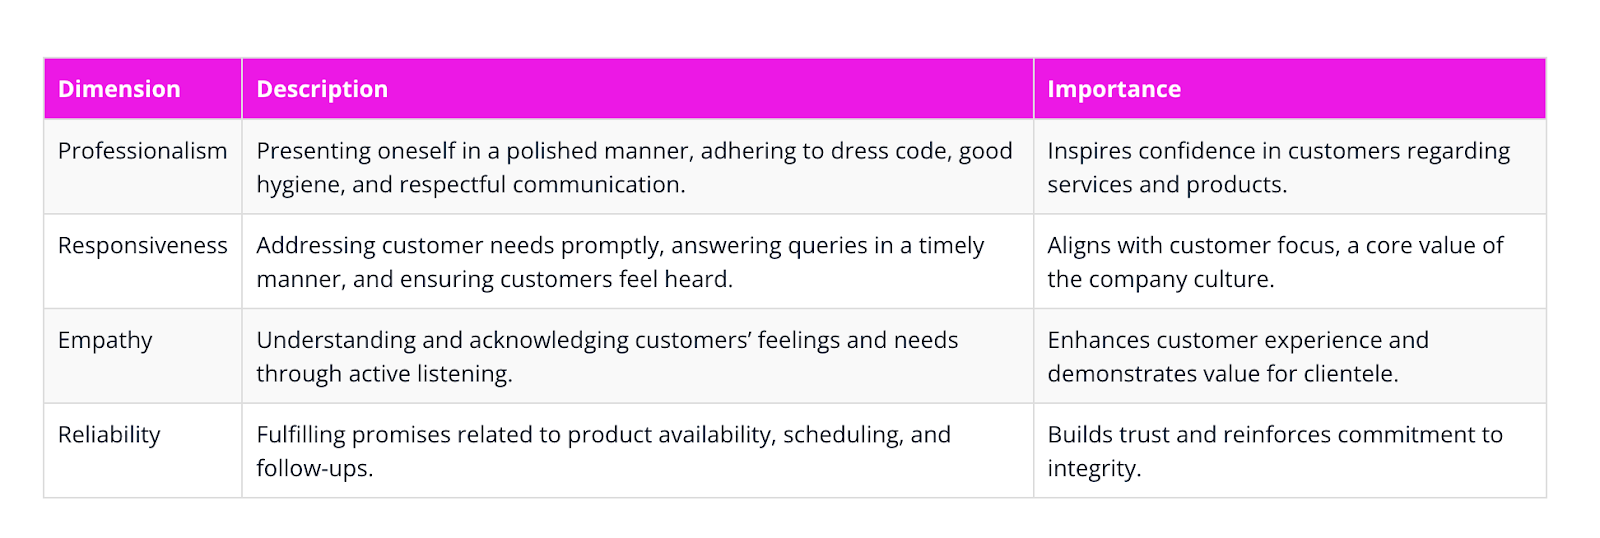
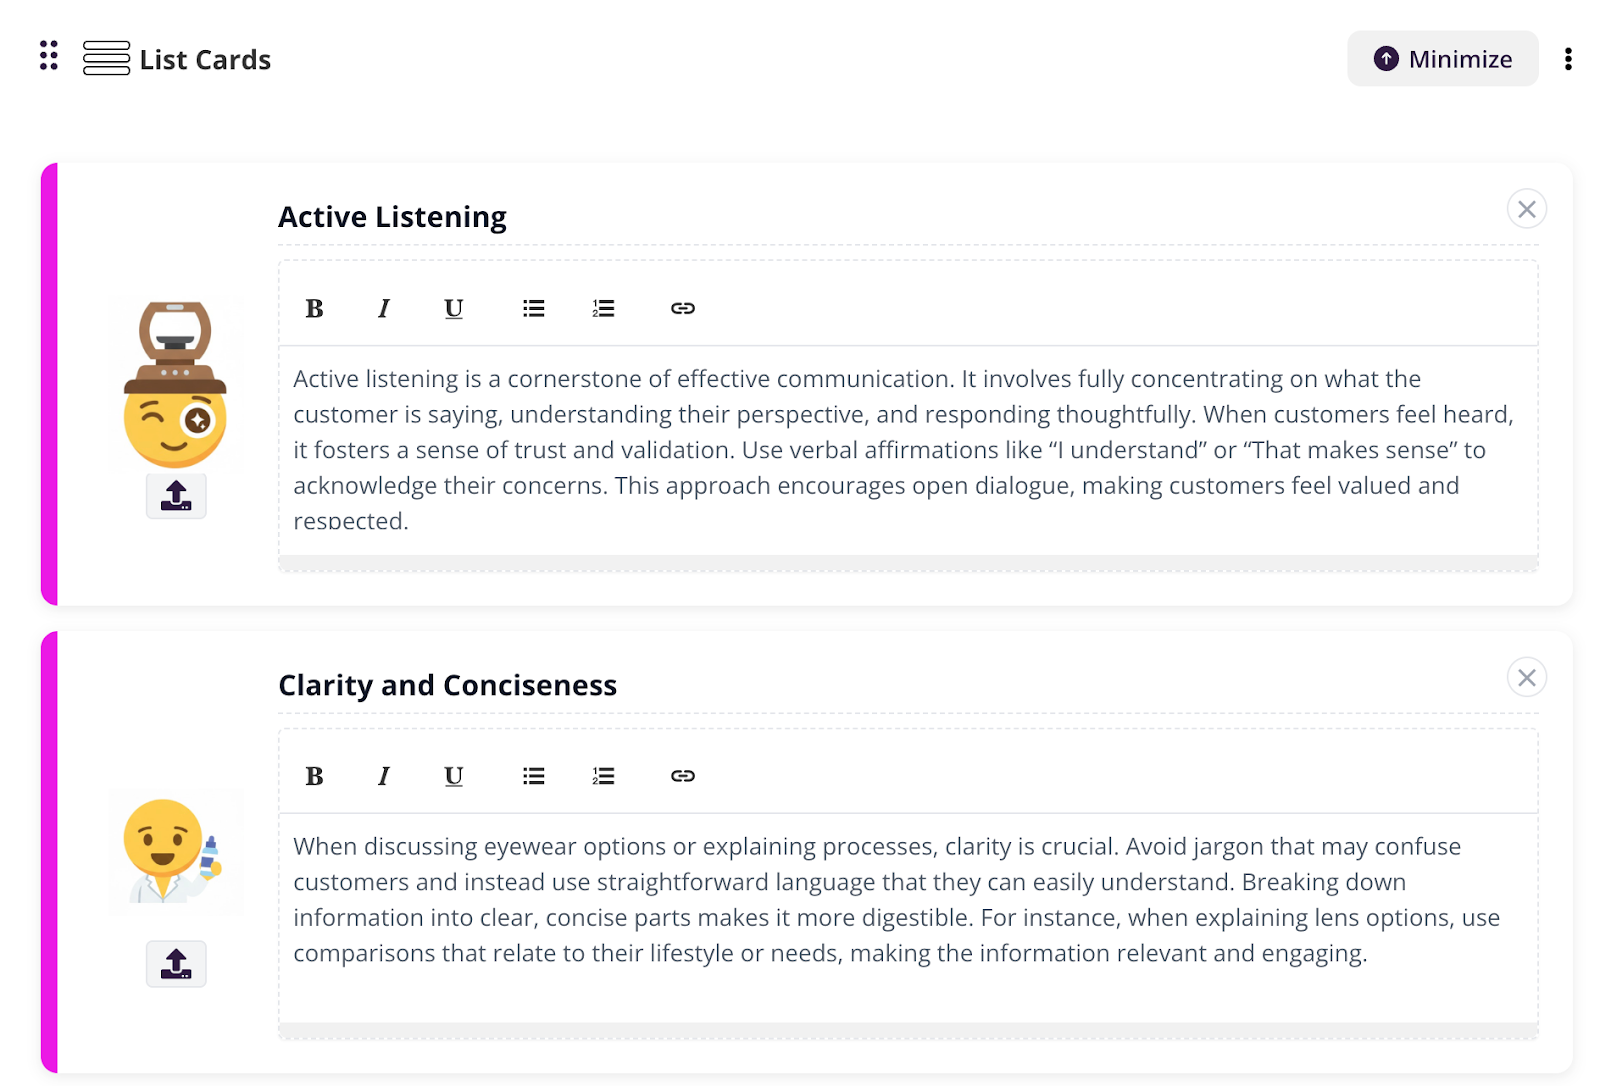
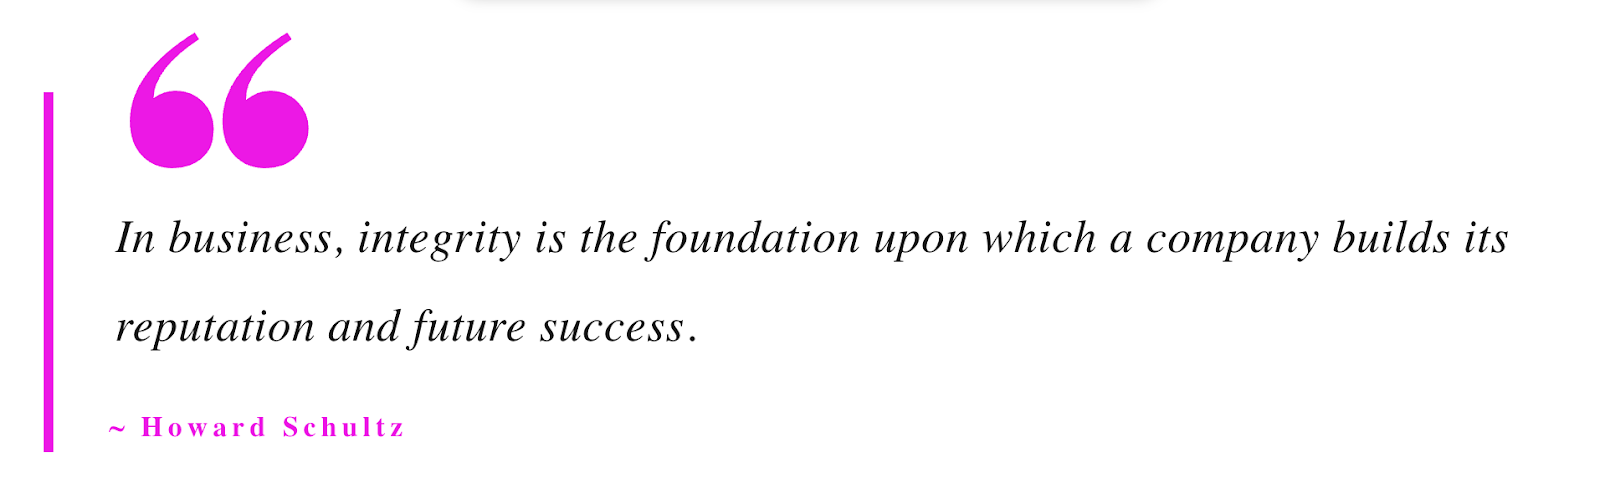
How it works
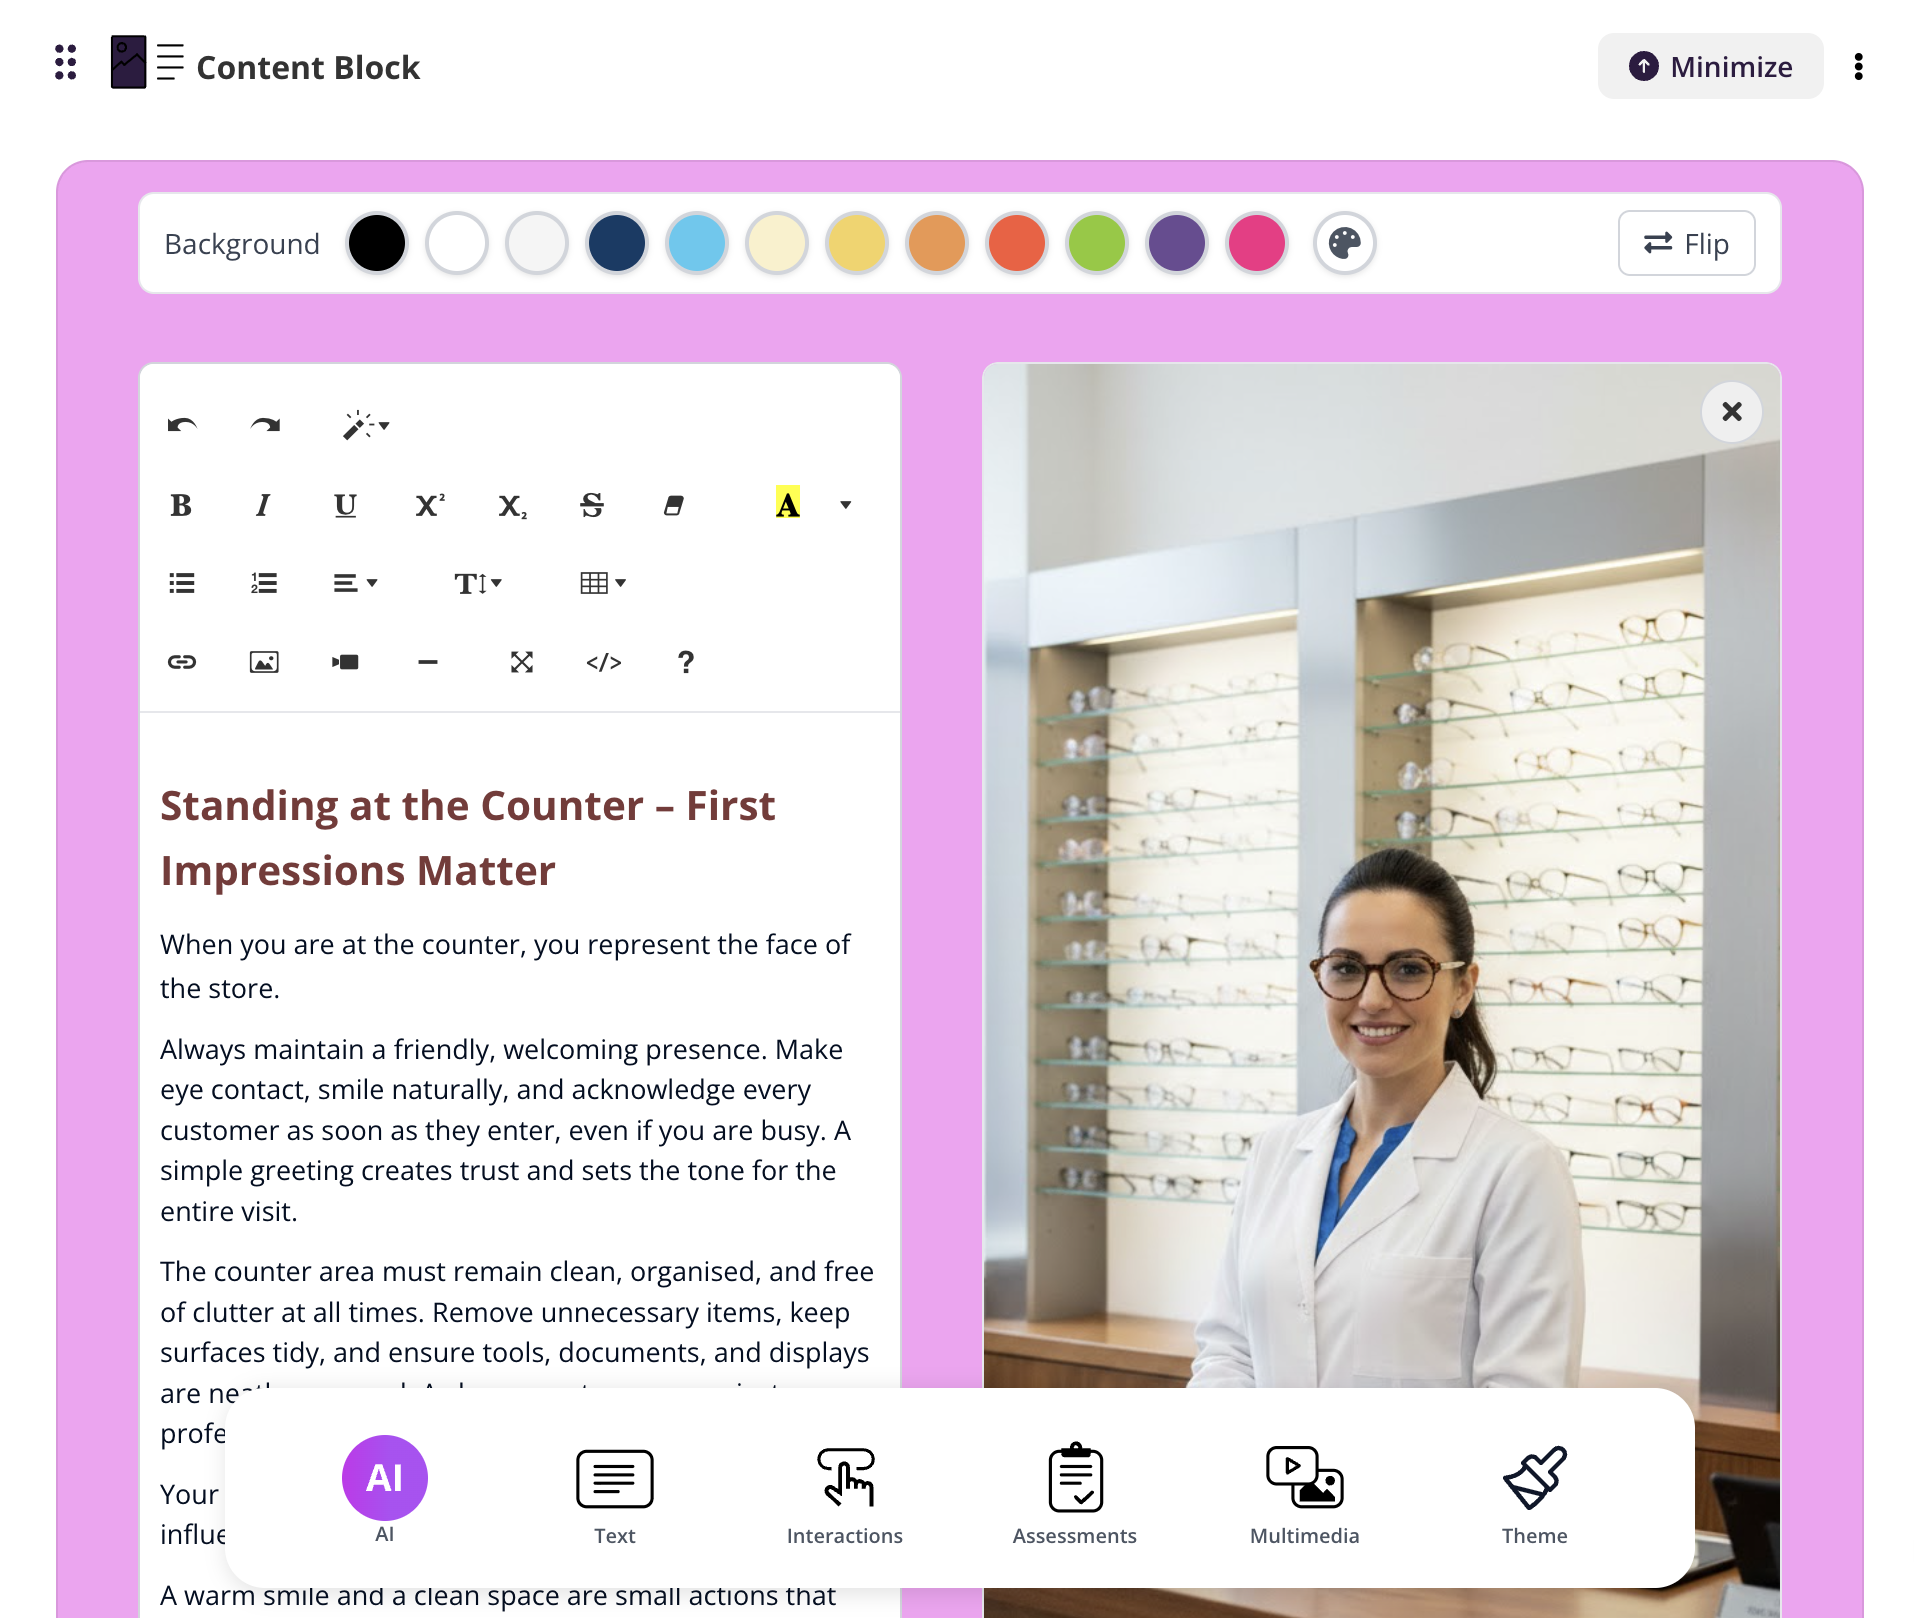
Click Text inside the course editor
Choose from the available content elements
Select your preferred layout and apply changes
Personalised AI Tutor (December 17, 2025)
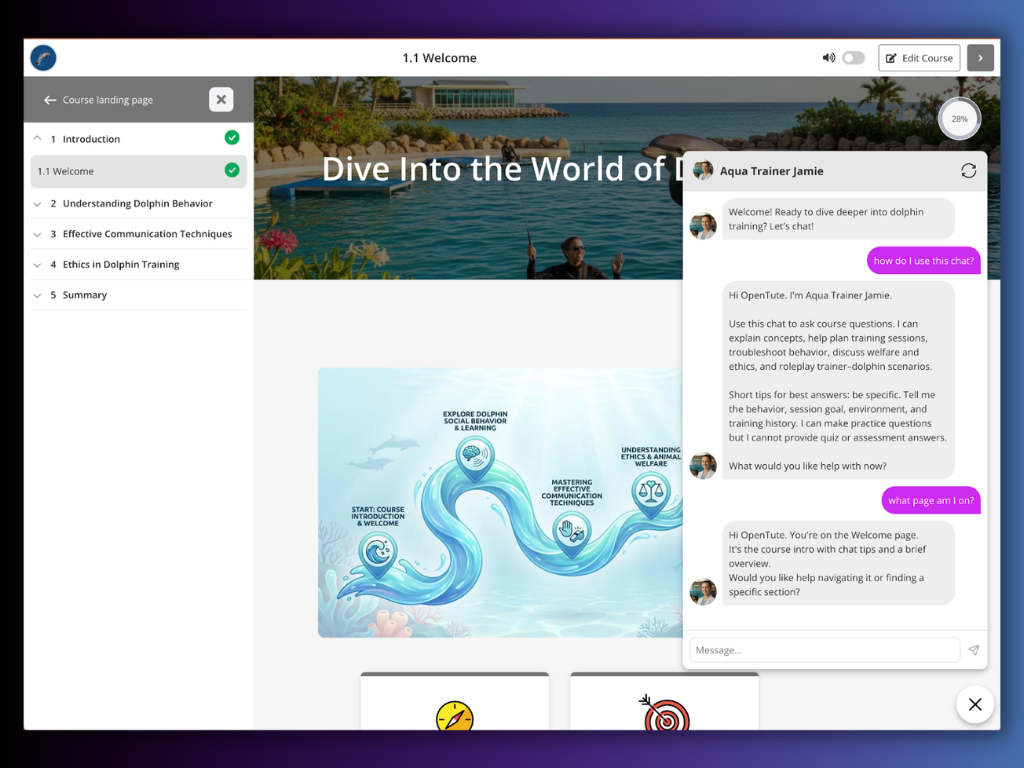
Every course now comes with its own AI tutor chatbot.
What's new
A unique AI tutor is automatically generated for each course
Tutor name and face are based on the course content
Learners can ask questions and receive contextual answers
No setup required
Why this matters
Instead of a generic chatbot, each course now has its own tutor identity. The AI understands the specific course content and provides more relevant, focused responses.
How it works
When a course is created, an AI tutor is generated automatically
The tutor is assigned a name and face image
Learners can interact with the tutor throughout the course
Responses are based on that course's content
You can edit the tutor name, image, and train it on the course or other documents
Icons (December 07, 2025)
Course content now includes icons automatically to improve visual clarity and engagement.
What's new
Icons are added automatically across course content
Makes learning content more visual and engaging
Improves readability and structure
No setup required
How it works
Icons appear automatically in supported content areas
No action is required from course creators or learners
Content becomes easier to scan and understand
Listen Mode (November 21, 2025)
Learners can now listen to survey questions being read aloud.
What's new
Questions are read aloud in surveys and quizzes
Learners can respond by speaking, typing, or selecting answers
Improves accessibility and hands-free learning
Built-in audio player appears automatically
How it works
When a learner opens a survey activity with Listen Mode enabled:
The question is displayed on screen
An audio player appears at the top of the activity
Learners can listen to the question
Learners can respond by speaking, typing, or selecting an option
Custom AI Avatars (November 19, 2025)
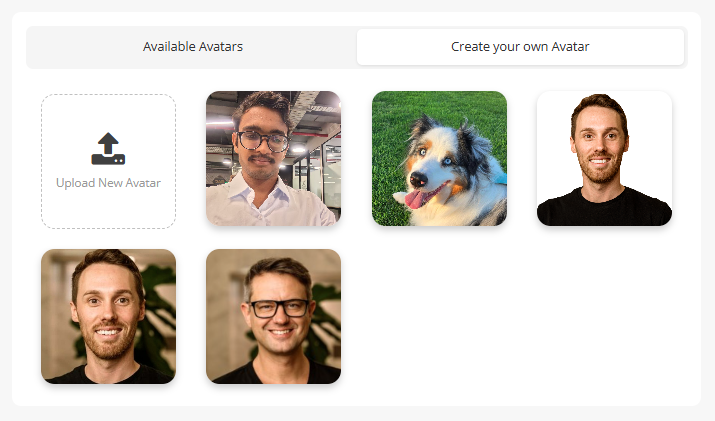
Create training videos with your AI avatar using just a single photo.
What's new
Generate an AI avatar from one uploaded image
Select from 100+ languages and 300+ accents
Customise voice, tone, and background
How it works
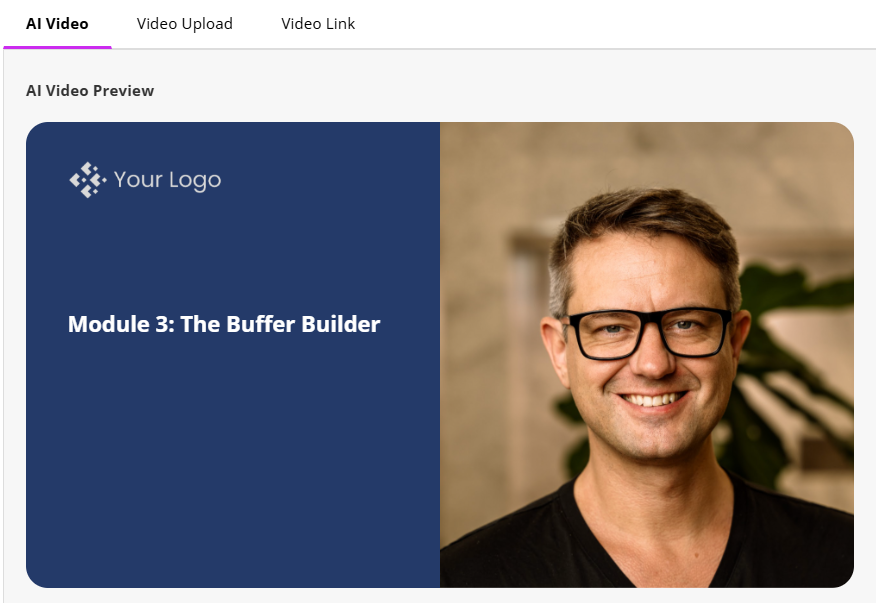
Upload a single photo
Enter your script or write one with AI
Generate your AI avatar video
Add the video directly into your course
Gamification (October 21, 2025)
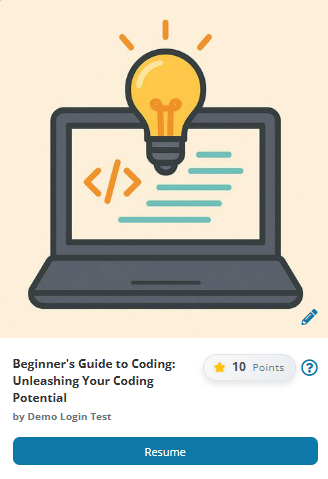
Make learning more motivating and engaging with pathways, badges, and leaderboards.
What's new
Pathways: guide learners step-by-step through sequences of activities
Badges: reward learners with visible achievements
Leaderboards: spark healthy competition with rankings
Optional auto-assign of badges based on rules
How it works
Pathways
Define a series of activities in a logical progression
Learners unlock steps as they complete previous ones
Ideal for learning journeys with prerequisites
Badges
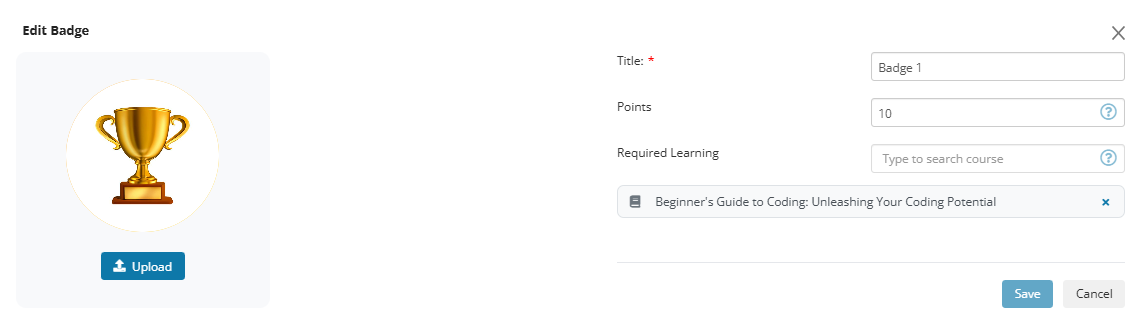
Create badge designs and criteria
Award badges when learners complete activities or reach milestones
Badges display in learner profiles
Leaderboards
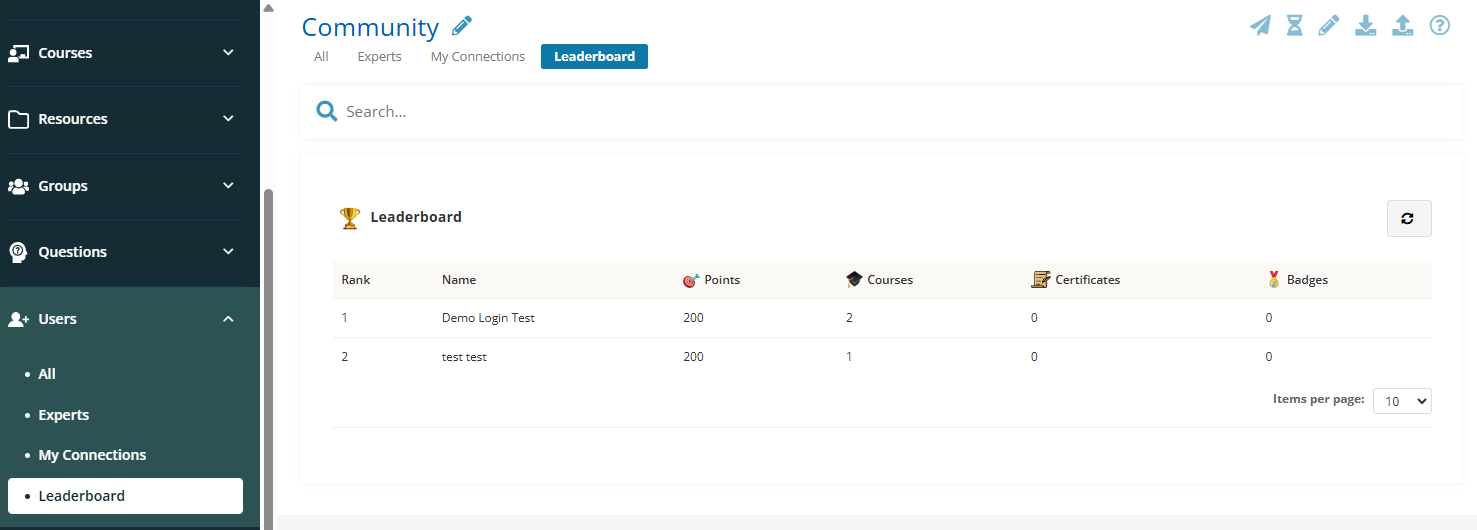
Activate leaderboard tracking for courses
Learners rank based on completed activities or points
Encourages friendly competition
New AI Video Avatars (October 16, 2025)

Choose from 500+ AI avatars for your training videos.
What's new
500+ avatar options available
Wider range of styles, looks, and professional settings
Greater diversity and representation
More flexibility to match your course audience
How it works
Open your AI video settings
Browse the expanded avatar library
Select your preferred avatar
Generate your video as usual/